The Forum Tally Add-on Patch has been introduced distributors to generate invoices directly in Tally, avoiding duplicate billing activities across multiple software systems. As a result, the process is faster, more seamless, and automated, ensuring greater accuracy and reducing manual effort.
To enable billing in Tally, it is essential to first synchronize the following key components. Only after completing this synchronization will distributors be able to generate invoices in Tally.
This application is compatible with Tally Version 3.1 and above and requires the following data to be synced:
1. Products with Tax Information
2. Vendors with Associated Depot Details
3. Retailers
4. Purchase Invoices
Tally Add-On Patch Deployment & Company Setup Workflow
To enable ForumNXT-Tally Integration, follow these steps:
Step 1 : Deploy the Tally Add-On Patch
1. Navigate to the Tally application installation path.
2. Right click and click on open file location.
3. Copy and paste the ForumNXT_Tally_Integration zipped file into this location.
4. Extract the zipped file to access the required folders and configuration files.
5. Inside the extracted folder :
The Log folder contains daily log files.
The TCP folder contains the Tally Add-on patch (ForumNXT_Tally_Integration.tcp).
Step 2 : Load the Add-On Patch in Tally
1. Open Tally and navigate to the Help Menu (F1).
2. Go to TDLs & AddOns and Enter.
3. Navigate to Manage Local TDLs and click on it.
4. Load the patch file in the appropriate location; the add-on is now integrated with Tally.
Step 3 : Create a Company in Tally
1. Press Alt + F3 and select “Create” to initiate company creation.
2. Enter the Company Name and other required details.
Note : It is must to fill the following details
State
Company Name
Financial year beginning from and Books beginning from
Click “Accept” to save the company setup.
When the Features and Add-On screen appears, enable "ForumNXT DMS Synchronization" by setting it to "Yes".
The company is now created with the Tally patch enabled.
Step 4 : Register the Company in ForumNXT Integration
After setting up the company, proceed with the registration process in ForumNXT Integration by entering the required details.
Navigate to and select "ForumNXT Integration." From there, proceed to and select "End User License Agreement.
Review the End User License Agreement, then accept the terms to proceed with the integration process.
Step 5 : Process to Create New Distributor in Tally
Access the ForumNXT Integration module within the Tally software.
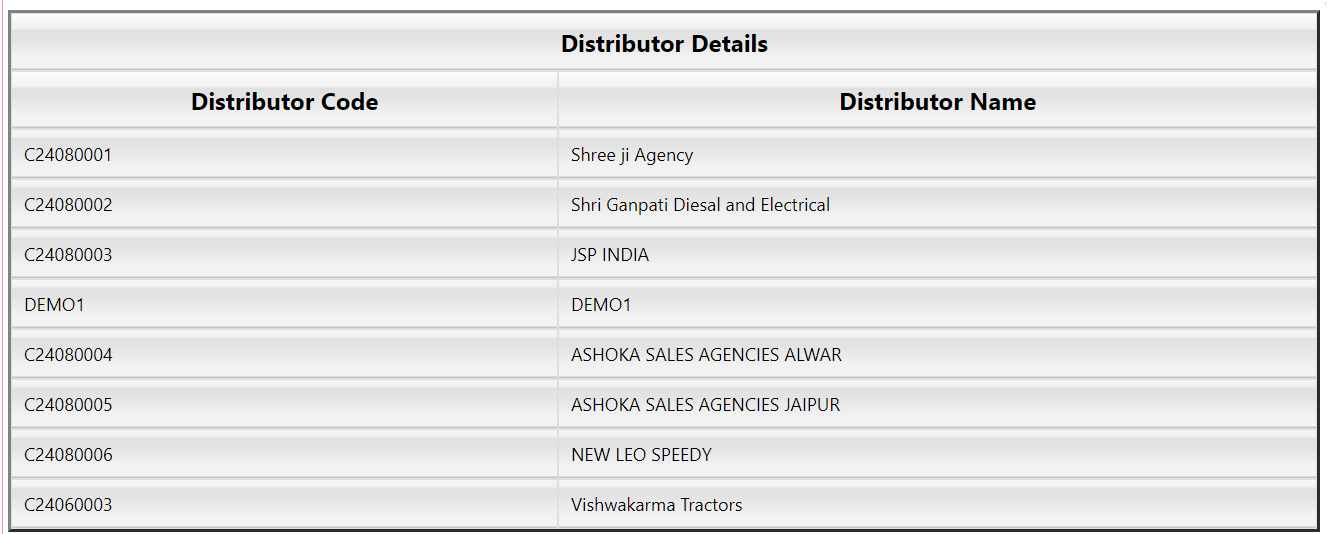
Within the ForumNXT Integration module, find and select the "Distributor Details" option.
In the designated fields, accurately enter all the required distributor details as provided by Corporate Admin. This may include information such as distributor name, Distributor code, Activate key, Version, URL and Domain Name.
Registration and Synchronization Process :
Validate all the details and click on Register.
Note : DMS Flavor: Unknown, Distributor Type: Unknown, Forum NXT Registration Status: Yet to Register.
After completing the registration, navigate to Forum NXT Integration → Distributor Details to verify that the Distributor CD Key has been successfully registered.
Once the registration is complete, go to Forum NXT Integration → Distributor Details, where the "Sync Config" option will be available. Click on "Sync Config" to proceed.
After syncing, you can check the Registration and Sync Status.
The Corporate Settings module provides distributors with a comprehensive view of company-specific configurations set at the corporate level.
General Settings : Displays essential details such as the distributor code, distributor type, application version, and the domain name associated with the registered company.
Auto Sync Settings : It highlights both corporate-level and user-level auto sync configurations, including the frequency and timing of automatic data synchronization between Tally and ForumNXT.
Sync Permitted Settings : It allows distributors to view the list of modules and fields they are permitted to access. For any restricted or denied modules, the distributor must seek approval from the corporate team to enable synchronization for those specific modules.
2. ForumNXT Restriction
This module helps distributor to view the General, Master, and Voucher-related restrictions that are applicable to their registered company.
3. Manual Sync
Manual Synchronization enables users to manually initiate the data exchange process between Tally and ForumNXT DMS as and when required. This functionality is particularly useful for distributors who need to ensure that the latest data is reflected across both platforms.
Using the Manual Sync option, distributors can :
Download master data such as product details with tax, vendor details Depots and retailer information from the DMS to their local Tally system.
Upload transaction data including sales invoices, receipts, credit notes, and other relevant transactional records from Tally to the DMS.
This two-way sync process uploading and downloading of data ensures consistency and accuracy between systems.
4. Auto Sync Settings
The Auto Sync feature enables seamless and automatic data synchronization between Tally and ForumNXT at predefined intervals. This eliminates the need for manual syncing, ensuring that transactional data such as invoices, receipts, and stock updates are consistently and accurately reflected across both systems.
5. Audit Log
1. Vouchers Upload Status :
This feature displays the status of vouchers uploaded by the distributor from Tally to ForumNXT. It helps in tracking whether the transaction data such as sales, purchases, payments, and receipts have been successfully communicated to the DMS.
2. Opening Stock Position :
Provides a data of the distributor's opening stock.
3. Current Stock Position :
Displays real-time information on the distributor’s current stock.
4. ForumNXT Products :
Lists all the products associated with ForumNXT that are available to the distributor.
5. ForumNXT Retailers :
Provides detailed information about retailers that are mapped in ForumNXT for the respective distributor.
6. ForumNXT Vendors :
Shows vendor-related information that is integrated with ForumNXT.
7. Sundry Debtors Upload Status :
Facilitates the distributor in uploading newly created retailers (in Tally) to the DMS.
6. Product Mapping
As distributors sell both DMS and non-DMS products through Tally, it is essential to differentiate and communicate only the DMS-related products to the DMS system. To facilitate this, distributors use a product mapping process.
This process involves the distributor creating the product in Tally and then mapping it to the corresponding product in the DMS system. The Product Mapping functionality enables the distributor to clearly identify which items are linked (mapped) to DMS and which ones are not (unmapped).
7. Upload Sundry Debtors
In Tally, distributors also generate invoices for non-DMS customers. If a new retailer is created in Tally and the customer belongs to the DMS network, the distributor must notify DMS about this addition. This is done using the "Upload Sundry Debtors" option.
Initially, the distributor creates the retailer in Tally and uploads the details through this option to inform DMS about the new retailer. Once received, DMS allocates a unique retailer code to the respective retailer.
To retrieve the assigned retailer code, the distributor must perform a “Sync All” operation. This ensures that the retailer information is properly updated in the DMS system.
8. Sify Live Update
Sify Live Update option is available in ForumNXT integration Menu which helps distributors download the latest feature updates. To get the latest features, the distributor’s configuration of SLU Registration must be Registered and SLU Application must be Available.
Also, the distributor must read through the instructions for the options available in the Menu.
New Retailer Creation Process in Tally
Step 1 : Create a New Ledger
1. Navigate to the GO TO page and select Alter.
2. Click on Ledger → Create and fill in all the required fields:
1. Name (e.g., Forum-1)
2. Under : Sundry Debtors
3. Keep the Credit Period and Credit Days as default.
4. Enter the Address and Pincode.
5. PAN and GST Numbers are optional and can be filled if necessary.
6. Set Registration Type as Regular.
Step 2 : Confirm Details
Press Enter after filling in all details.
If a warning message appears stating "GSTIN/UIN not specified", press Enter to accept and then press Esc to exit.
Step 3 : Upload Sundry Debtors
1. Navigate to ForumNXT Integration Menu → Upload Sundry Debtors.
2. The uploaded status of the retailer will be displayed.
3. Click the Upload button at the bottom right of the page.
Step 4 : Check Retailer Status in Audit Log
1. Open the Audit Log.
2. Navigate to Sundry Debtors Upload Status to check the retailer status (initially without the Retailer Code).
Step 5 : Sync Data
1. Go to Manual Sync.
2. Click on Sync All to update the Retailer Code.
Step 6 : Verify Retailer Addition
1. Navigate to ForumNXT Integration → Audit Log.
2. Open ForumNXT Retailers.
3. The retailer will now be successfully added with the Retailer Code.
Forum NXT Syncing Process
To ensure accurate data synchronization between the Tally system and the Distributor Management System (DMS), users can utilize the manual sync and upload transaction features. Below is a detailed breakdown of the process:
1. Once-a-Day Upload
The system is designed to sync the data once per day to maintain opening stock details.
2. Last Sync Date Tracking
The system provides a last sync date feature, allowing users to check the most recent synchronization timestamp.
This helps users verify whether the latest data has been uploaded and identify if any manual intervention is required.
3. Downloading Masters & Transactions
Users have the option to manually download the latest updates related to masters and transactions.
This includes :
Master Data Updates – Any modifications or new entries related to products, customers, or pricing.
Transactional Data – Sales orders, invoices, purchase records, and other financial transactions.
Downloading the latest updates ensures that users are working with the most accurate and up-to-date information.
4. Uploading Transactions
The upload transaction feature allows users to manually upload important data into the DMS, including :
Sales – Transactions involving product sales to retailers or customers.
Collections & Payments – It involves the debit, credit note information, Collection information of retailers.
This ensures seamless data integration between Tally and DMS, maintaining consistency across platforms.
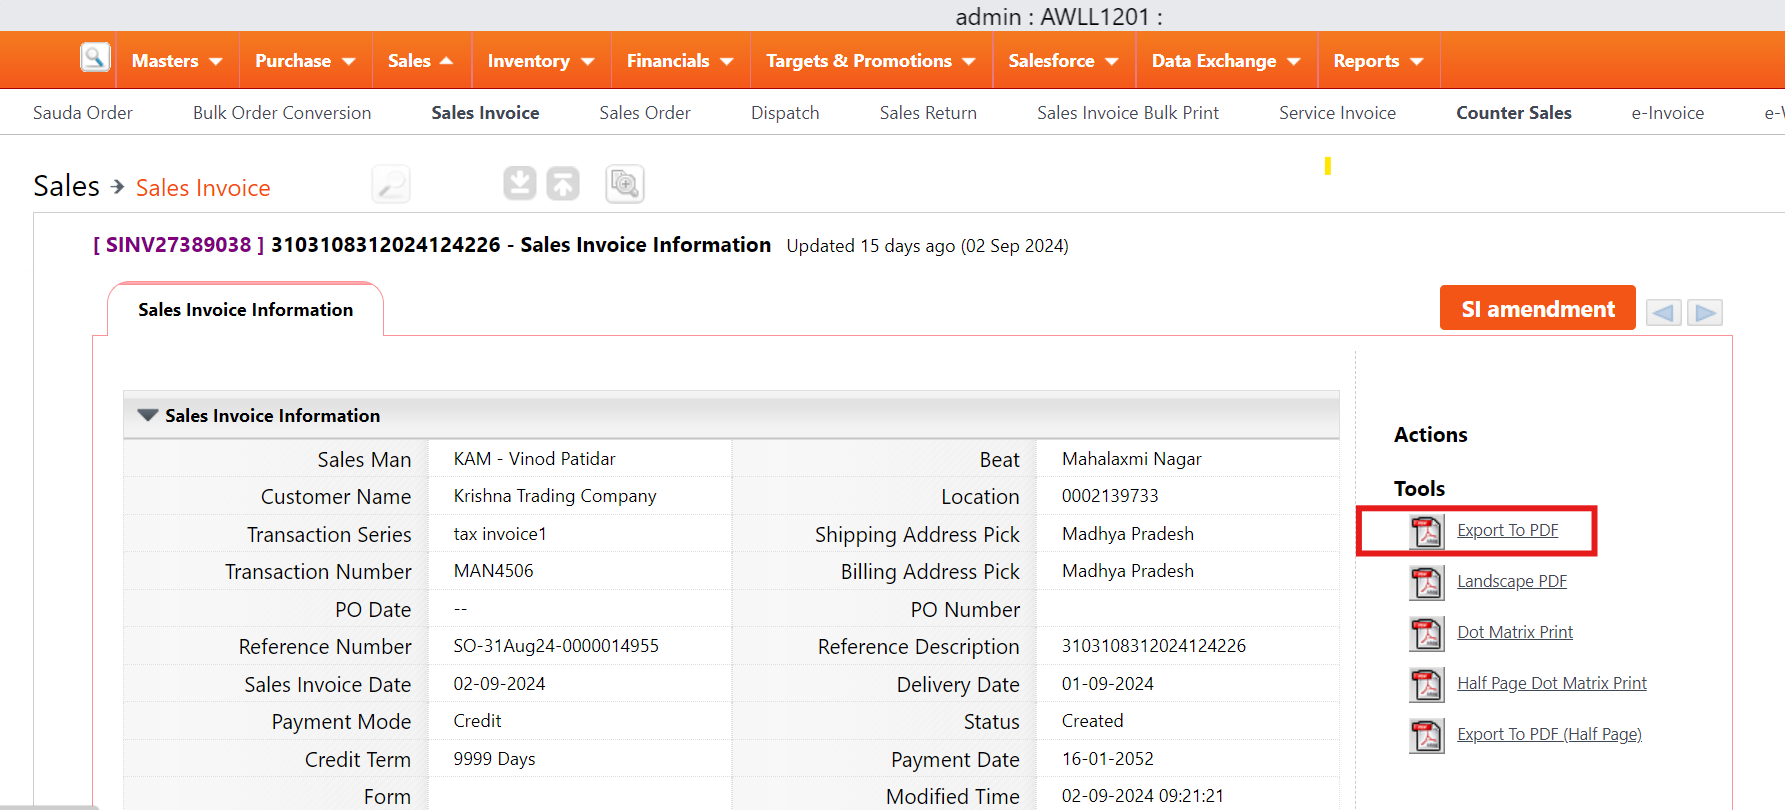
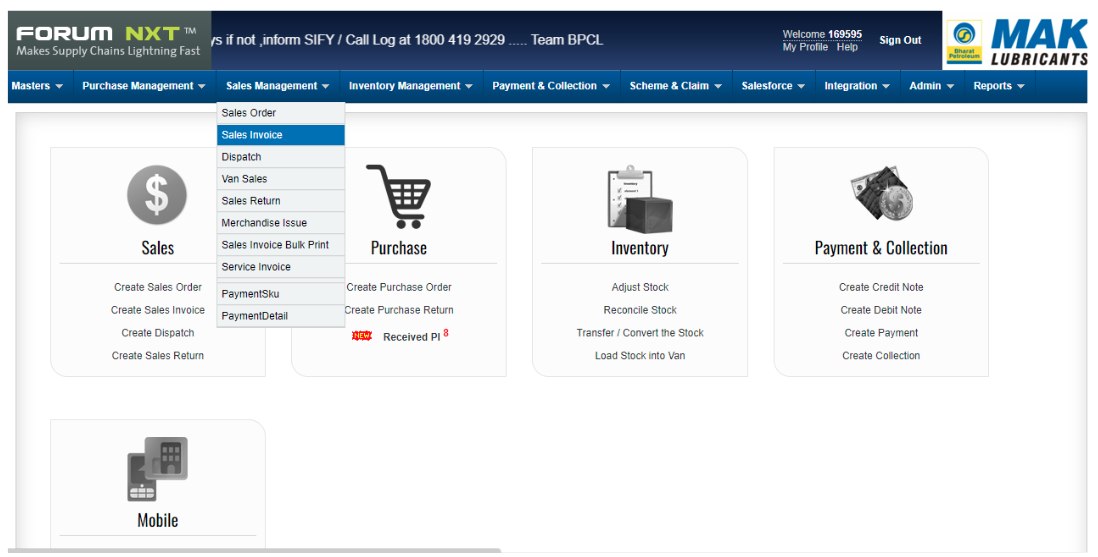
Invoice Creation in Tally
Step 1 : Accessing the Voucher Screen
Open Tally and navigate to the homepage.
Click on "Vouchers", which will open the invoice creation screen.
Step 2 : Switching to Sales Invoice Mode
By default, the system opens the Payments window.
To switch to the Sales Invoice window :
Press the F8 key, which will provide options for Sales and Sales Invoice.
Select Sales Invoice to proceed with creating a new invoice.
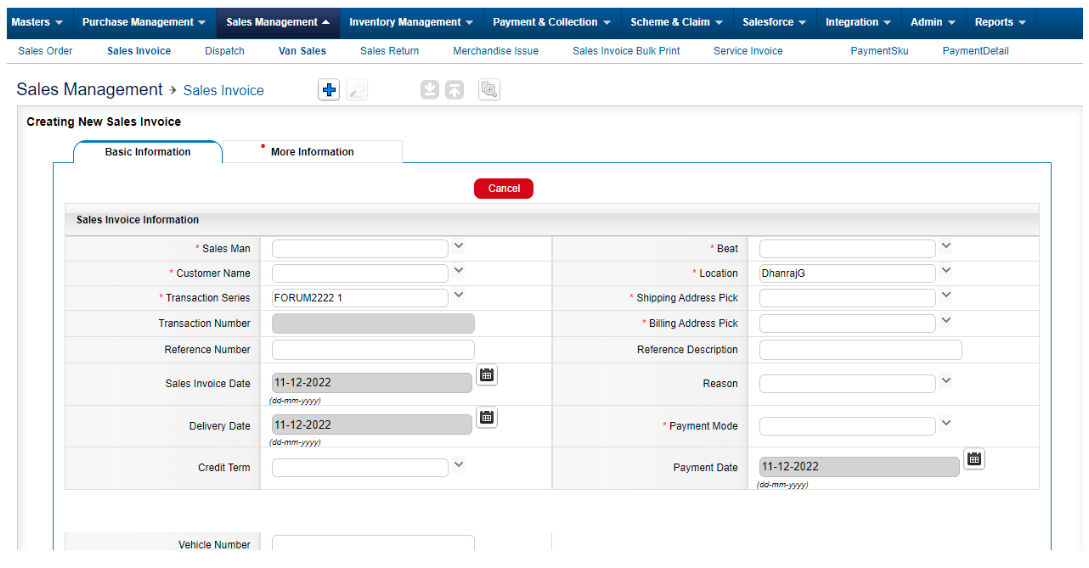
Step 3 : Entering Invoice Number
The Sales Invoice screen will now be displayed.
In the designated Invoice Number field, enter the invoice number and press Enter to proceed.
Step 4 : Selecting the Customer
Once the Invoice Number is entered, select the Customer Name from the list.
Press Enter to proceed through the subsequent fields.
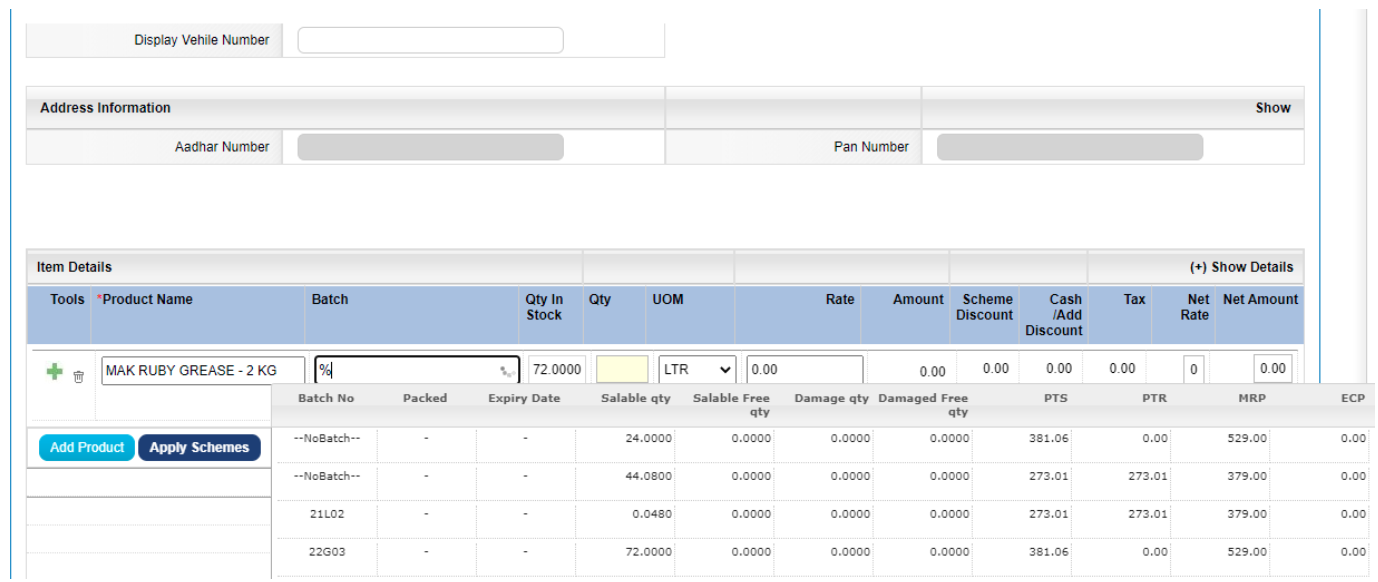
Step 5 : Adding Items for Billing
After selecting the customer, enter the items that need to be billed.
Specify the quantity for each item being sold.
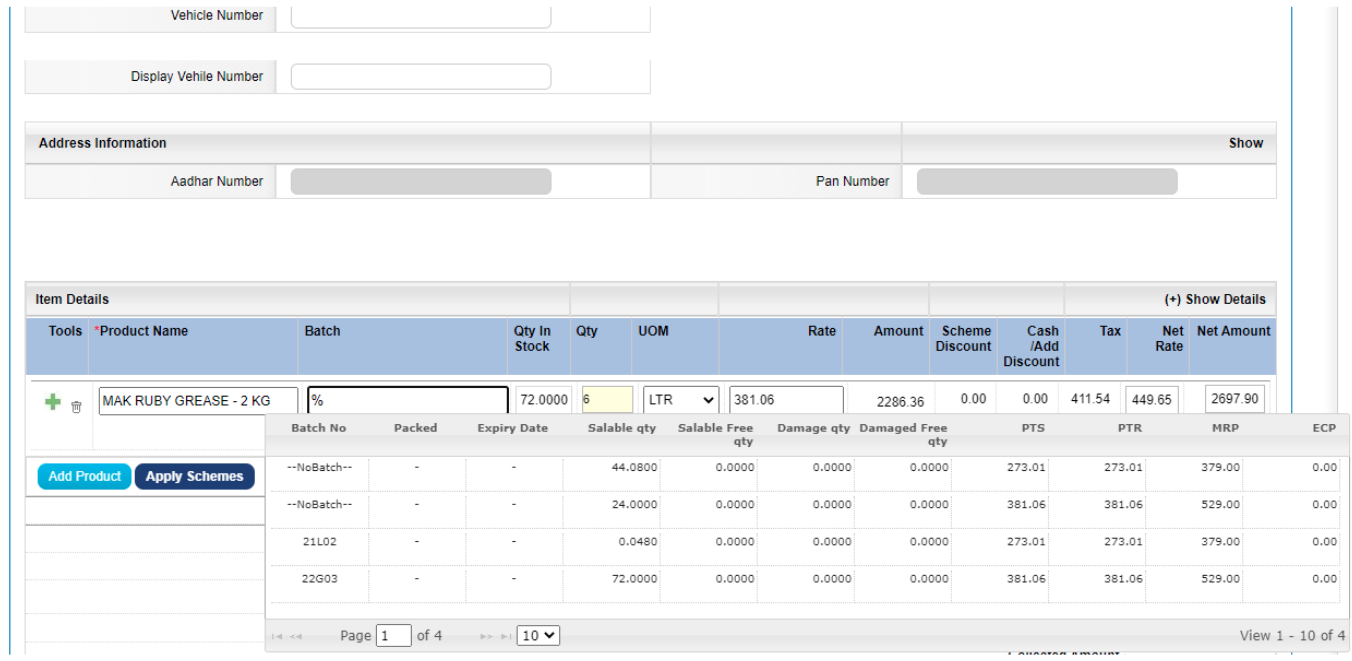
Step 6 : Applying Tax and Finalizing the Invoice
After adding the items, select the appropriate tax rate applicable to the transaction.
Continue pressing Enter through the remaining fields to finalize the details.
Once all details are verified, select accept to save the invoice successfully.
Synchronizing the Invoice with DMS
After creating the invoice in Tally, it must be uploaded and synchronized with DMS.
Step 7 : Verifying Invoice Upload Status
Navigate to the Forum Integration Menu.
Open the Audit Log – Voucher Upload Status.
The newly created invoice will appear in the "Yet to Upload" state.
Step 8 : Manually Syncing the Invoice to DMS
To sync the invoice with DMS, go to the Manual Sync section.
Click on "Sync All", which will initiate the synchronization process.
Once completed, the invoice will be successfully uploaded to DMS.
Version Summary
Author
Reviewer
Approver 1
Approver 2
Current Version
Current Version Published On
Maiden Version Published On
Pavithra
S Keerthana
Julian Shawn Dmonte
Raja Sekharam Uppuluri
1.0
28-07-2025
28-07-2025
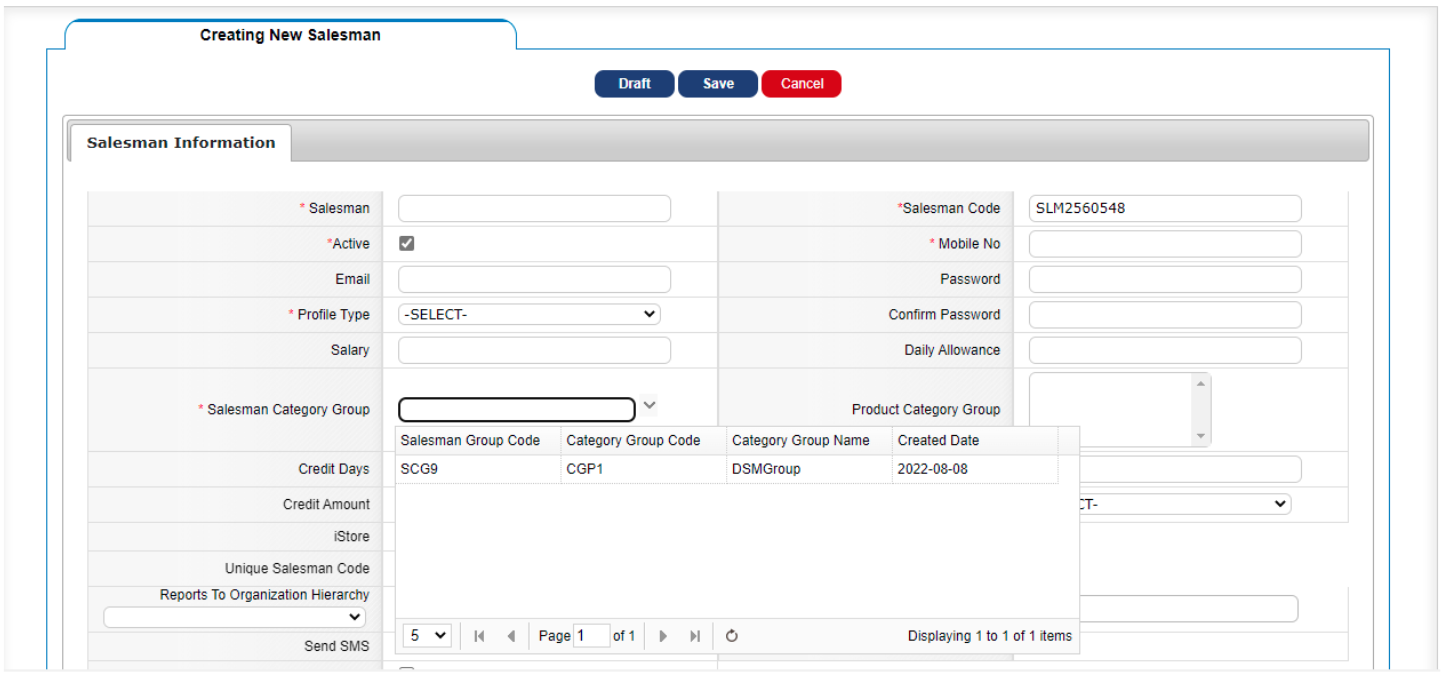
OBJECTIVE :
This document provides a workflow for mapping a salesman to the Distributor.
Issue Short Description : Mapping a Salesman to the Distributor
Service Type : SR
Priority : Low
Problem Code : Others
INPUTS :
1. Distributor Information (Name, Code).
2. Salesman Information (Name, Code).
Example Case ID- IT#0053366611
Workflow :
Create a case in the ServiceNow portal and provide the case ID to the customer.
Contact the distributor to get additional information and request for clarification if needed.
Here’s a step-by-step guide for mapping a salesman to the distributor :
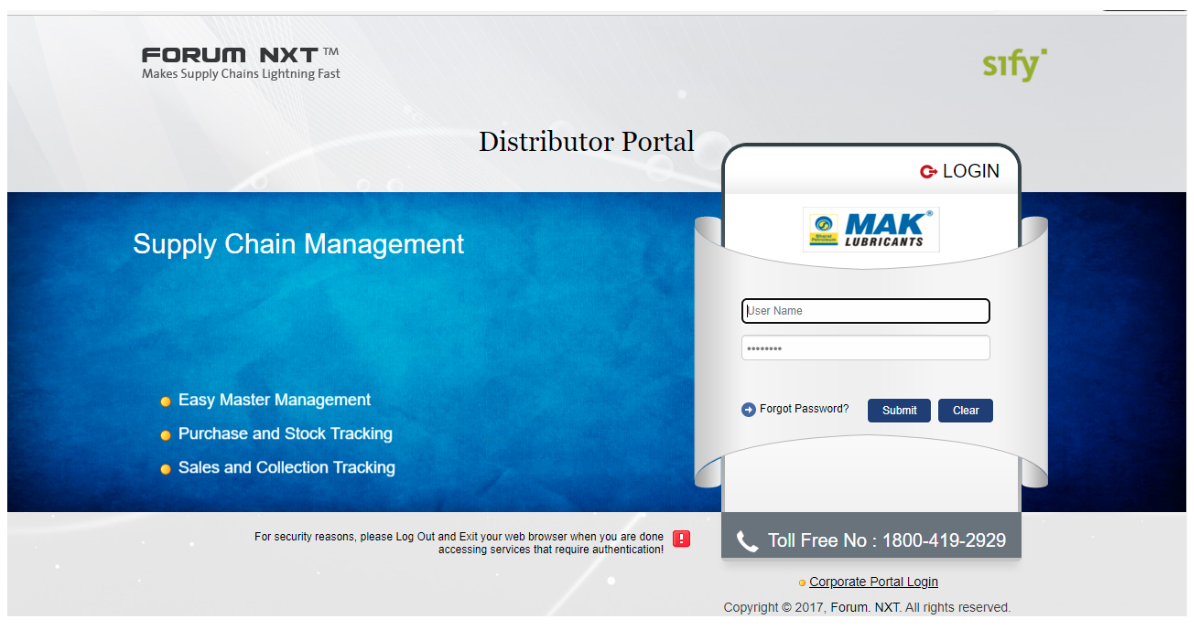
1. Log in to Corporate Portal :
Use support credentials to access the portal.
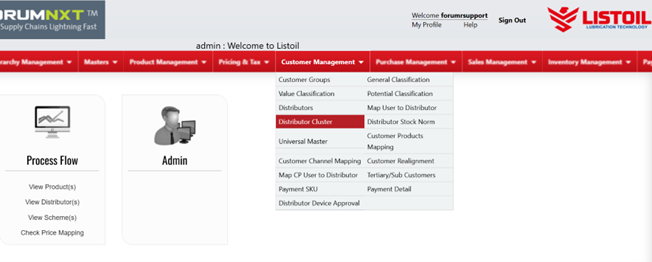
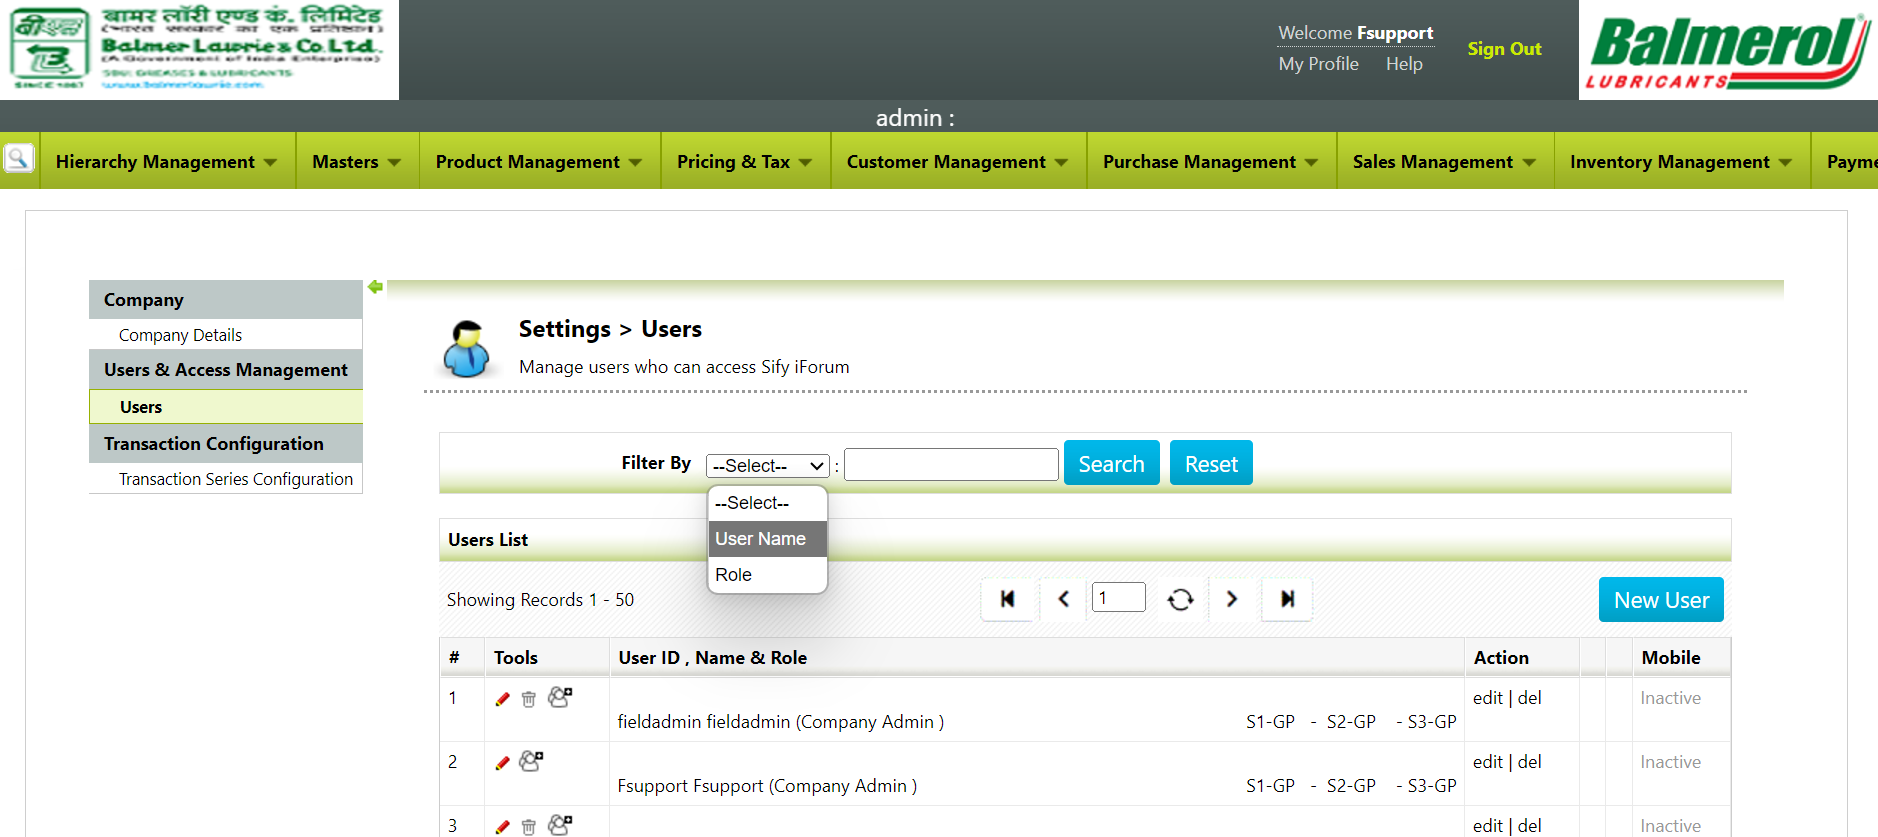
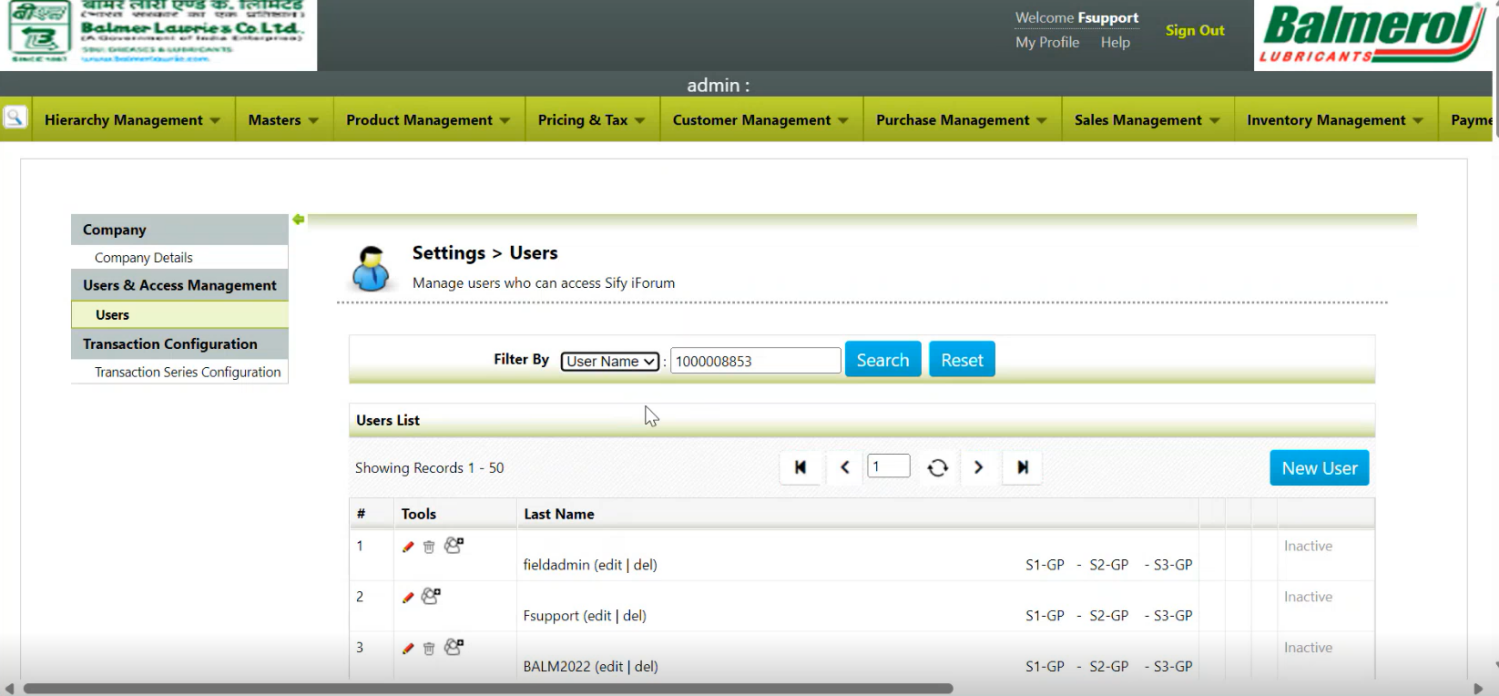
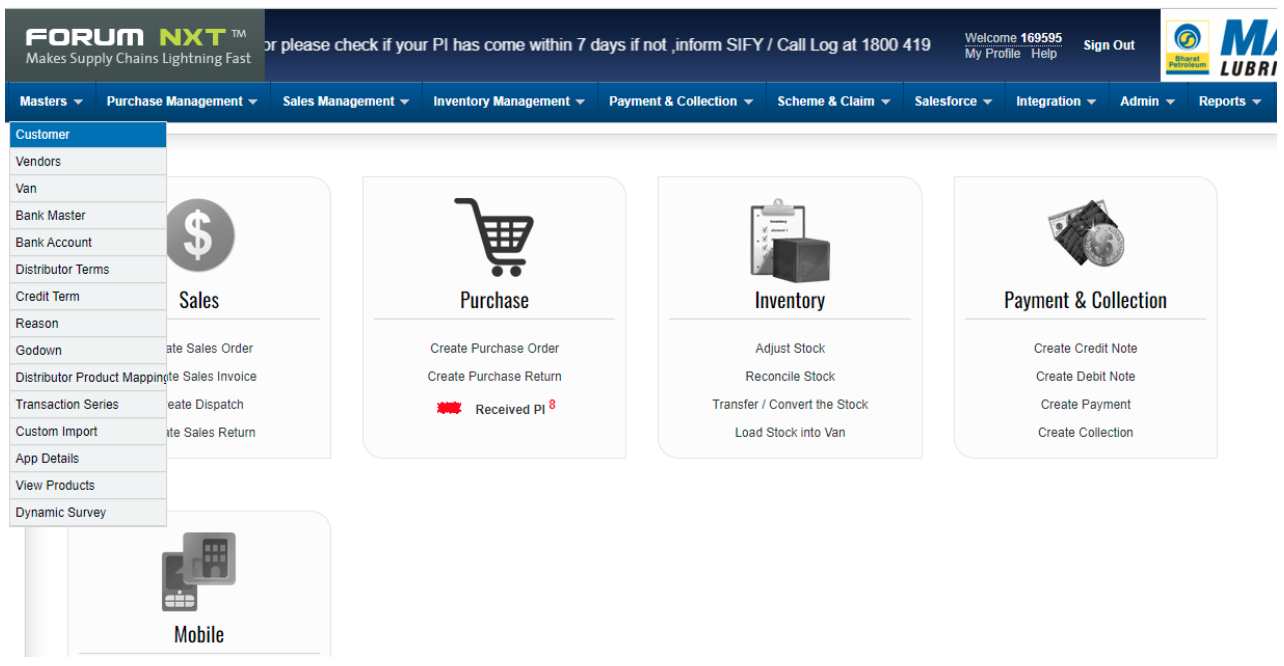
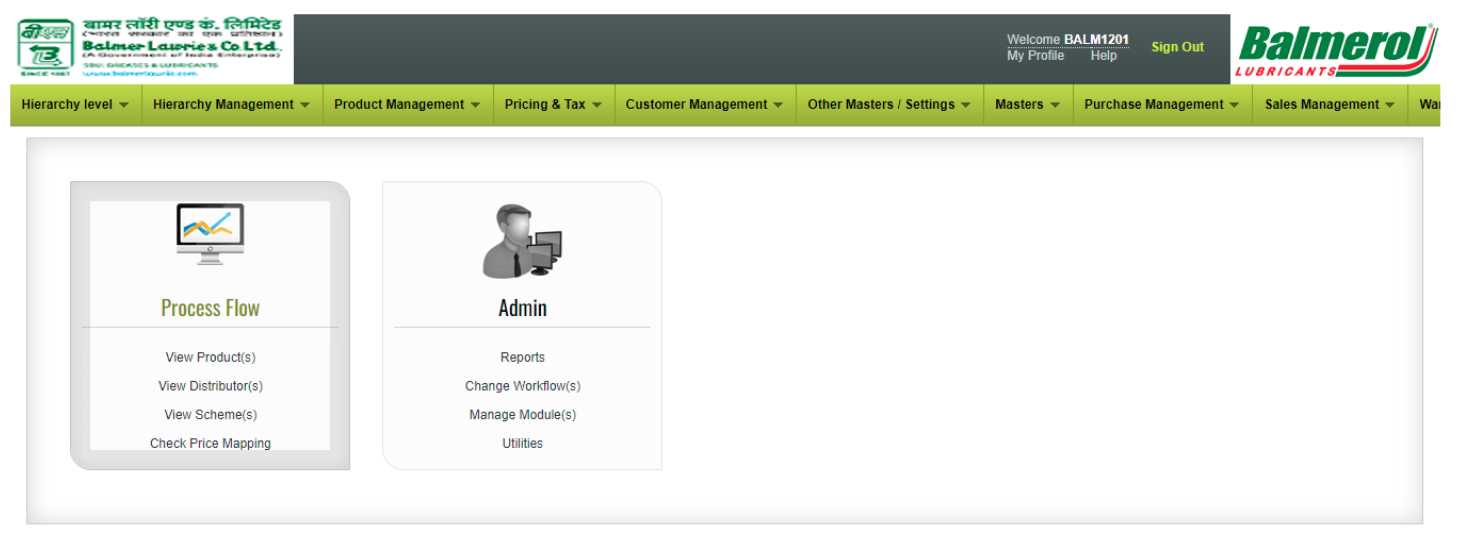
2. Go to Customer Management Module :
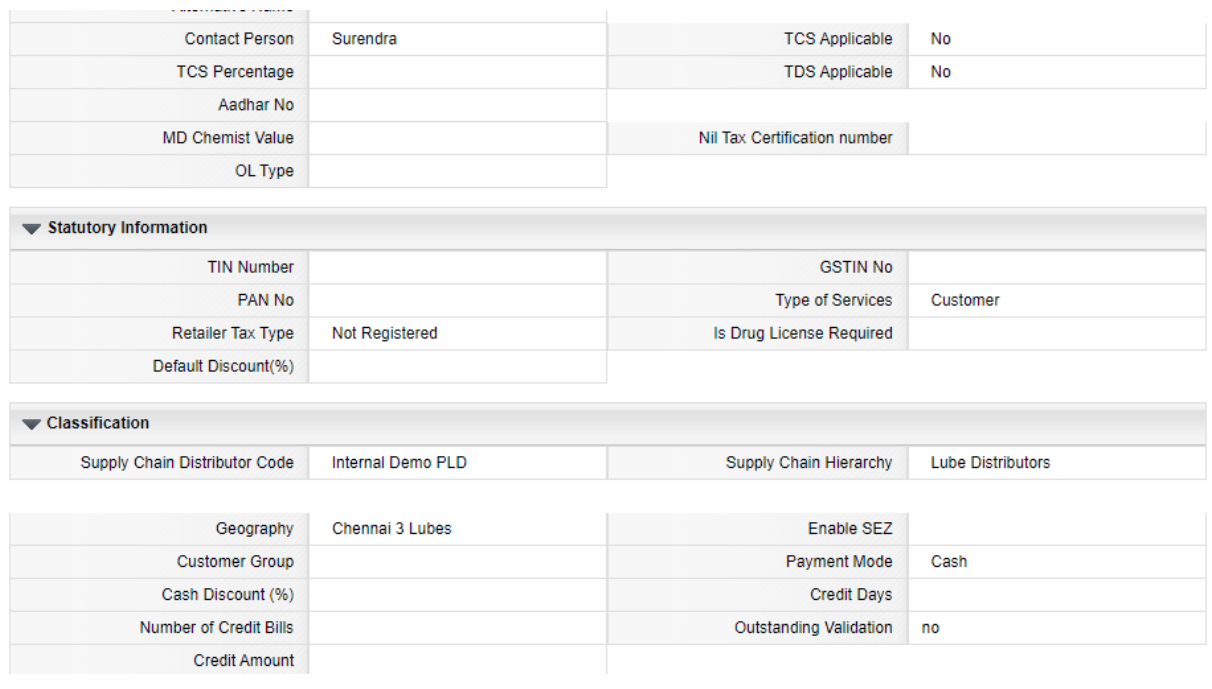
Navigate to the Customer Management module and select the Distributors section
Use the Distributor Name in search field to locate the desired distributor. If the distributor is in active state, then the status will be displayed as Active.
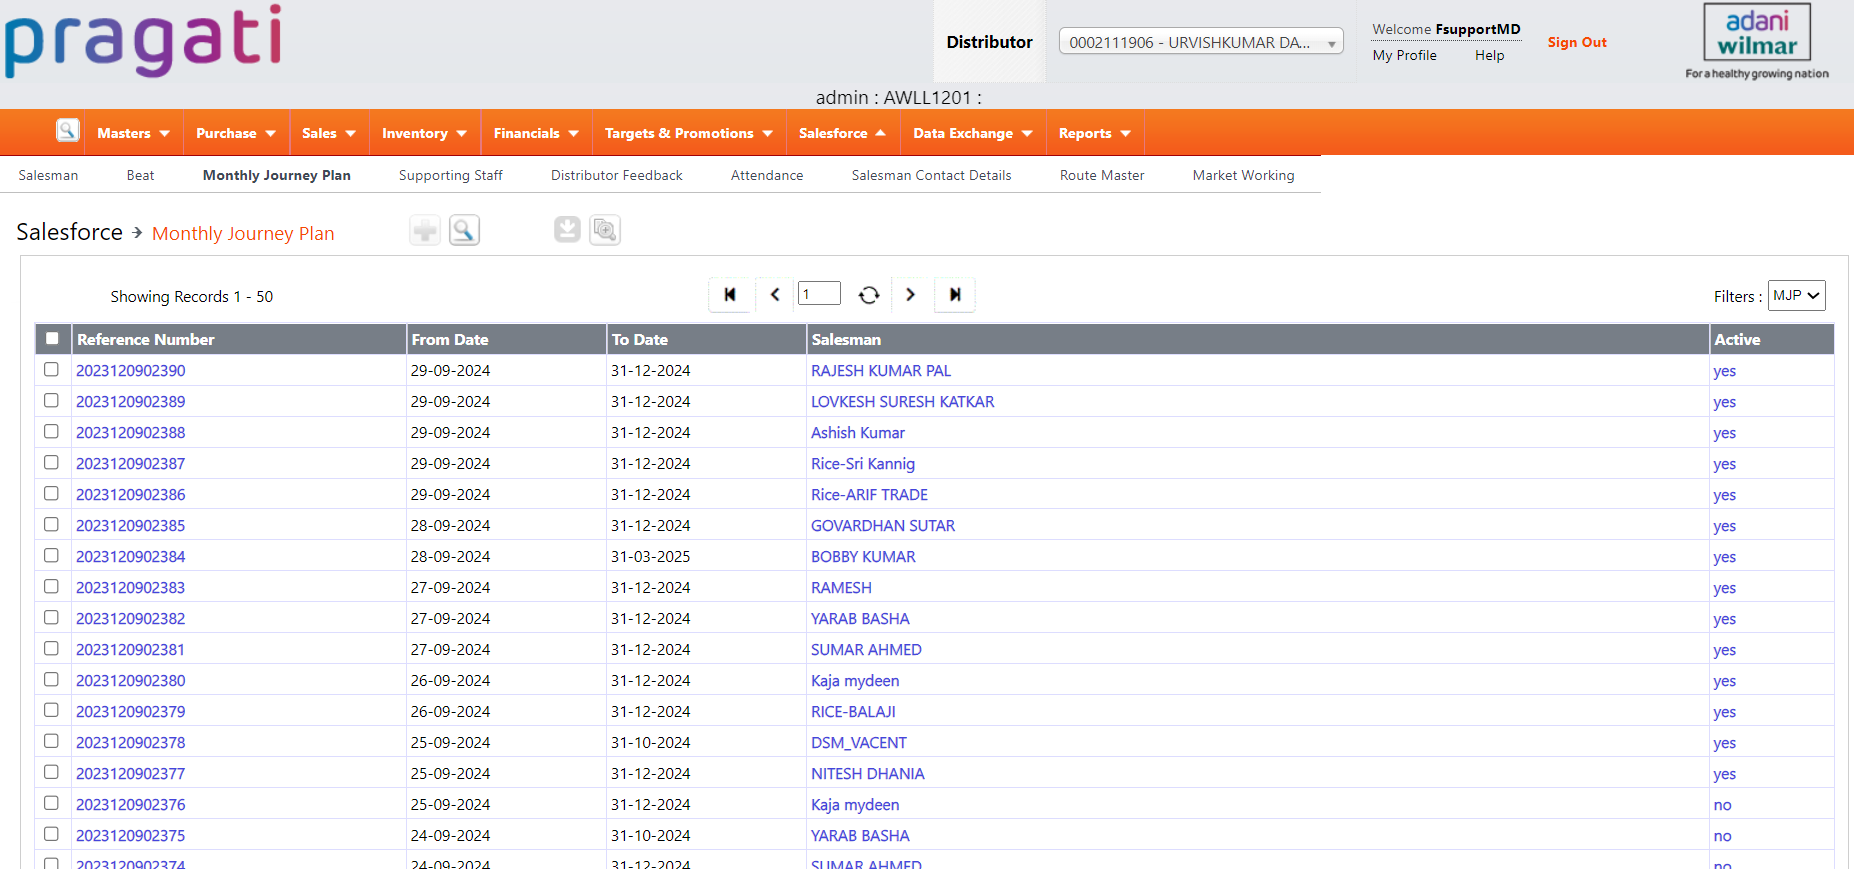
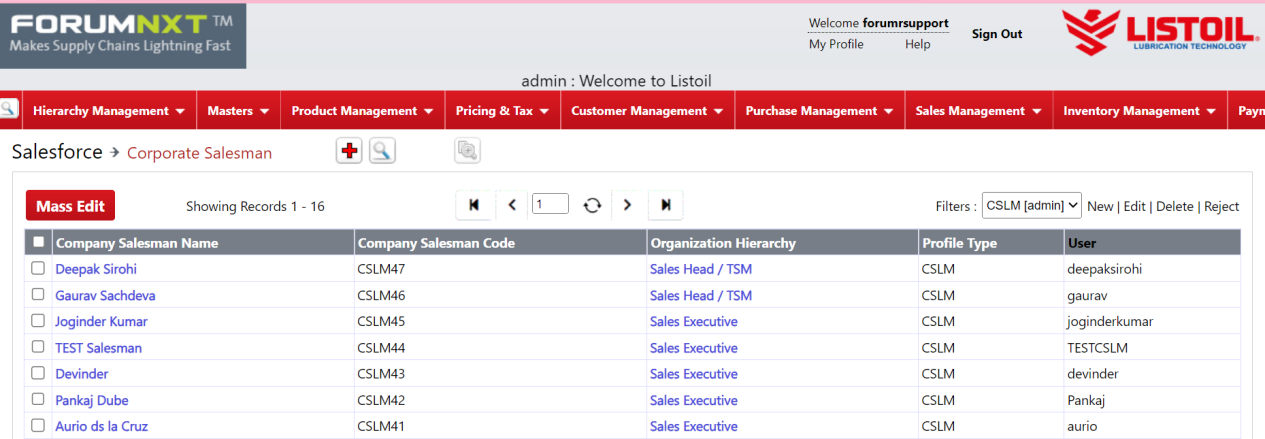
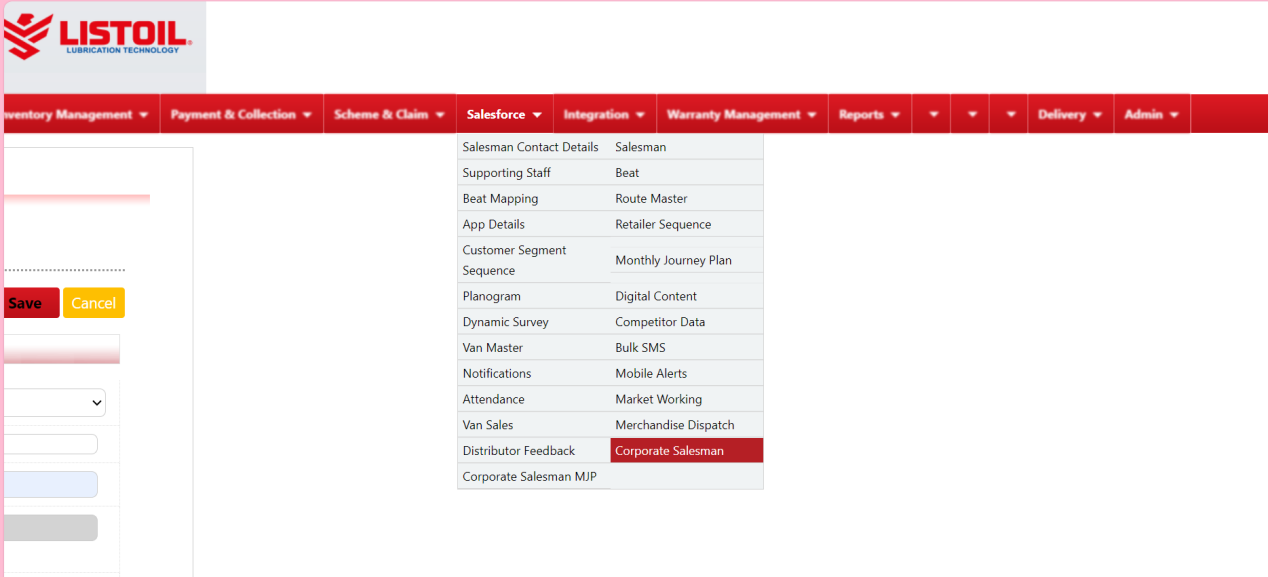
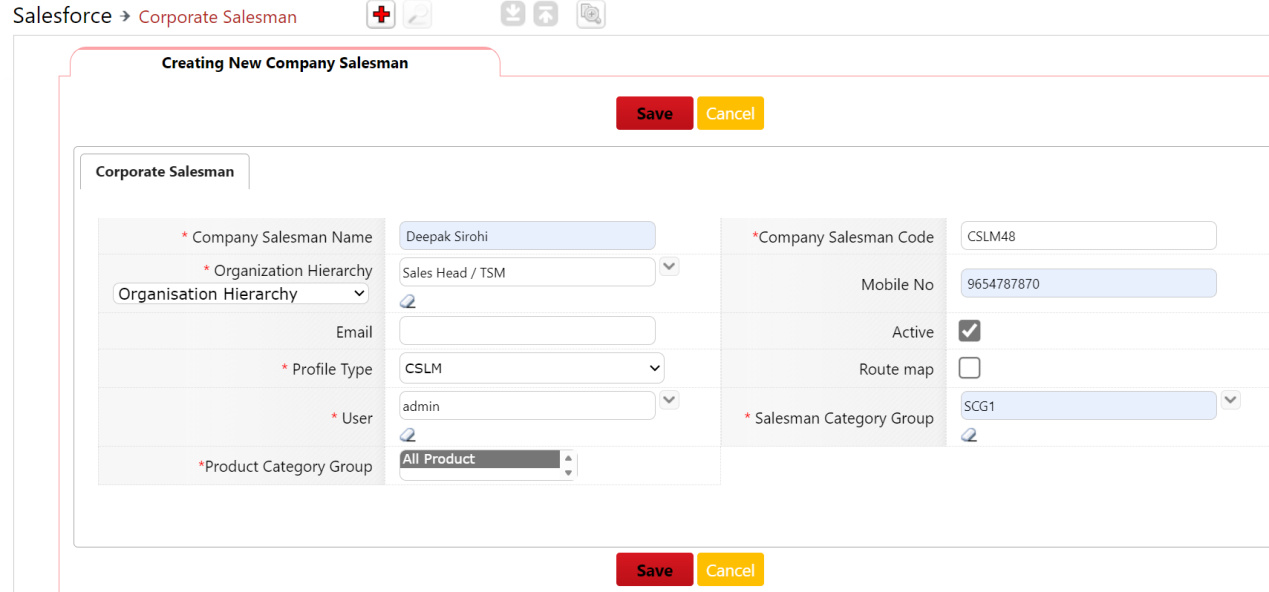
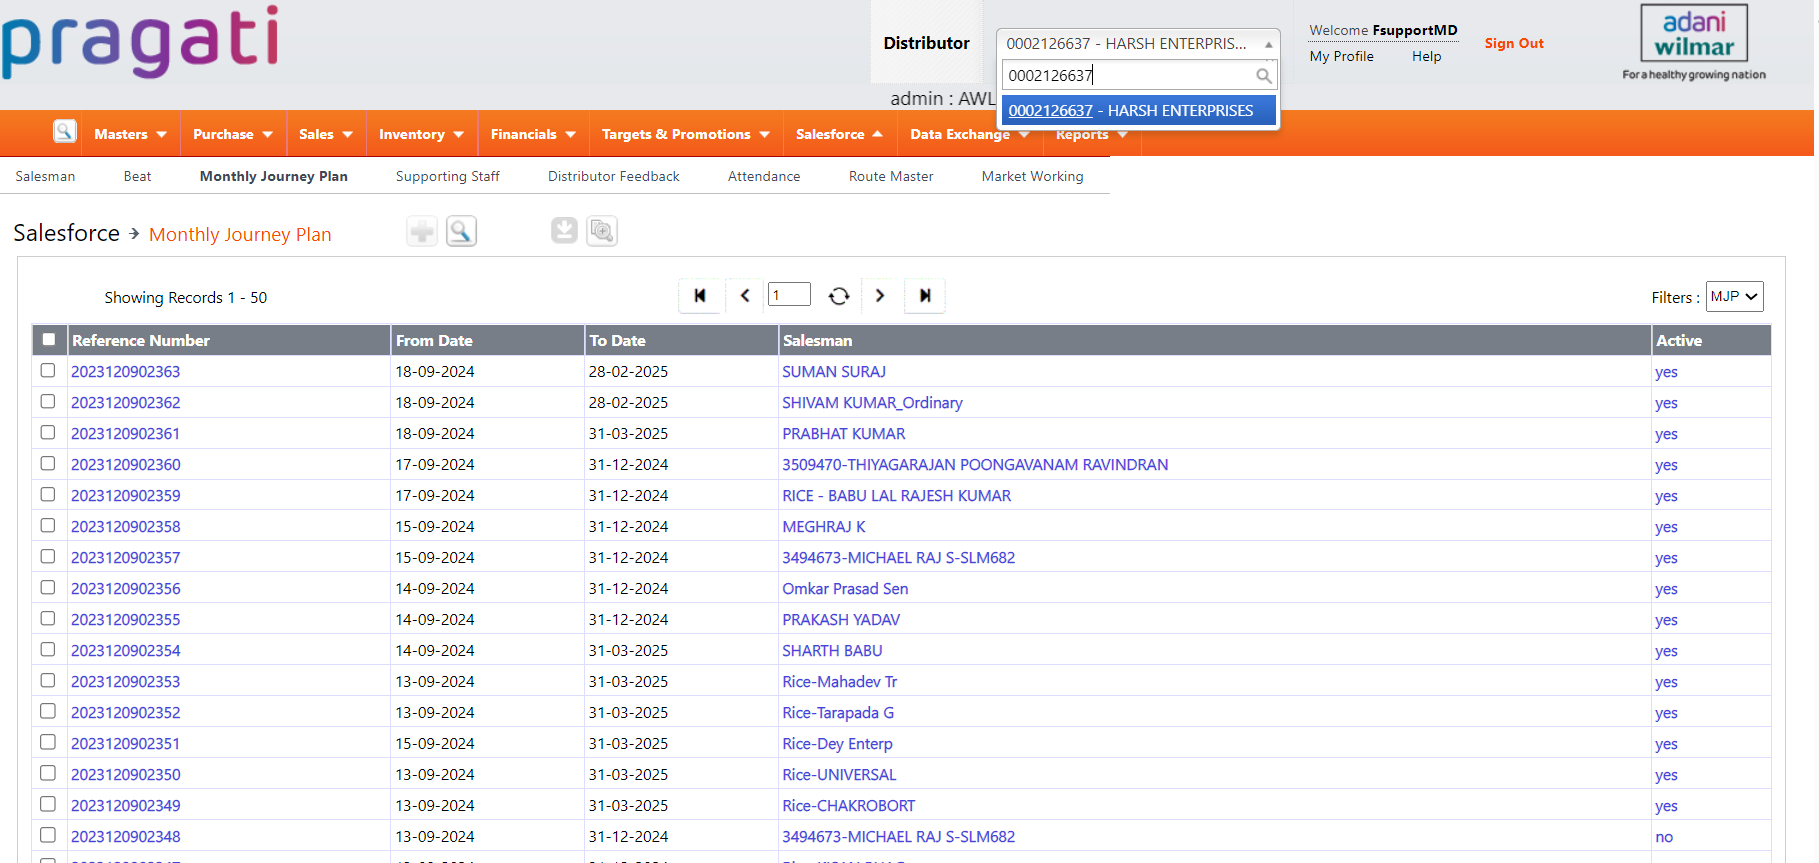
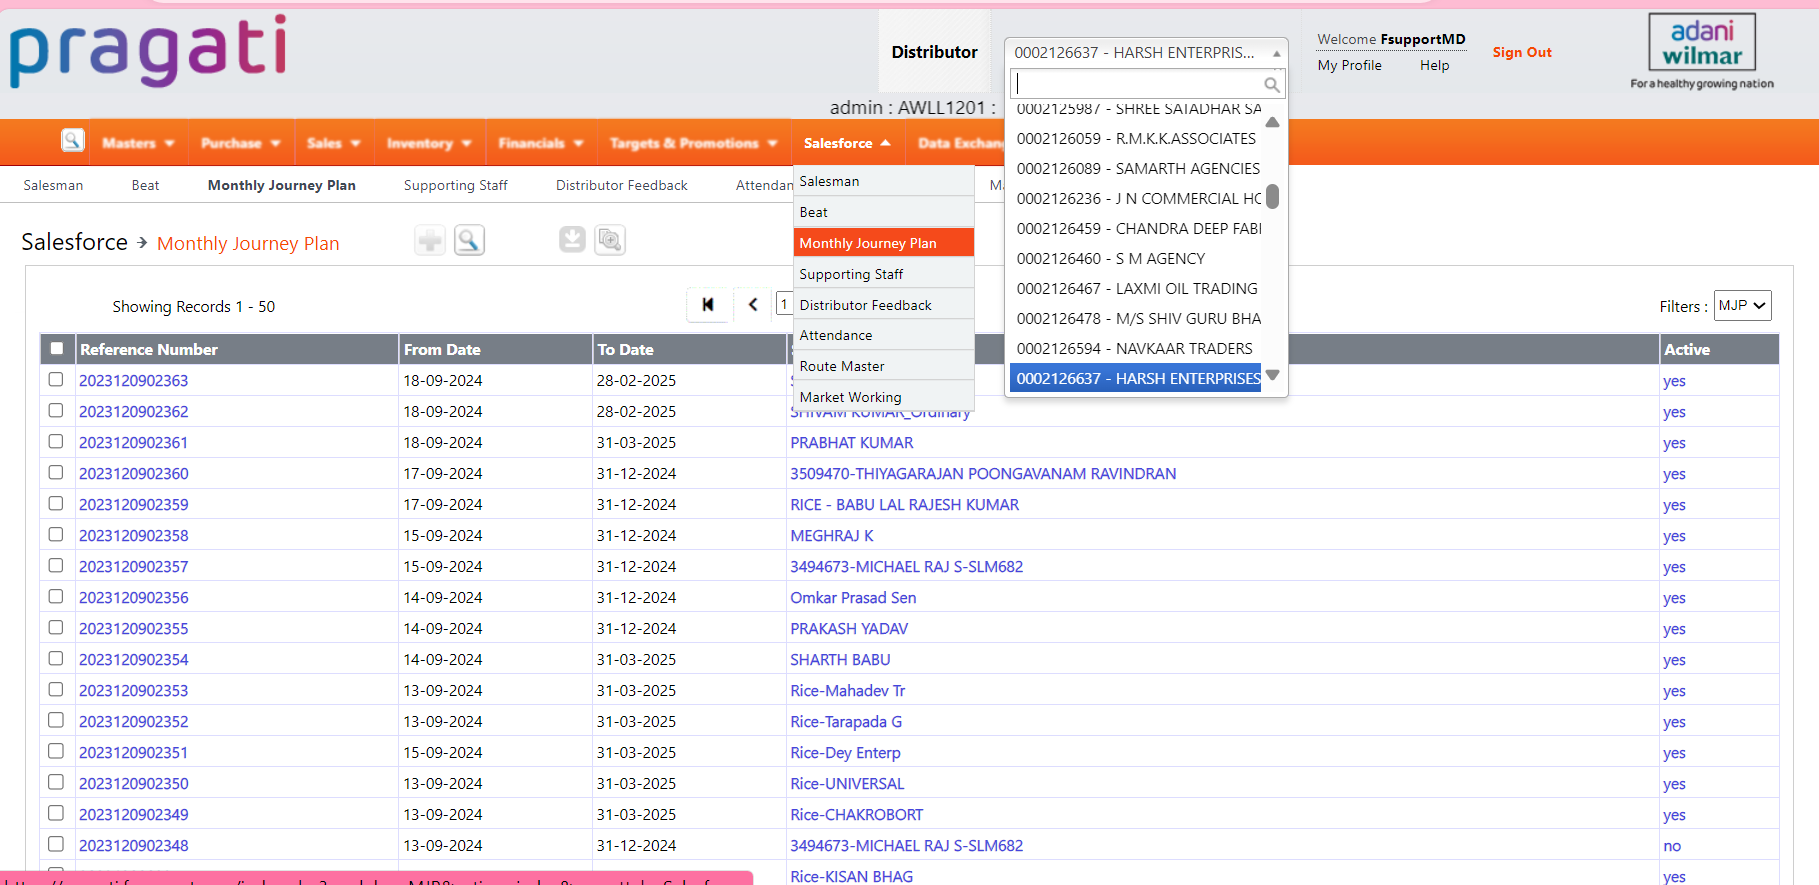
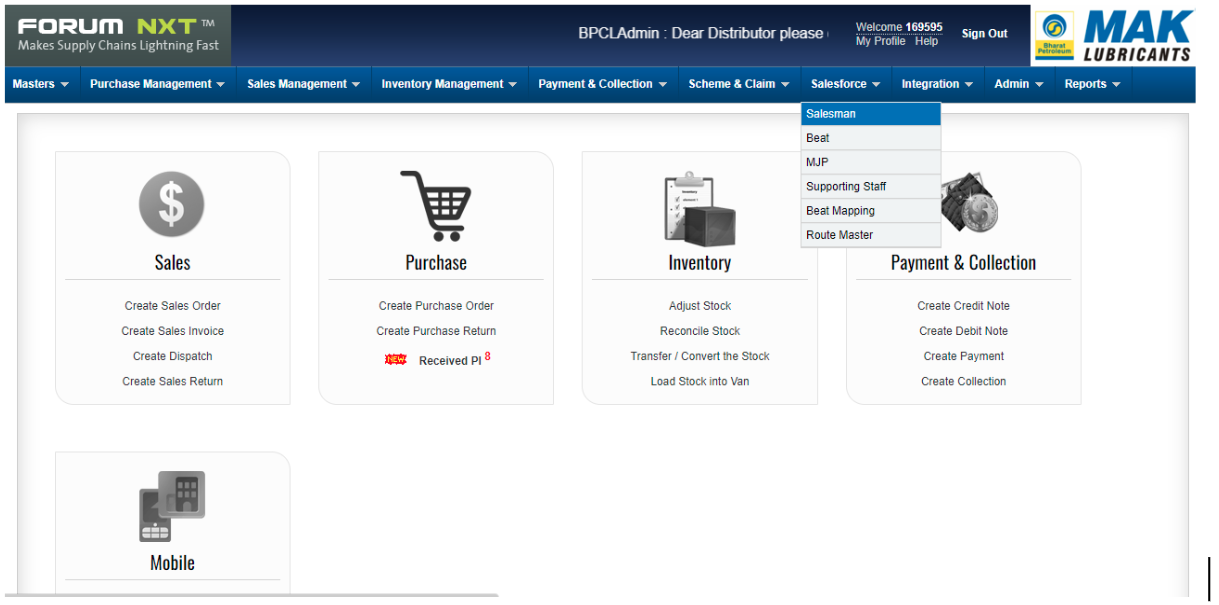
3. Go to Salesforce Module :
Navigate to the Salesforce module and open the Corporate Salesman section.
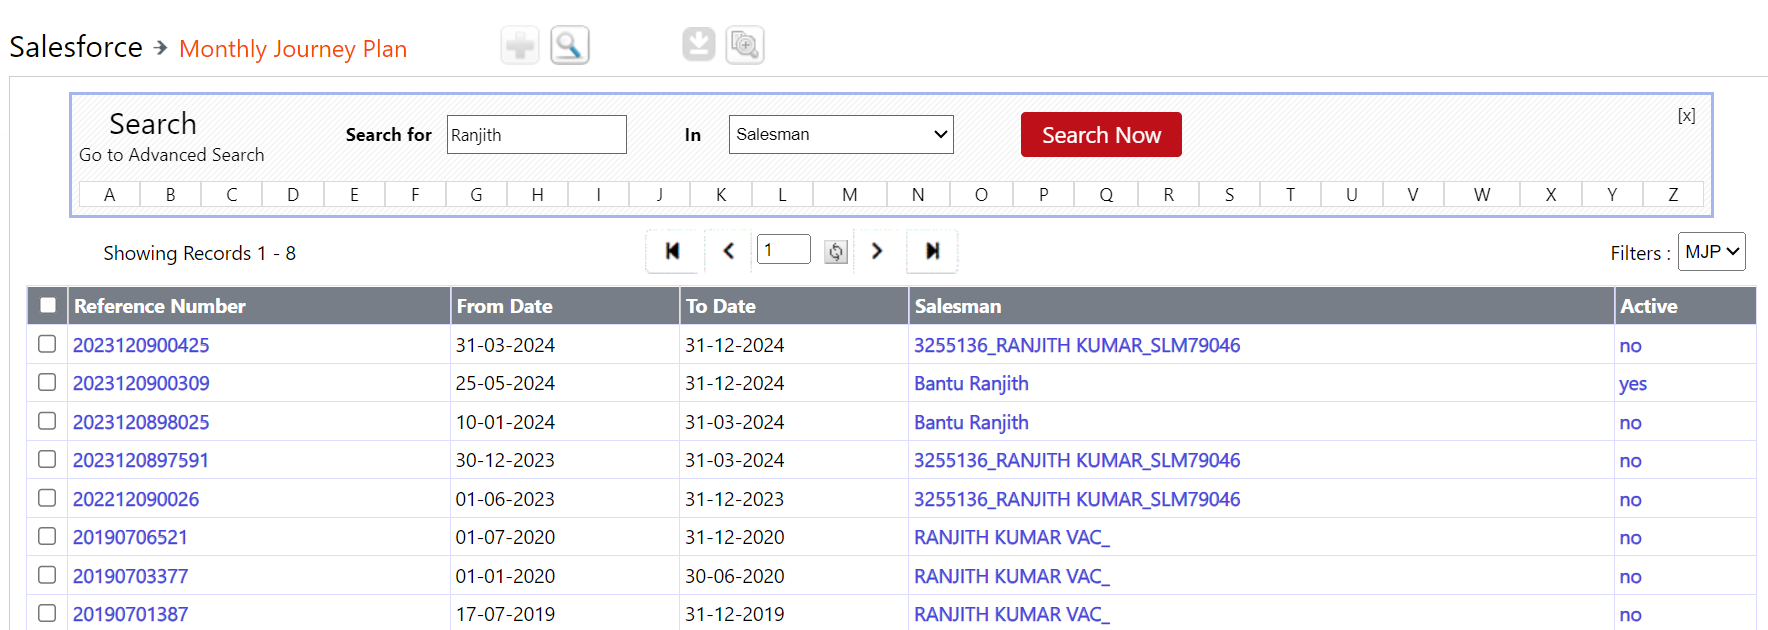
Search by Salesman Code to retrieve the corresponding salesman details. If found, the system will display the status as Active.
Go to the Distributor Mapping section and search to verify whether the respective distributor is mapped.
If the Distributor is not mapped to the salesman, proceed to map the Salesman with the appropriate Distributor.
After performing the search via the Action option, it was found that the Support Team does not have edit access for this record.
Therefore, the case is reassigned to the PMO Bucket for further action
4. Assign to PMO :
Give the whole Description of this request and assign this case to PMO Bucket
5. Validation :
Once the necessary changes are completed, verify whether the Salesman is successfully mapped to the respective Distributor in the Distributor Mapping section.
If the mapping has been completed and the request fulfilled, proceed to send the Resolution Mail to the Customer as confirmation.
Version Summary
Author
Reviewer
Approver 1
Approver 2
Current Version
Current Version Published On
Maiden Version Published On
Malladi Nikhila
S Keerthana
Julian Shawn Dmonte
Raja Sekharam Uppuluri
1.0
15-07-2025
15-07-2025
Depot Creation :
The main reason for depot creation is to manage inventory, to extend supply chain flexibility and for efficient transportation.
If we receive a mail to create a new depot in the portal, we need to get the approval from the HO team.
If approval received, Follow the below mentioned steps to create a new depot in the portal.
Step 3 : Check if the given depot has already been created by searching the given depot code in portal.
Step 4 : If depot has been not created before the click on the "+" button to create a new depot in portal.
Step 5 : Create the depot using the given depot code and then fill the required details such as Depot name, Depot location, Geographical category, State & city, Postal code and GSTIN NO.
Step 6 : Save the entries to create a depot.
Step 7 : Check in front end,if the depot has been created as per the given data by the client.
Version Summary
Author
Reviewer
Approver 1
Approver 2
Current Version
Current Version Published On
Maiden Version Published On
Mohammed Kashif
Nisha Bhatt
Julian Shawn Dmonte
Subramanian
1.0
24-04-2024
24-04-2024
Enable to edit net rate :
The net rate option is enabled to change the amount of the particular product while creation of sales order.
If we receive a mail to enable net rate for any of the products in the portal, We need to get the approval from the HO team.
If approval received, Follow the below mentioned steps to enable to net rate option for the mentioned product in the portal.
Log in credentials:
Fsupport - ID / Pass
Steps for depot creation :
Step 1 : Log in to the portal.
Step 2 : Masters ---> View product.
Step 3 : Search the product using the product code and check whether the allow rate edit option is enabled.
Step 4 : If edit rate option is not enabled for the given product then click on edit option.
Step 5 : Enable the net rate edit option and then without changing anything click on save and then approve to view as net rate enabled product.
Version Summary
Author
Reviewer
Approver 1
Approver 2
Current Version
Current Version Published On
Maiden Version Published On
Mohammed Kashif
Nisha Bhatt
Julian Shawn Dmonte
Subramanian
1.0
24-04-2024
24-04-2024
Product activation and inactivation :
The activation and inactivation of the products in the portal are done based on the sales team request.
If we receive a mail to activate and inactivate any of the products in the portal, We need to get the approval from the HO team.
If approval received, Follow the below mentioned steps for activation and inactivation of the mentioned product in the portal.
Log in credentials:
Fsupport - ID / Pass
Steps for depot creation :
Step 1 : Log in to the portal.
Step 2 : Masters ---> View product.
Step 3 : Search the product using the product code.
Step 4 : check the status of the mentioned product to proceed with activation or activation of product.
Step 5 : Click on edit option and change the status of the product as requested.
Step 6 : Post completing the changes click on save and then approve to view the made changes in front end.
Version Summary
Author
Reviewer
Approver 1
Approver 2
Current Version
Current Version Published On
Maiden Version Published On
Mohammed Kashif
Nisha Bhatt
Julian Shawn Dmonte
Subramanian
1.0
24-04-2024
24-04-2024
Scheme activation and inactivation :
The scheme activation and inactivation is done based on the sales team request to apply the schemes during the creation of sales order.
The schemes can be defined in two ways based on the configurations. they are:
1. Amount based discounts.
2. Free products based discounts.
If we receive a mail to activate and inactivate the scheme, We need to get the approval from the HO team.
If approval received, Follow the below mentioned steps for activation and inactivation of the mentioned scheme in the portal.
Log in credentials:
Fsupport - ID / Pass
Steps for depot creation :
Step 1 : Log in to the portal.
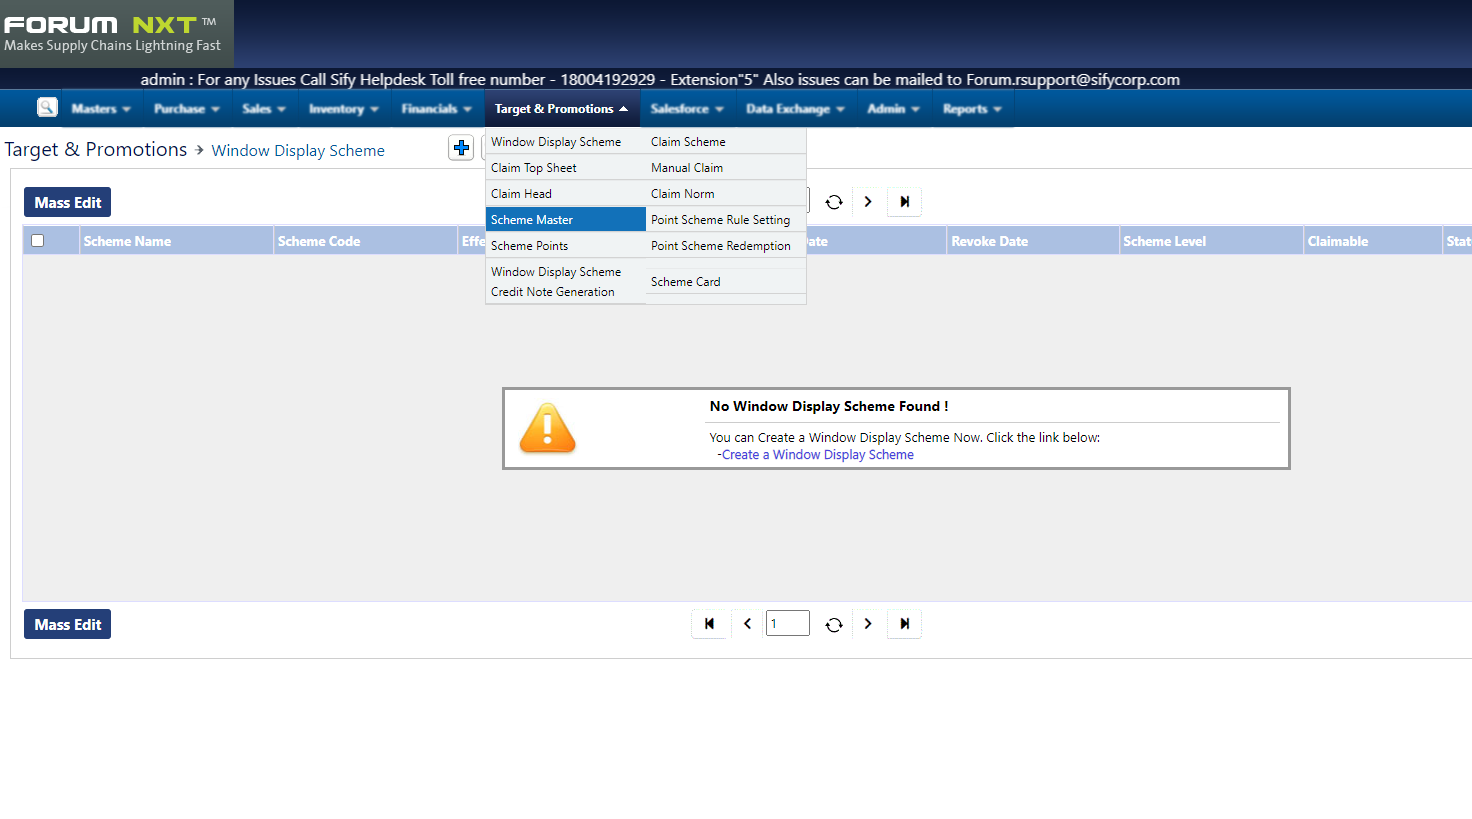
Step 2 : Scheme & Claim ---> Scheme Master.
Step 3 : Search the scheme using the given scheme code.
Step 4 : Check the status of the scheme if need any changes in state.
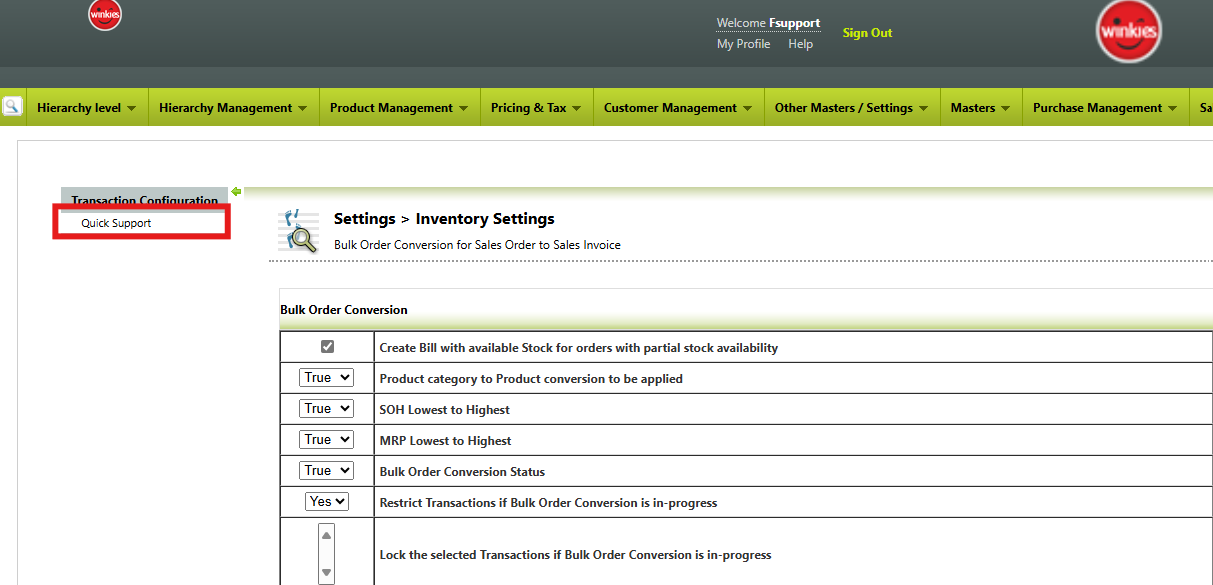
Step 5 : If the status of the scheme is required to change, then click on Admin module ---> Settings ---> Quick Support.
Step 6 : In the scheme status change, enter the given scheme code and select.
Step 7 : Change the revoke date as per the requirement and then click on submit.
Step 8 : Enter the password (Admin) and save.
Step 9 : Post saving the changes confirm in the scheme whether the made changes are reflecting on front end.
Version Summary
Author
Reviewer
Approver 1
Approver 2
Current Version
Current Version Published On
Maiden Version Published On
Mohammed Kashif
Nisha Bhatt
Julian Shawn Dmonte
Subramanian
1.0
24-04-2024
24-04-2024
Scheme Extend :
The scheme date is extended based on the sales team requirement to apply the scheme more than the already defined days.
If we receive a mail to extend the scheme date in the portal, We need to get the approval from the HO team.
If approval received, Follow the below mentioned steps to extend the mentioned scheme date in the portal.
Log in credentials:
Fsupport - ID / Pass
Steps for depot creation :
Step 1 : Log in to the portal.
Step 2 : Scheme & Claim ---> Scheme Master.
Step 3 : Search the scheme using the given scheme code.
Step 4 : Check the status of the scheme if need any changes in effective to date.
Step 5 : If the effective to date of the scheme is required to change, then click on Admin module ----> Settings ----> Quick Support.
Step 6 : In the scheme status change, enter the given scheme code and select.
Step 7 : Change the scheme's Effective to date and Revoke date as per the request and submit.
Step 8 : Enter the password (Admin) and save.
Step 9 : Post saving the changes confirm in the scheme whether the made changes are reflecting in front end.
Version Summary
Author
Reviewer
Approver 1
Approver 2
Current Version
Current Version Published On
Maiden Version Published On
Mohammed Kashif
Nisha Bhatt
Julian Shawn Dmonte
Subramanian
1.0
24-04-2024
24-04-2024
Remove distributor from scheme :
The process of removal of distributor from the scheme is done to stop the benefits of the scheme for the particular distributor.
If we receive a mail to remove the distributor from the scheme in the portal, We need to get the approval from the HO team.
If approval received, Follow the below mentioned steps to remove the distributor from the mentioned scheme in the portal.
Log in credentials:
Fsupport - ID / Pass
Steps for depot creation :
Step 1 : Log in to the portal.
Step 2 : Scheme & Claim ---> Scheme Master.
Step 3 : Search the scheme using the given scheme code.
Step 4 : Check the status of the scheme if need any changes in effective to date.
Step 5 : If the distributor is available in the scheme, then click the edit option.
Step 6 : Change the revoke date and click on save.
Step 7 : Post saving the changes confirm in the scheme whether the made changes are reflecting in front end.
Version Summary
Author
Reviewer
Approver 1
Approver 2
Current Version
Current Version Published On
Maiden Version Published On
Mohammed Kashif
Nisha Bhatt
Julian Shawn Dmonte
Subramanian
1.0
24-04-2024
24-04-2024
Add distributor in scheme :
The process of adding the distributor to the scheme is done to gain the benefits of the scheme by the particular distributor.
If we receive a mail to add the distributor to the scheme in the portal, we need to get the approval from the HO team.
If approval received, Follow the below mentioned steps to add the distributor to the mentioned scheme in the portal.
Log in credentials:
Fsupport - ID / Pass
Steps for depot creation :
Step 1 : Log in to the portal.
Step 2 : Scheme & Claim ---> Scheme Master.
Step 3 : Search the scheme using the given scheme code.
Step 4 : Check in Distributor revoke column whether the given distributor is available in the mentioned scheme.
Step 5 : If the distributor is not available in the mentioned scheme, then click and copy the distributor cluster.
Step 6 : Navigate with Other master’s module ---> Custom import ---> Click on Distributor cluster mapping remove.
Step 7 : Paste the cluster name and then select to download the file.
Step 8 : In the downloaded file fill the given CD code, cluster code and row ID.
Step 9 : After the changes are made, save the CSV file.
Step 10 : Add the prefix "000" to the distributor code using the formula and save the CSV file again.
Formula = "000"+distributor column
Step 11 : Upload the changes made CSV file in Distributor cluster mapping remove module.
Note : The upload should be done without closing the CSV file.
Step 12 : Post import confirm in the Distributor revoke column whether the distributor has been added into the scheme.
Version Summary
Author
Reviewer
Approver 1
Approver 2
Current Version
Current Version Published On
Maiden Version Published On
Mohammed Kashif
Nisha Bhatt
Julian Shawn Dmonte
Subramanian
1.0
24-04-2024
24-04-2024
RPI deletion :
The RPI has been deleted from the portal based on the distributor requirement, due to that particular RPI would not have been converted as PI from log period or due to any errors.
If we receive a mail to remove the RPI from the portal, we need to get the approval from the HO team.
If approval received, Follow the below mentioned steps to remove the RPI from the portal.
Log in credentials:
Fsupport - ID / Pass
Steps for depot creation :
Step 1 : Log in to the portal.
Step 2 : Purchase management ---> RPI.
Step 3 : Search the RPI using the reference NO.
Step 4 : If the RPI is available, then open the admin module ---> Settings ---> Quick Support.
Step 5 : In RPI delete section fill the distributor code and fill the date and click on load button to display the RPI.
Step 6 : Delete the mentioned RPI and check if the changes are reflecting in the front end.
Version Summary
Author
Reviewer
Approver 1
Approver 2
Current Version
Current Version Published On
Maiden Version Published On
Mohammed Kashif
Nisha Bhatt
Julian Shawn Dmonte
Subramanian
1.0
24-04-2024
24-04-2024
OBJECTIVE:
This document provides a workflow for Application Slowness.
Issue Short Description : Slowness Issue
Service Type : IR
Priority : High
Problem Code : Application Slowness - Internet Issue Or Network Server Issue
INPUTS:
1. Distributor Information
2. Confirm the Module
To address the application’s performance issue, let's proceed with the following steps:
1. Confirm Module with Customer:
Begin by asking the customer to specify the exact module or modules where they experience slow performance. This will help us narrow down the root cause.
If the issue is related to a specific module like Sales Order or Reports, we must ask the customer for the date range they are selecting while performing the operation.
Also, request the exact time the issue occurred, as this information will help the development team analyze and resolve the issue more efficiently.
2. Request Screen Control:
Politely request control over their screen, which will allow us to directly observe the performance issues.
3. Ask Customer to Demonstrate:
Ask the customer to guide you through the specific steps or actions they perform when they notice the
slowdown. This can help identify if certain actions, inputs, or navigations are contributing to the issue.
Additionally, validate the issue both in the Distributor Portal and using our test credentials.
Workflow:
Create a case in the ServiceNow portal and provide the case ID to the
customer.
Contact the distributor to get additional information and request for
clarification if needed.
Analyse the issue using the following steps:
1. Login to the Distributor Portal: Use the provided ID and Password to access the system (Via Control)
2. Clear Browser Cache and Cookies: Instruct users to clear their cache and cookies, as stored data can
sometimes slow down web applications.
3. Browser Compatibility Check: Verify if the application is optimized for the browser in use. Try
accessing it through different browsers to see if the slowness persists.
4. Network Speed Test: Confirm that the user’s internet connection is stable and running at a sufficient
speed for the application’s requirements. A slow connection can significantly impact performance.
5. Connect with Technical Team: If the slowness issue persists:
Connect with the technical team.
Inquire whether any PAN India reports are being generated in the backend
that could be affecting performance.
If not assign the case to development team.
6. Document the Findings
Summarize the problem (slowness) and all actions taken to troubleshoot the
issue.
Attach Recording of first level troubleshooting.
Version Summary
Author
Reviewer
Approver 1
Approver 2
Current Version
Maiden Version
Current Version Published On
Maiden Version Published On
Mohammed Kashif
Nisha Bhatt
Julian Shawn Dmonte
Subramanian
2.2
2.1
22/11/2024
22/11/2024
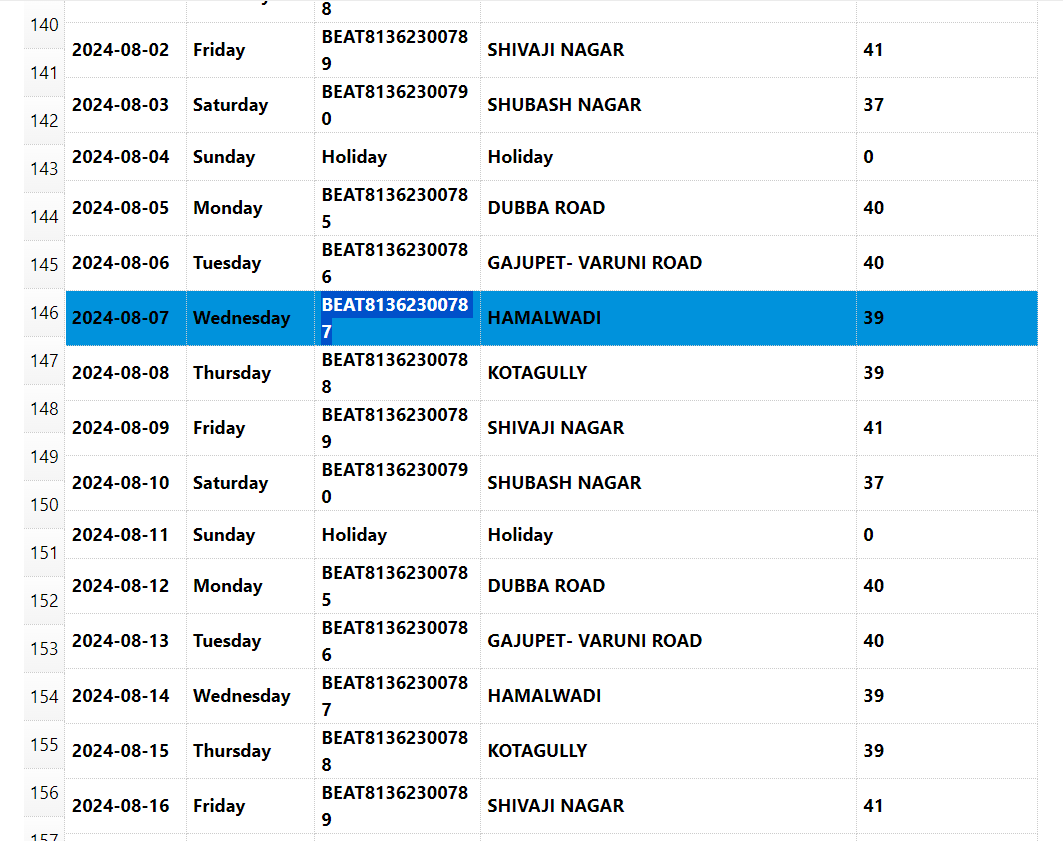
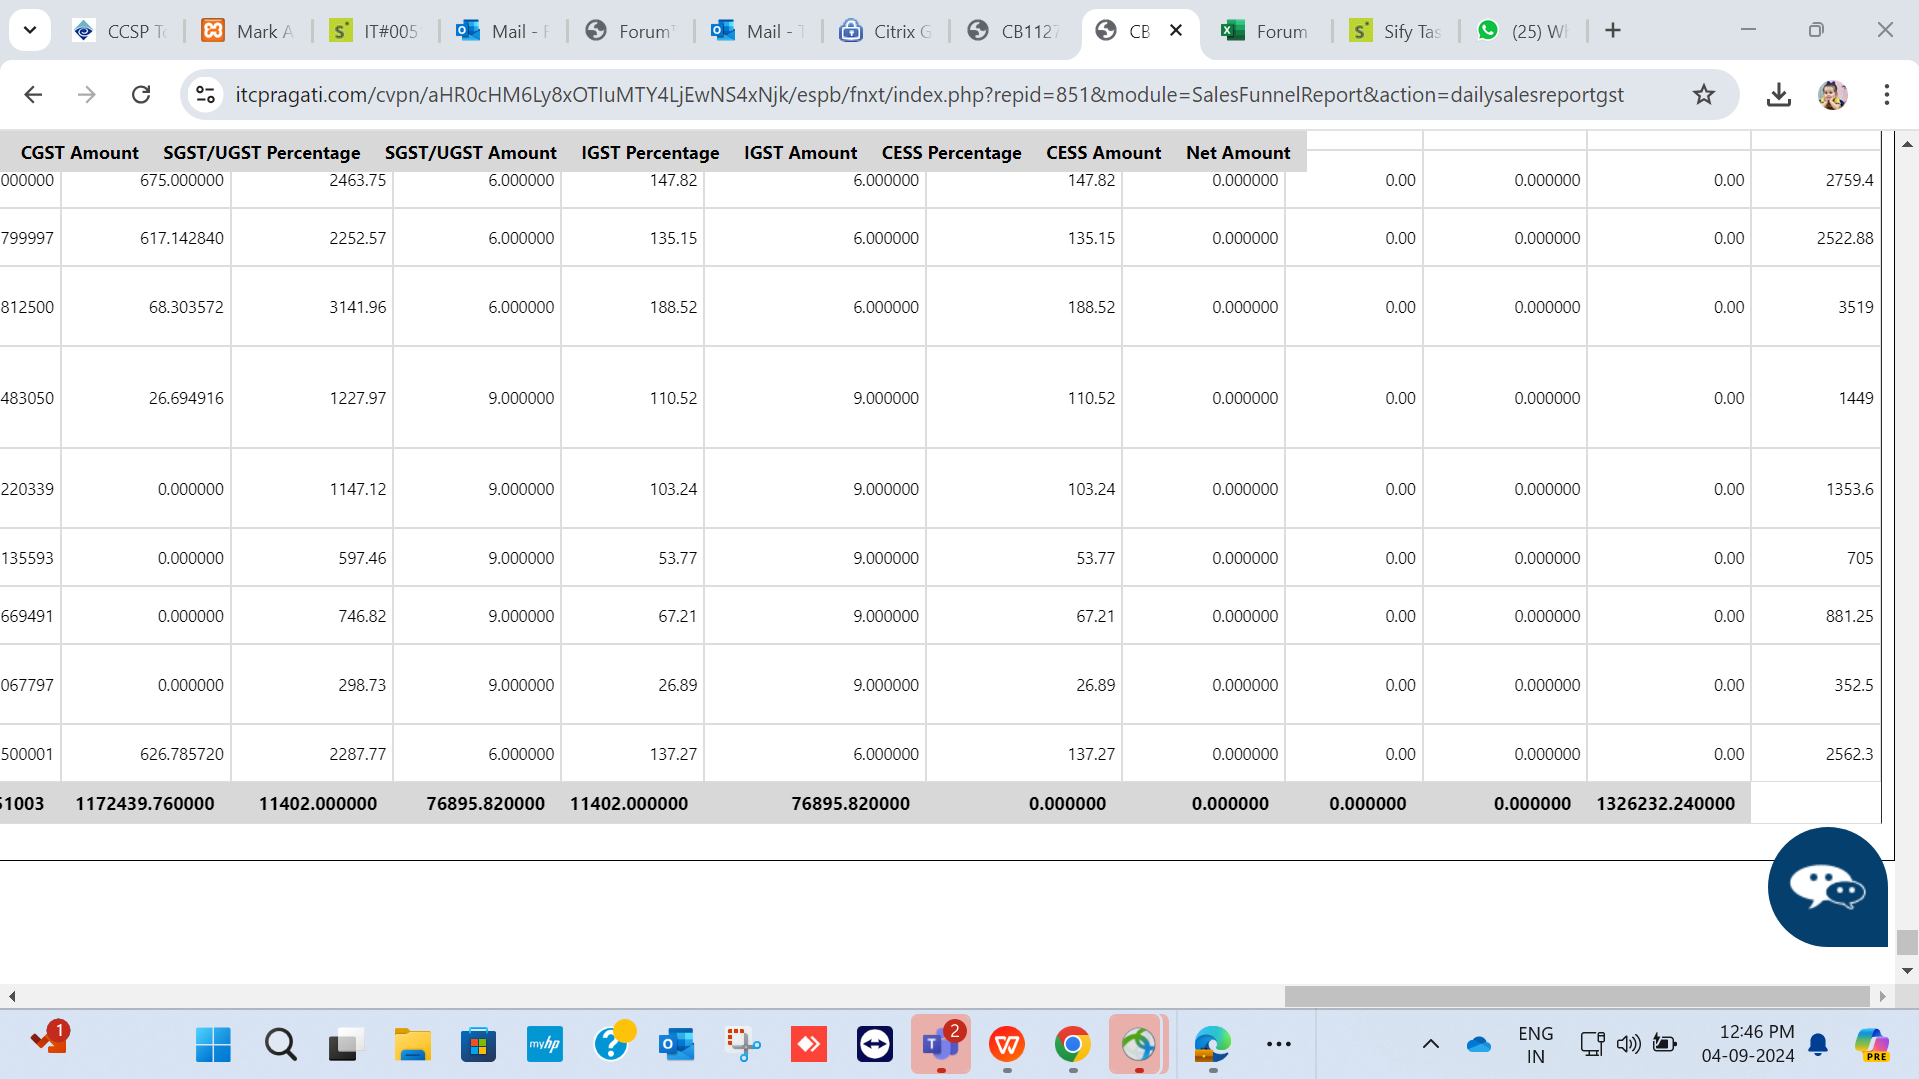
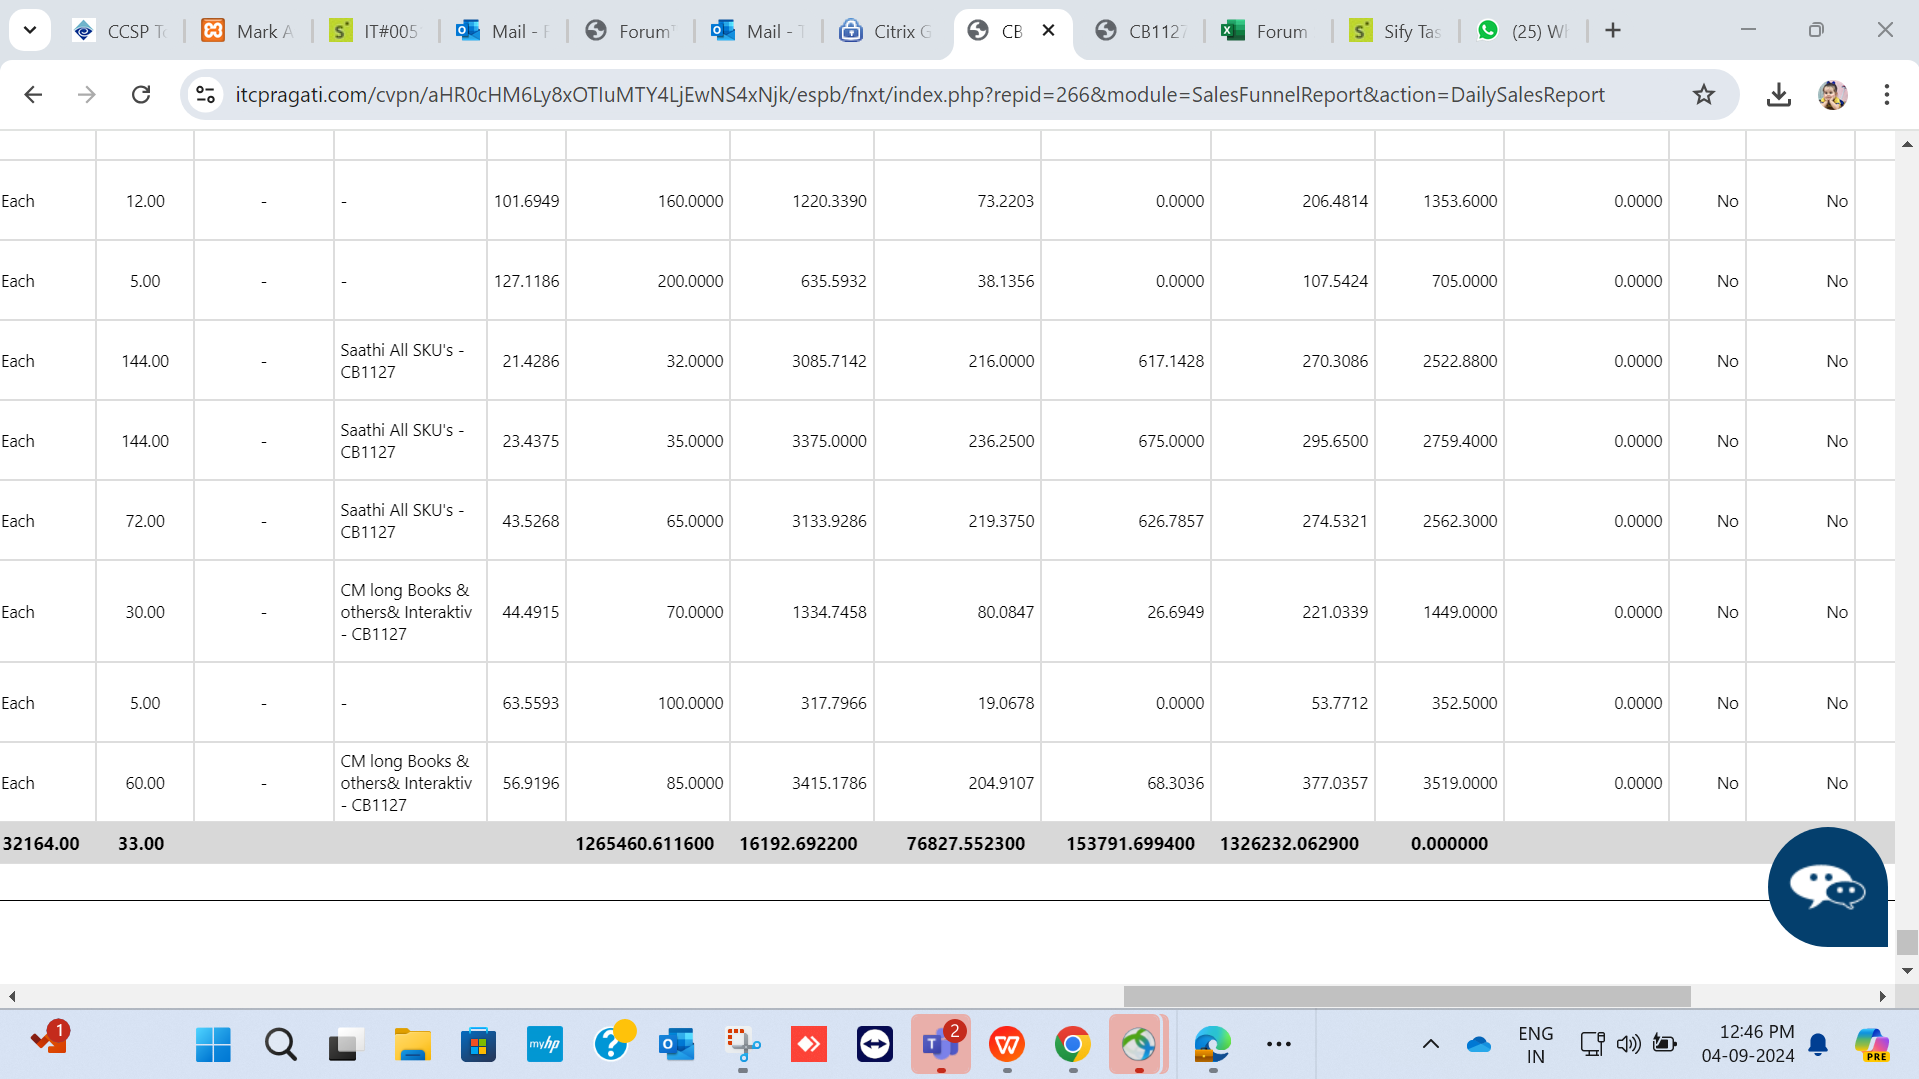
OBJECTIVE:
This document provides a workflow for Branch and Region showing blank in DSR.
Issue Short Description : Branch and Region showing blank in DSR
Service Type : IR
Priority : Low
Problem Code : Report Value Mismatch
INPUTS:
1. Daliy sales report generated by Customer
2. Distributor Information (if the issue is for any particular distributor)
3. Get the Date range of sales report extraction
Workflow:
Create a case in the servicenow portal and provide the case ID to the
customer.
Contact the distributor to get additional information and request for
clarification if needed.
Issue 1: Blank Branch and Region in Portal Report
1. Login to the Distributor Portal: Use the provided ID and Password to access the system or use test
credentials.
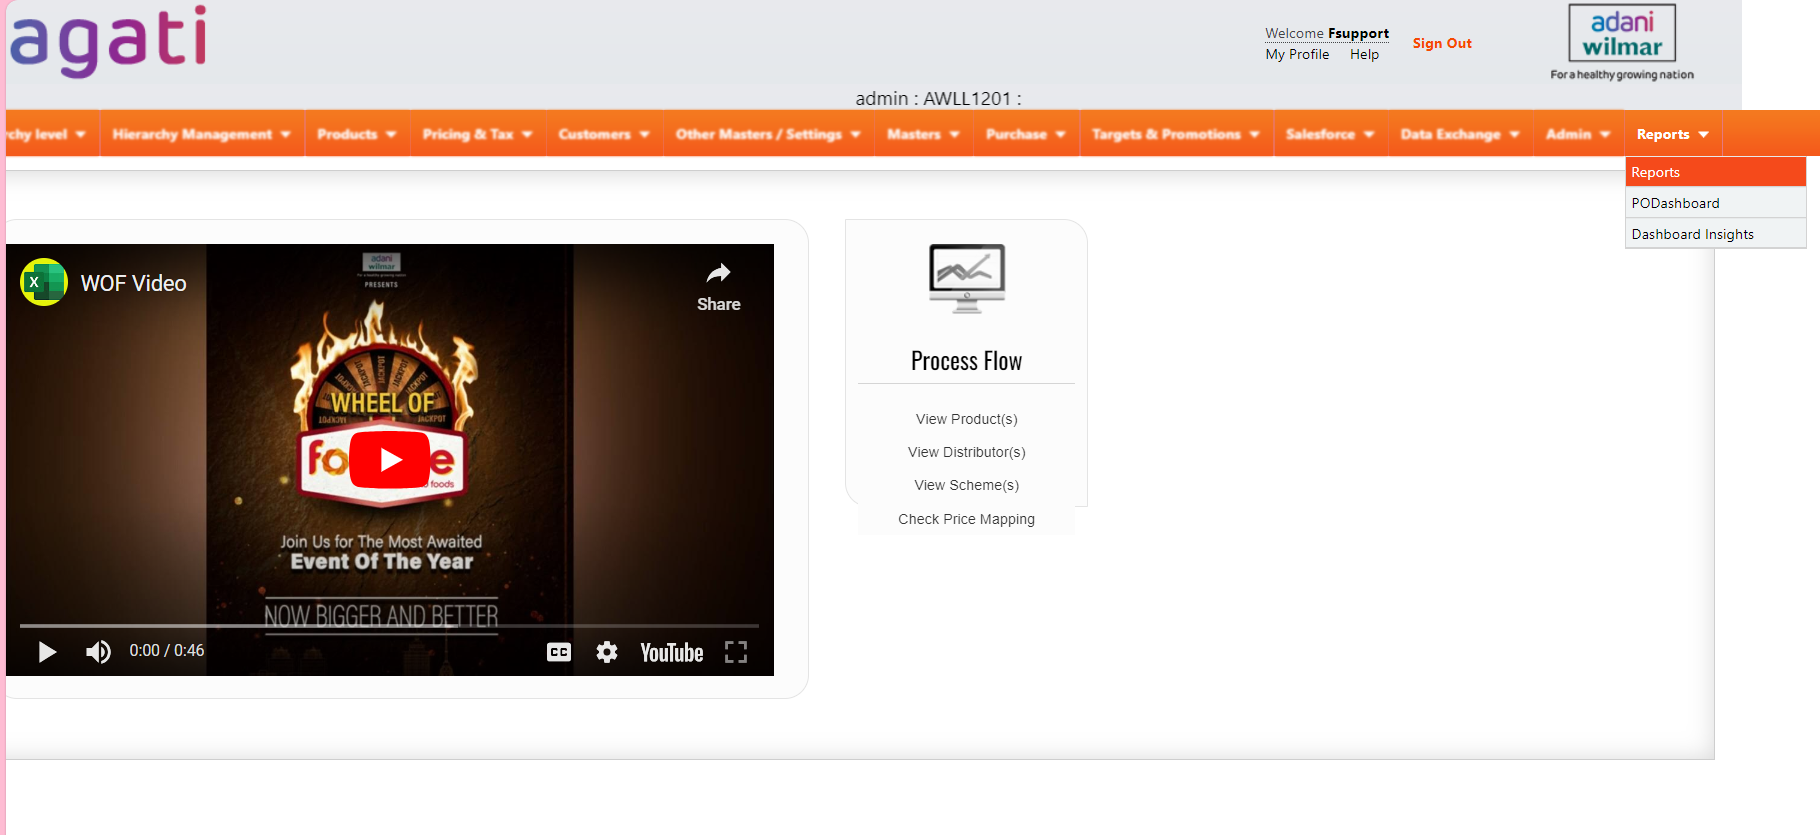
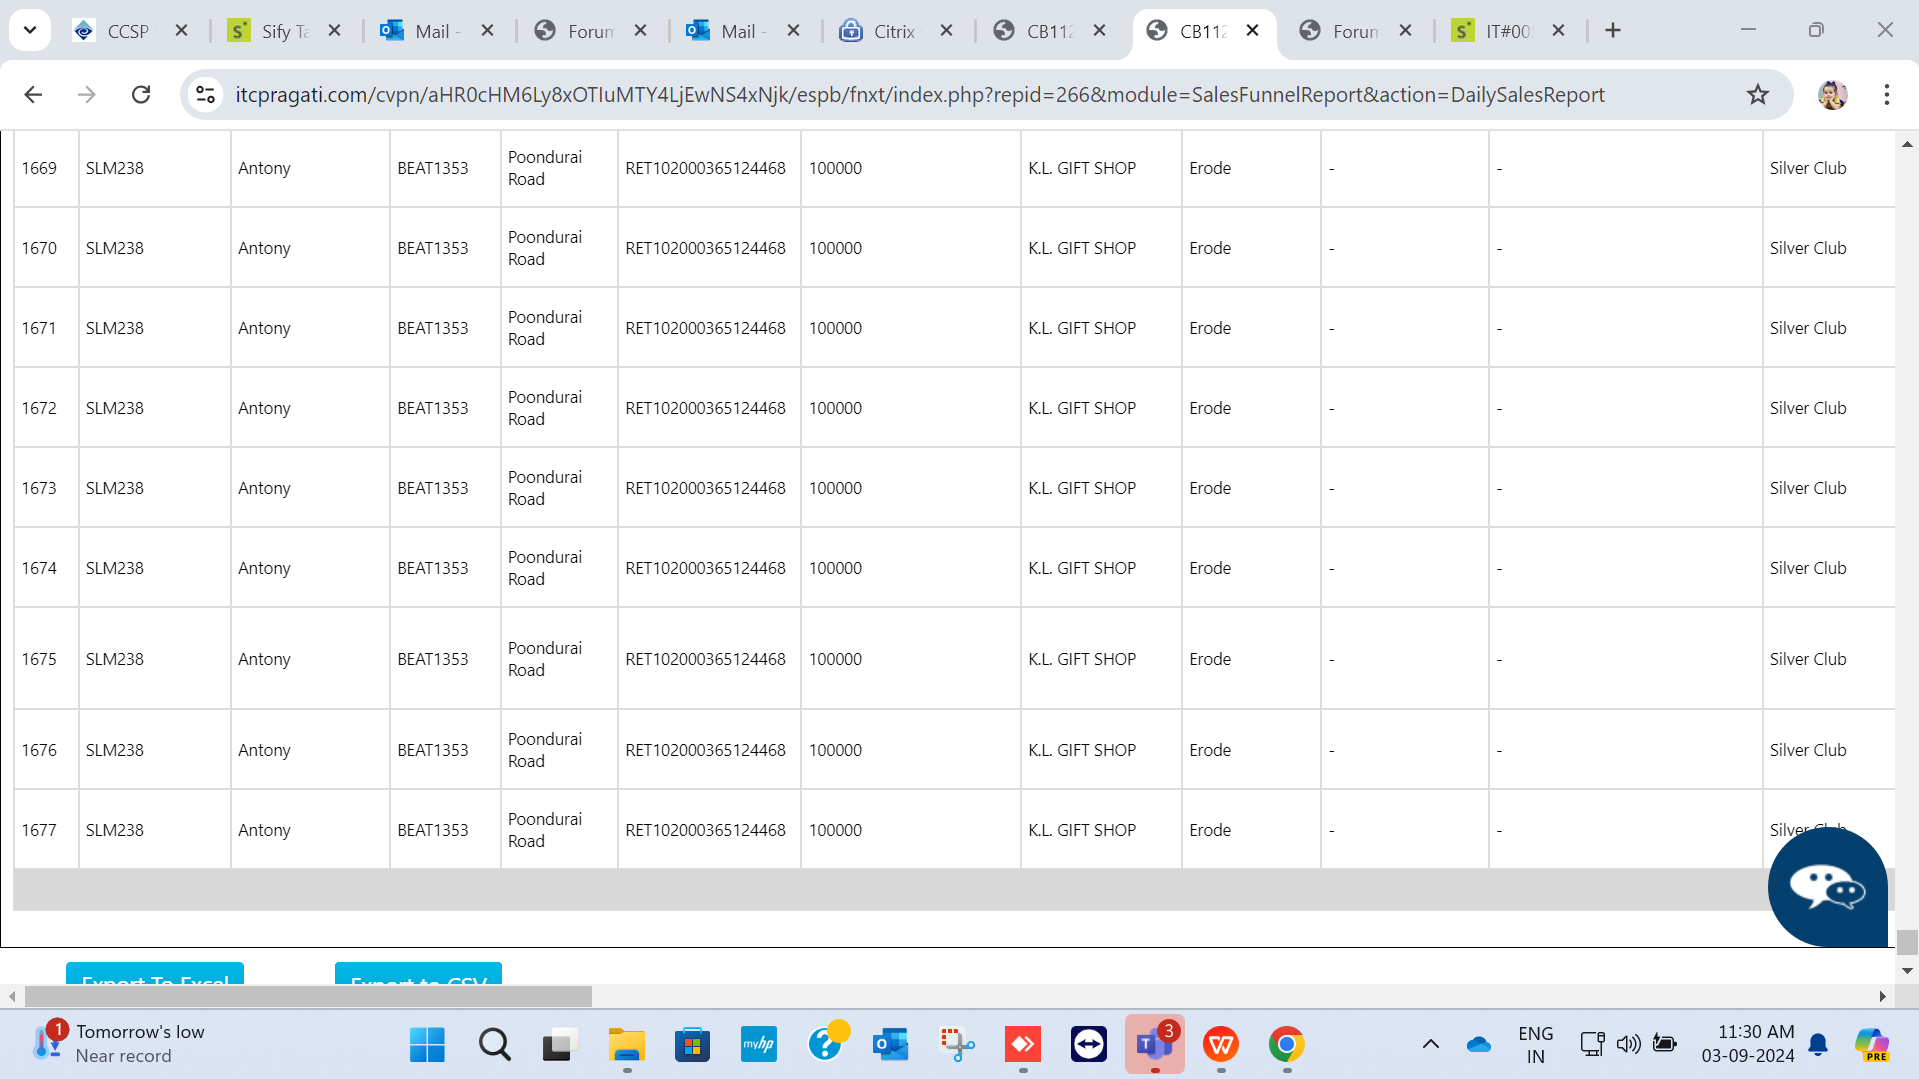
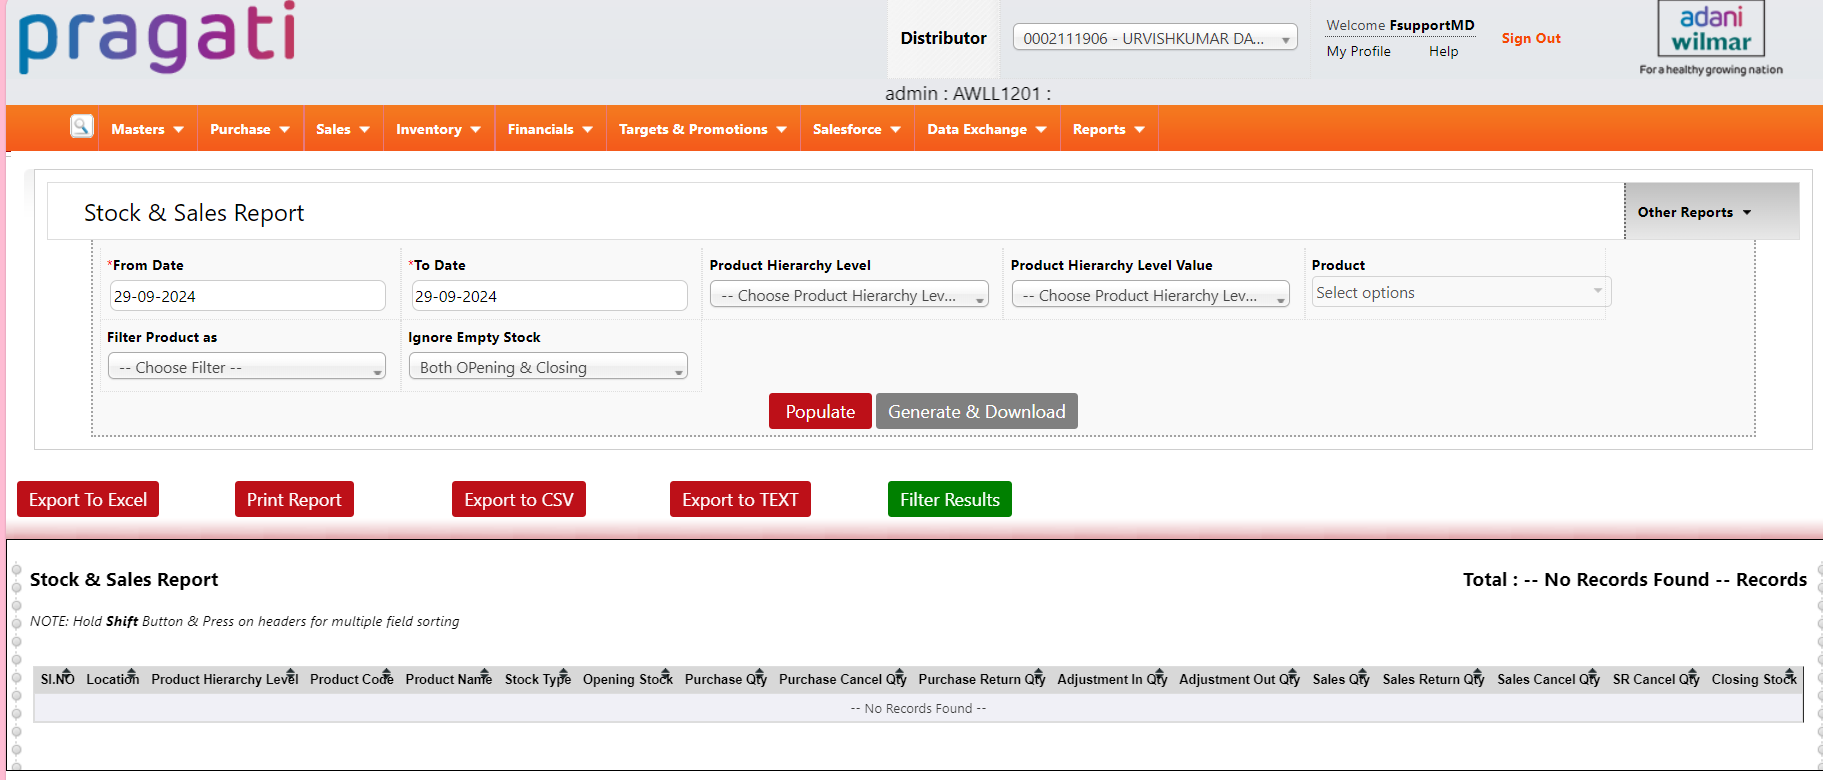
2. Navigate to Report:
Go to Reports → Sales
Select Daily Sales Report
3. Generate the Report:
Choose the desired date range and generate the report.
Review the report output to check if branch and region data are still
blank.
Escalate to Development Team
If the issue replicates, assign the case to the development team.
Once the development team resolves the issue, recheck and update the
customer with screenshots
Issue 2: Branch and Region showing blank in SQL Query
If the daily sales report’s branch and region columns are blank when
generated via a query, here are specific steps to analyze and resolve:
Steps to Troubleshoot SQL Query Issue:
Share the exact SQL query used for generating the report with the technical team.
To ensure that the daily sales report reflects accurate data, please confirm the following:
Additional Checks:
1. Geography:
Ensure that each distributor’s geographic data (e.g., country, state, city)
is accurate and updated in the
system.
2. Organizational Hierarchy:
Verify that the distributor is correctly aligned within the organizational
hierarchy, including any relevant
divisions, departments, or business units.
3. Branch and Region:
Confirm that branch and region details for the distributor are current and
correctly mapped to ensure
visibility in the daily sales report.
Version Summary
Author
Reviewer
Approver 1
Approver 2
Current Version
Current Version Published On
Maiden Version Published On
Mohammed Kashif
Nisha Bhatt
Julian Shawn Dmonte
Karthick Krishna Kumar, Subramanian, Kannan
2.1
22/11/2024
22/11/2024
OBJECTIVE:
This document provides a workflow for handling collection issues in the DMS.
COLLECTION:
In a billing application,collections refer to the process of tracking and managing payments received from
customers for goods or services rendered. The collection concept ensures that all payments are recorded,
outstanding amounts are monitored, and customers are followed up for any overdue invoices.
COLLECTION REPORT:
ACollection Report provides detailed information on the payments collected from customers over a specific
period. It shows amounts paid against invoices and helps businesses track received payments from customers.
OUTSTANDING REPORT:
AnOutstanding Report provides detailed information on the payments collected from customers over a specific period. It shows amounts paid against invoices and helps businesses track received payments from customers.
ISSUE DETAILS: 1. Collection Issue:The error"Salesman cannot be none"in DMS while entering collection details
Issue Short Description : Collection: Salesman cannot be none
Service Type : IR
Priority : Low
Problem Code : Collection & Salesman Wise Collection Issues
Create a case in the servicenow portal and provide the case ID to the customer.
Contact the distributor to get additional information and request for clarification if needed.
Analyse the issue using the following steps:
1. Login to the Distributor Portal: Use the provided ID and Password to access the system or use test
credentials.
2. Salesforce Check:
Navigate to Salesforce → Select the Salesman
Ensure that the mentioned Beat is mapped to the Salesman
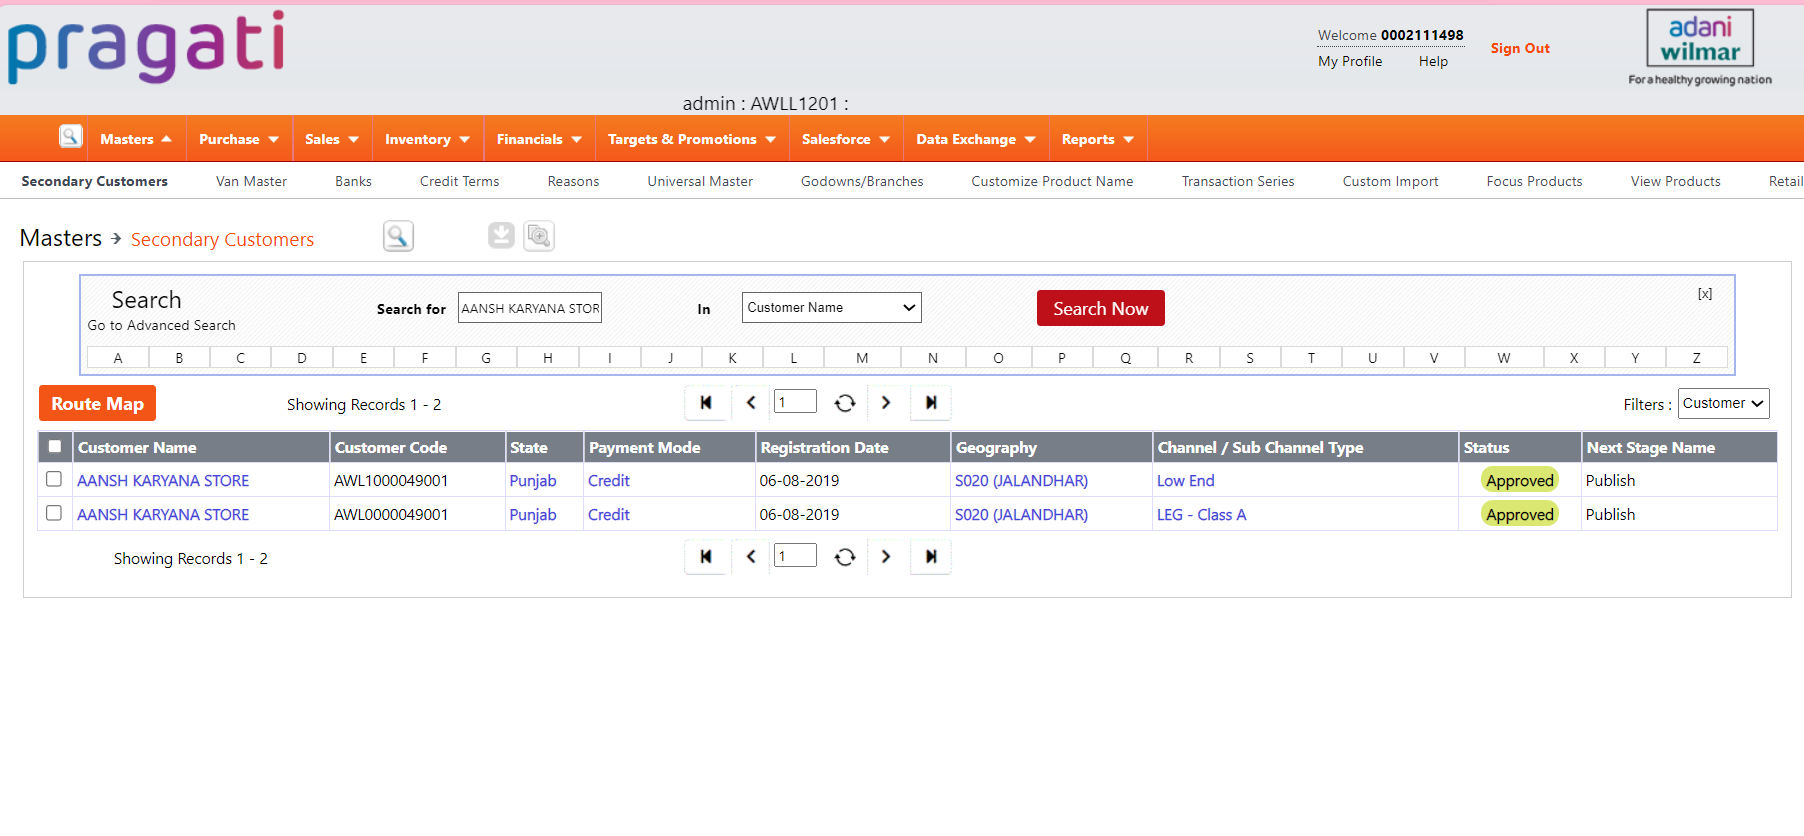
3. Check customer mapping:
Navigate to Masters → Secondary Customers.
Search for the specific customer
Verify that the correct Beat is mapped to the customer.
4.If the Beat is not mapped correctly:
Contact the Zonal Team to request mapping corrections.
Send a reply to the customer with screenshots of the mapping
5.If the Zonal Team asks for mapping on our end:
Request IT approval and assign the case to theDevelopment Team.
Once the mapping is completed by the Dev Team, check, and share the updates with the customer along with screenshots.
2. Collection Issue: Collection amount has been collected by the salesman, but it is not showing in the report
Issue Short Description : Collection: Not updated correctly
Service Type : IR
Priority : High
Problem Code : Collection data not synced with Fnxt Web for a user
INPUTS:
1. Distributor Information
2. Collection code details
3. Customer/ Retailer information
4. Error screenshot (if any)
Workflow:
Create a case in the servicenow portal and provide the case ID to the customer.
Contact the distributor to get additional information and request clarification if needed.
Analyse the issue using the following steps:
1. Login to the Distributor Portal: Use the ID and Password to log in either FsupportMD or Fuspport.
2. Navigate to Financials:
Go to Financials → Collections.
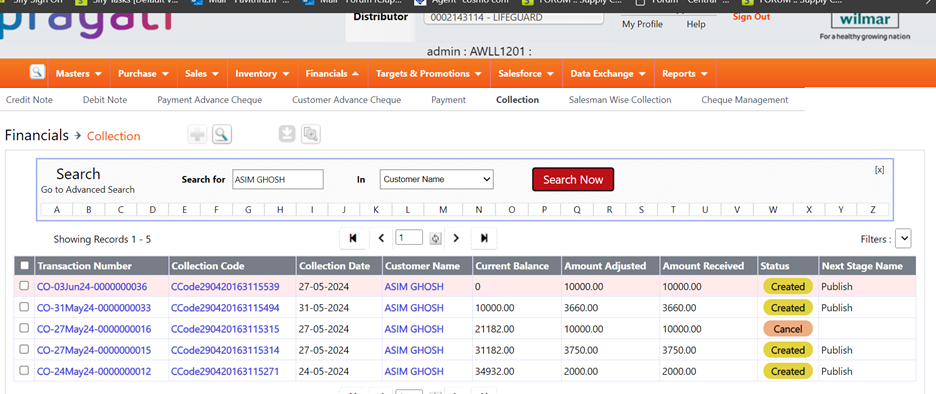
Search for the relevant collection code or transaction number to confirm that the collection entry was created and saved correctly.
3.Verify the collection status:
Confirm that the collection status is marked as "Created”
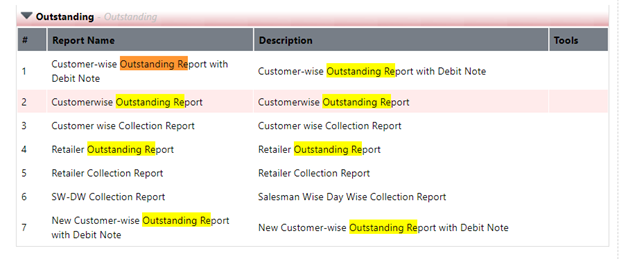
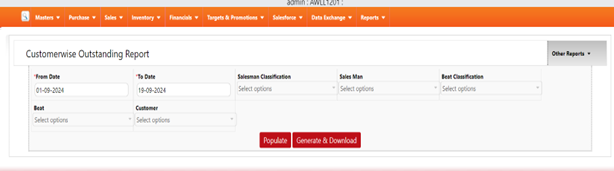
Go to Reports → Customer-wise Outstanding Report.
Search for the Customer and select the start and end dates for the report.
Generate the report and cross check if the collection appears.
4. Generate Customer Wise Collection Report:
In DMS, navigate to Reports → Customer Wise Collection Report.
Select the appropriate start date and end date to ensure the period includes the collection date.
Select the relevant customer from the dropdown or search for the customer.
Click Generate to create the report.
3. Review Collection in the Report:
Once the report is generated, verify if the collection amount for the selected customer is listed correctly.
If the collection is not listed, check the invoice numbers, collection dates, andamounts to ensure accuracy.
If the invoice number is not present, escalate the case to the Development Team.
Validate the corrections and provide the necessary screenshots to the customer.
Version Summary
Author
Reviewer
Approver 1
Approver 2
Current Version
Current Version Published On
Maiden Version Published On
Nageena Sultana K
Nisha Bhatt
Julian Shawn Dmonte
Karthick Krishna Kumar, Subramanian, Kannan
2.1
22/11/2024
22/11/2024
OBJECTIVE:
Customer realignment in a billing application refers to the process of restructuring or adjusting customer accounts, segments, or hierarchies to reflect updated business strategies, organizational changes, or customer needs.
ISSUE DETAILS:
1.Customer Realignment: Customer code changed after realignment process
Issue Short Description : Customer code changed after realignment Service Type : IR Priority : Low Problem code : Customer Master Edit
INPUTS:
1. From and To Distributor Information
2. Salesman & Beat Information
3. Error screen shot (if any)
4. Customer Realignment Report (if required)
5. Realignment Date
6. Customer Details for which the customer code has changed
Workflow:
Create a case in the servicenow portal and provide the case ID to the customer.
Contact the distributor to get additional information and request for clarification if needed.
Analyse the issue using the following steps:
1. Login to Portals:
From Distributor Portal: Use the CD code as both the ID and password to log in.
To Distributor Portal: Similarly, log in with the same credentials.
Note: If unable to log in using the CD code, access the FsupportMD (CP portal) with the same ID and password. Search for the CD using the provided CD code.
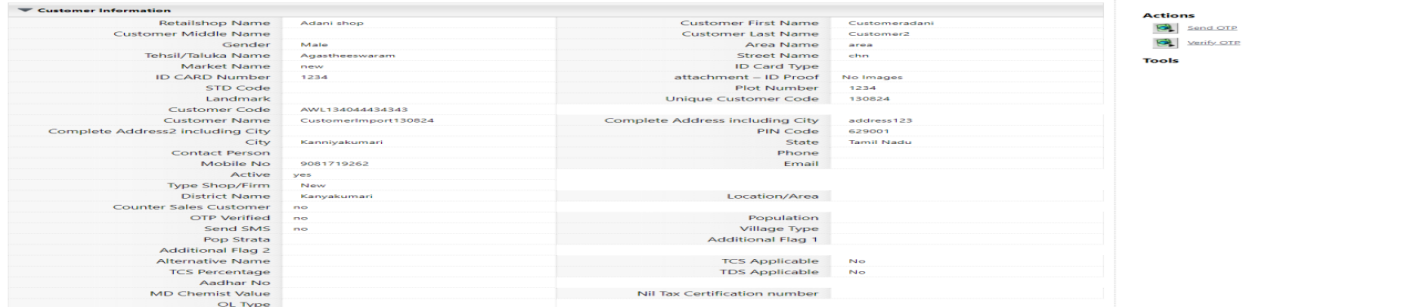
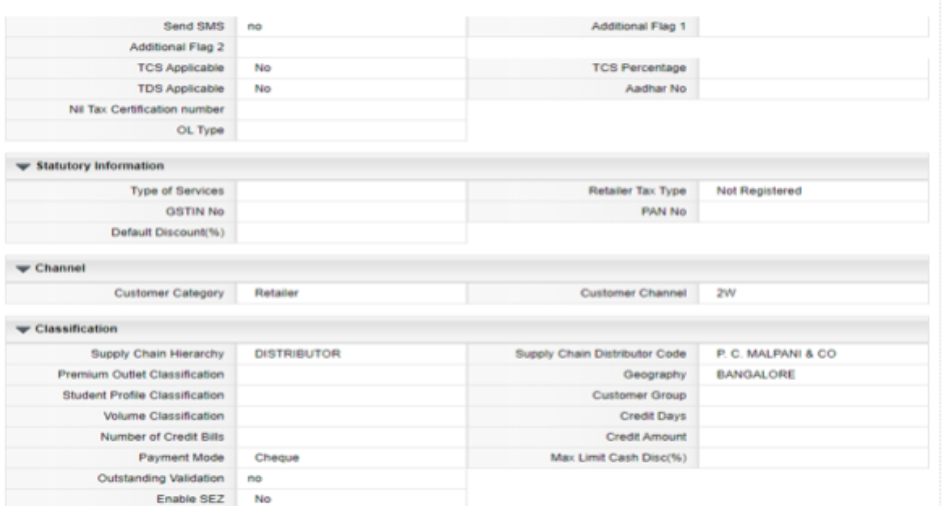
2. Frontend Check:
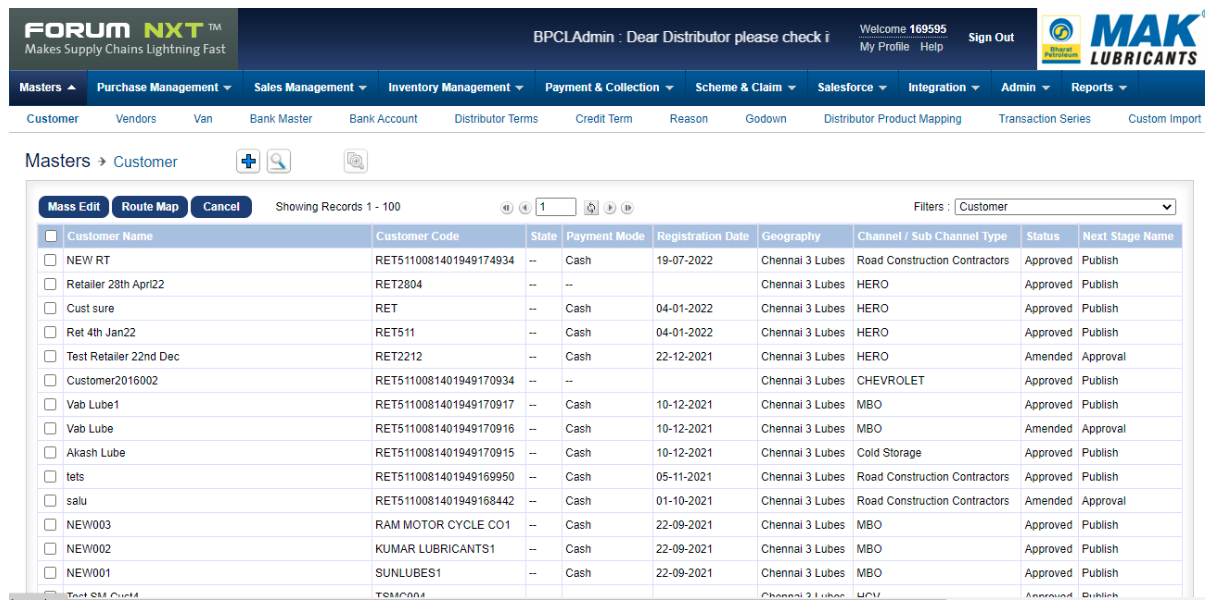
Go to Masters → Customer.
Search for the Customer using the Customer name or Customer code.
Validate the Customer Code in From and To distributor.
Confirm with Customer which is correct code.
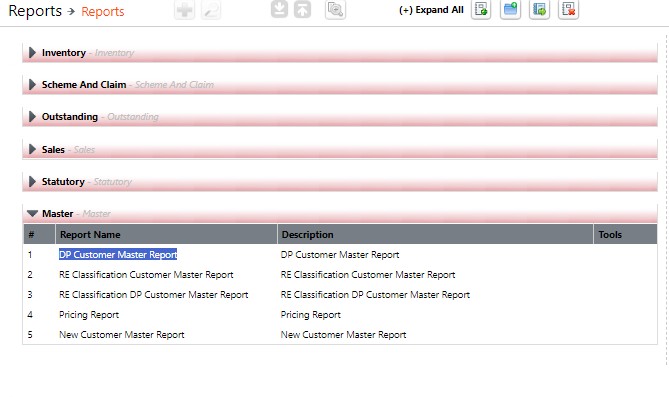
3. Access the Reports:
Navigate to Reports → Master → DP Customer Master Report.
Generate Reports: Generate and download the DP Customer Master Report for both the From CD and To CD.
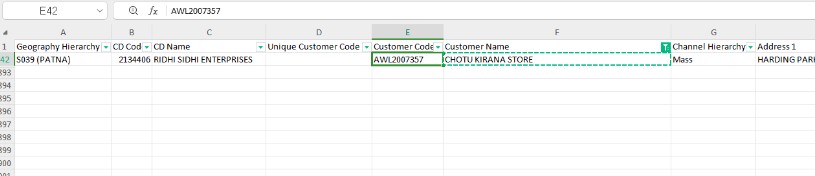
4. Review Reports:
From CD Report: Open the generated report and search for customer names and validate with the given correct code.
To CD Report: Open the report and search for customer name and check. If it is mismatched assign the case to development team.
5.Assign the Ticket to DEV Team:
Realignment Date
From Distributor and To Distributor Details
Customer Data with Discrepancy(including customer name and both the incorrect and correct customer codes)
Attach Relevant Reports:Include any reports or screenshots showing the customer code discrepancies.
Once resolved, verify the fix and respond to the customer with screenshots as proof of resolution.
Note: Instructed the team to log into the system and search for the customer directly in the frontend using the customer’s name or code.
This will provide real-time data, ensuring the most current information without waiting for the report refresh.
Version Summary
Author
Reviewer
Approver 1
Approver 2
Current Version
Current Version Published On
Maiden Version Published On
Mohammed Kashif
Nisha Bhatt
Julian Shawn Dmonte
Karthick Krishna Kumar, Subramanian, Kannan
2.1
22/11/2024
22/11/2024
OBJECTIVE:
Customer realignment in a billing application refers to the process of restructuring or adjusting customer accounts, segments, or hierarchies to reflect updated business strategies, organizational changes, or customer needs.
Here is the structured workflow based on your description for handling the issue where a customer is not showing during realignment.
ISSUE DETAILS:1.Customer Realignment: Customer’s is not showing in the system during a realignment process.
INPUTS:
1. From and To Distributor Information
2. Salesman & Beat Information
3. Error screen shot (if any)
4. Customer Realignment Report (if required)
Workflow:
Create a case in the servicenow portal and provide the case ID to the customer.
Contact the distributor to get additional information and request for clarification if needed.
Analyse the issue using the following steps:
1. Login to the Distributor Portal:Use the provided ID and Password to access the system or use test credentials.
2. Navigate in DMS
After logging in, follow the path: Masters → Customer Master.
Search the customer-by-Customer Namein the Customer Master section.
After selecting the customer’s name, verify the Active Statusis set to "Yes".
Note: If the status is "No" or the customer is inactive, the customer will not reflect in the realignment process.
Make sure those customers are already realigned in “To distributor” by generating Customer Master Report.
3. Generate Reports
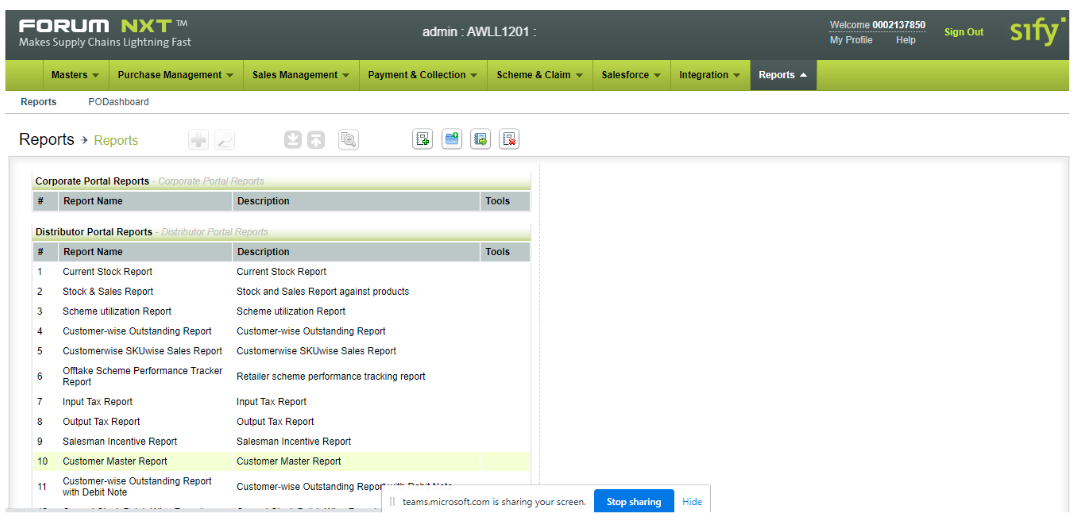
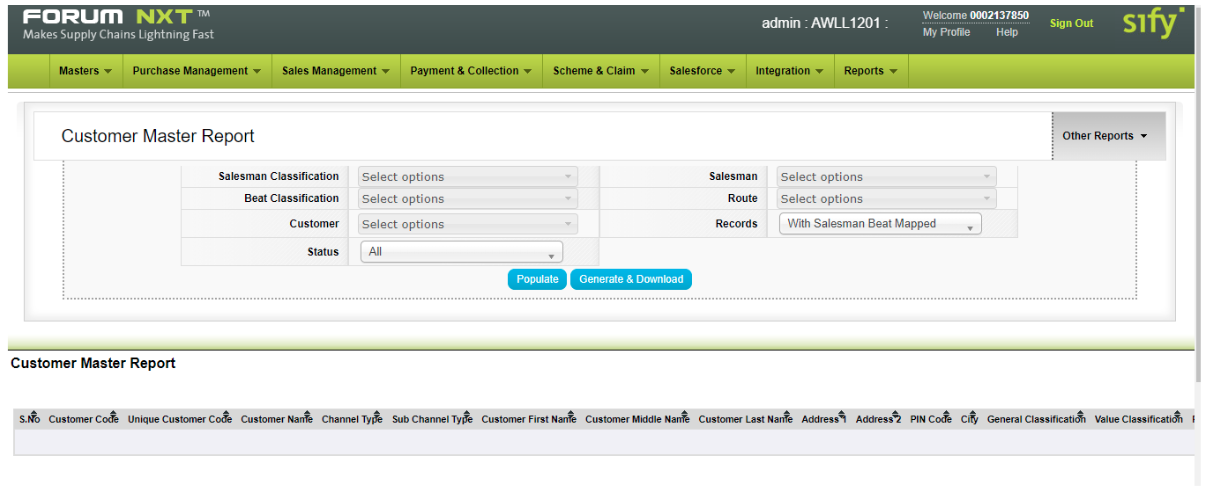
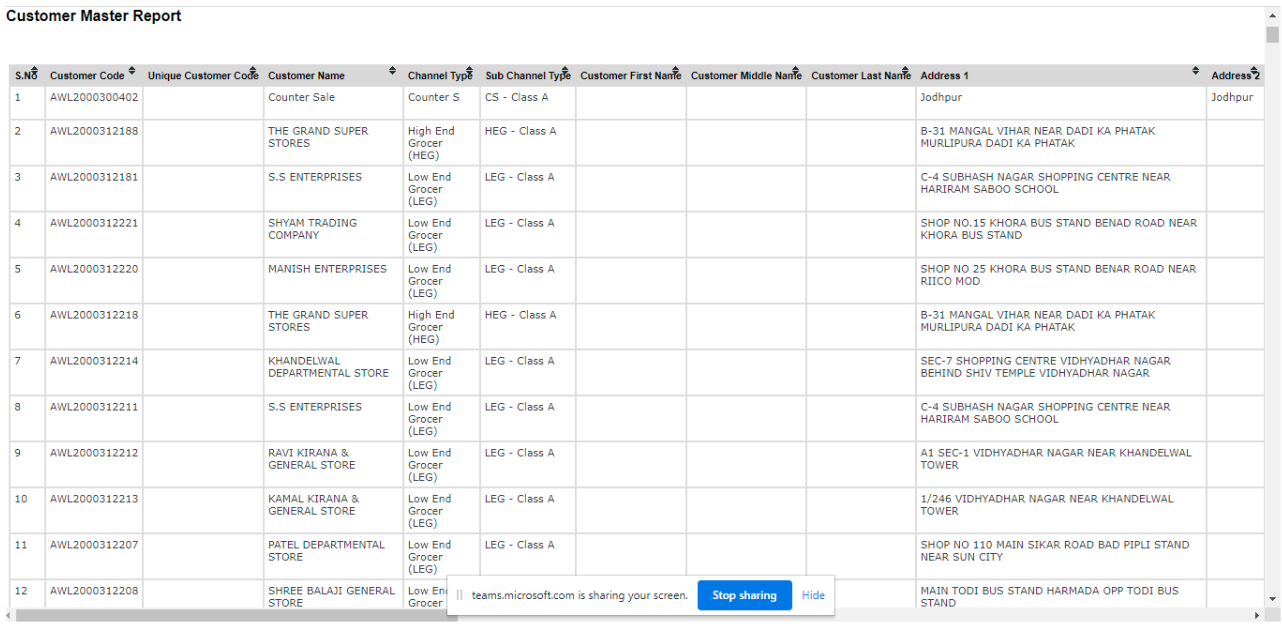
Go to Reports → Customer Master Report.
Generate and downloadthe report to cross-check customer details in “from distributor” as well as “To Distributor”.
4. Initiate Realignment Process
After confirming that all customers are activefor the respective salesman and beat:
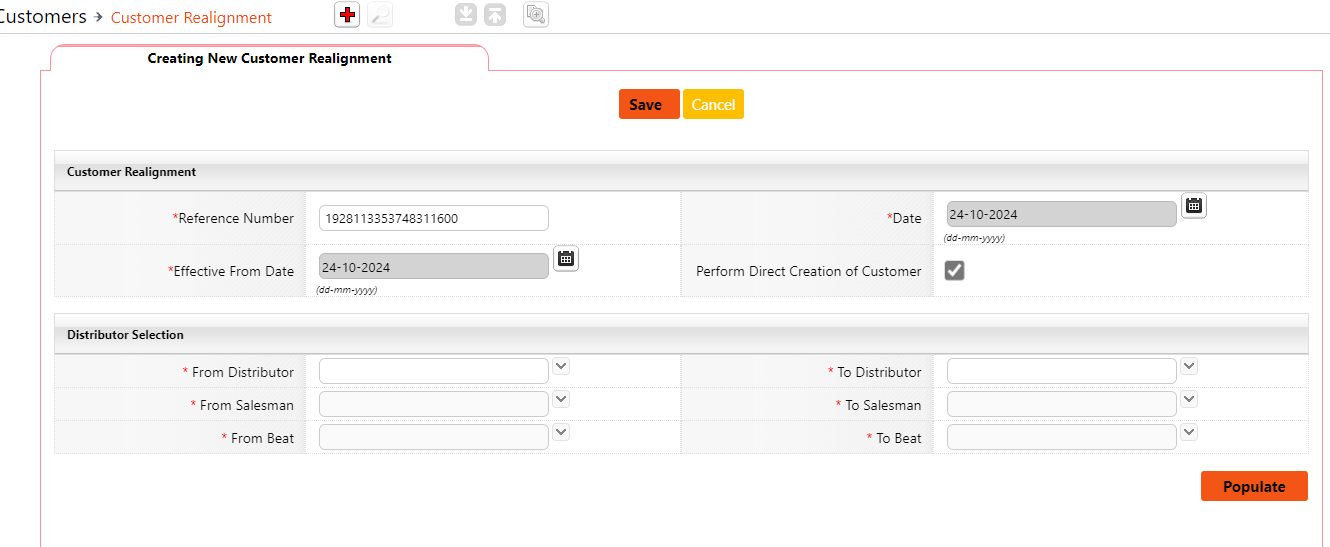
Go to the Realignment Screen:
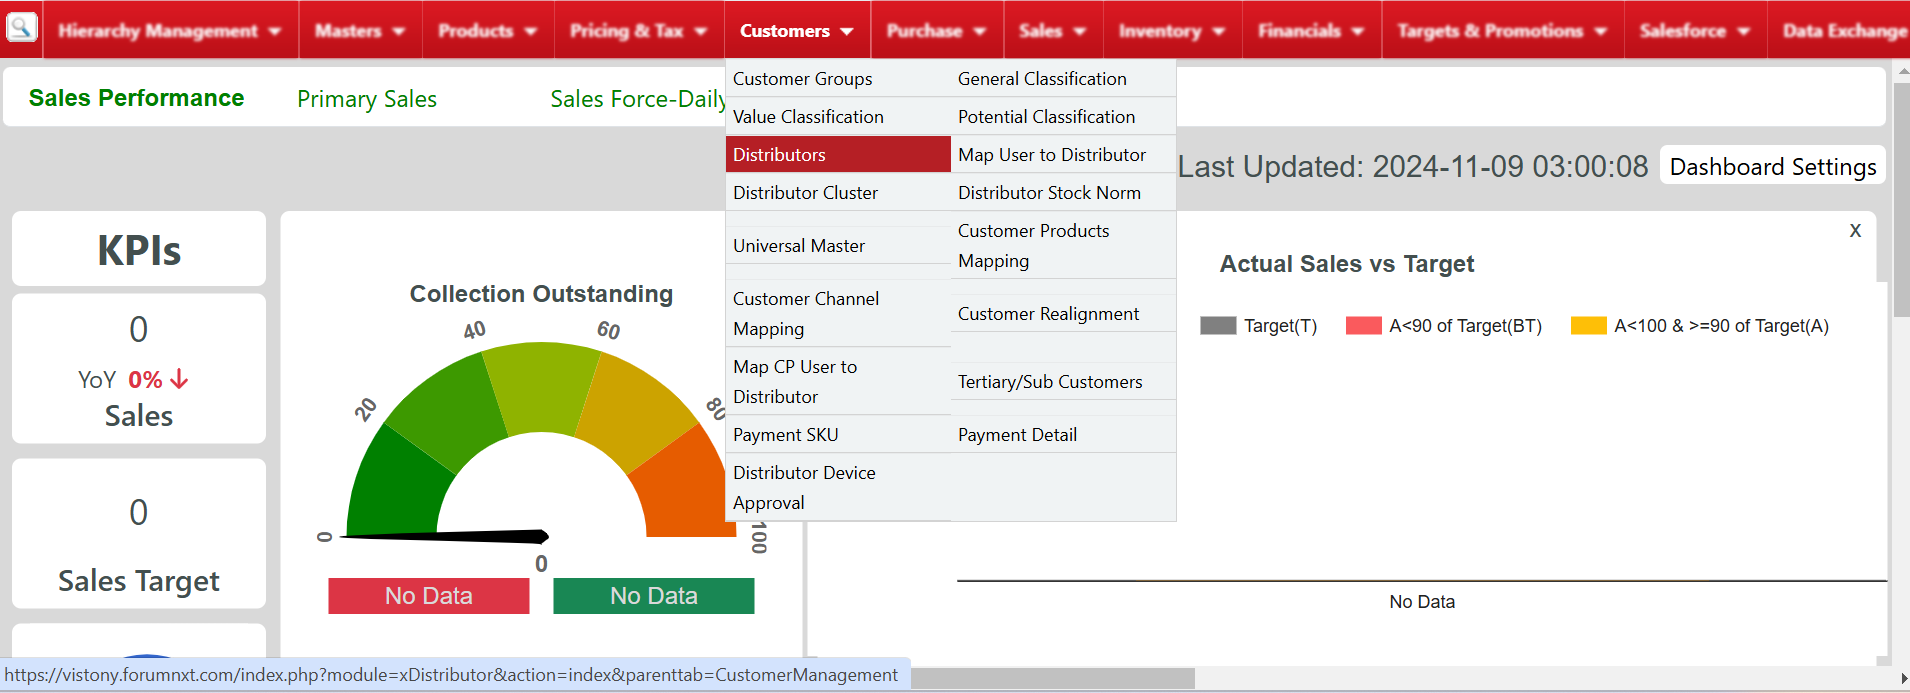
Navigate to the Realignment screenin the DMS portal (Corporate portal)
Go to Customers and click on Customer Realignment.
5. Initiate the Realignment:
Select the appropriate:
From Distributor and To Distributor.
From Salesman and To Salesman.
From Beat and To Beat.
Enter All Required Details:
a. Ensure all the necessary fields for the realignment process are filled out accurately.
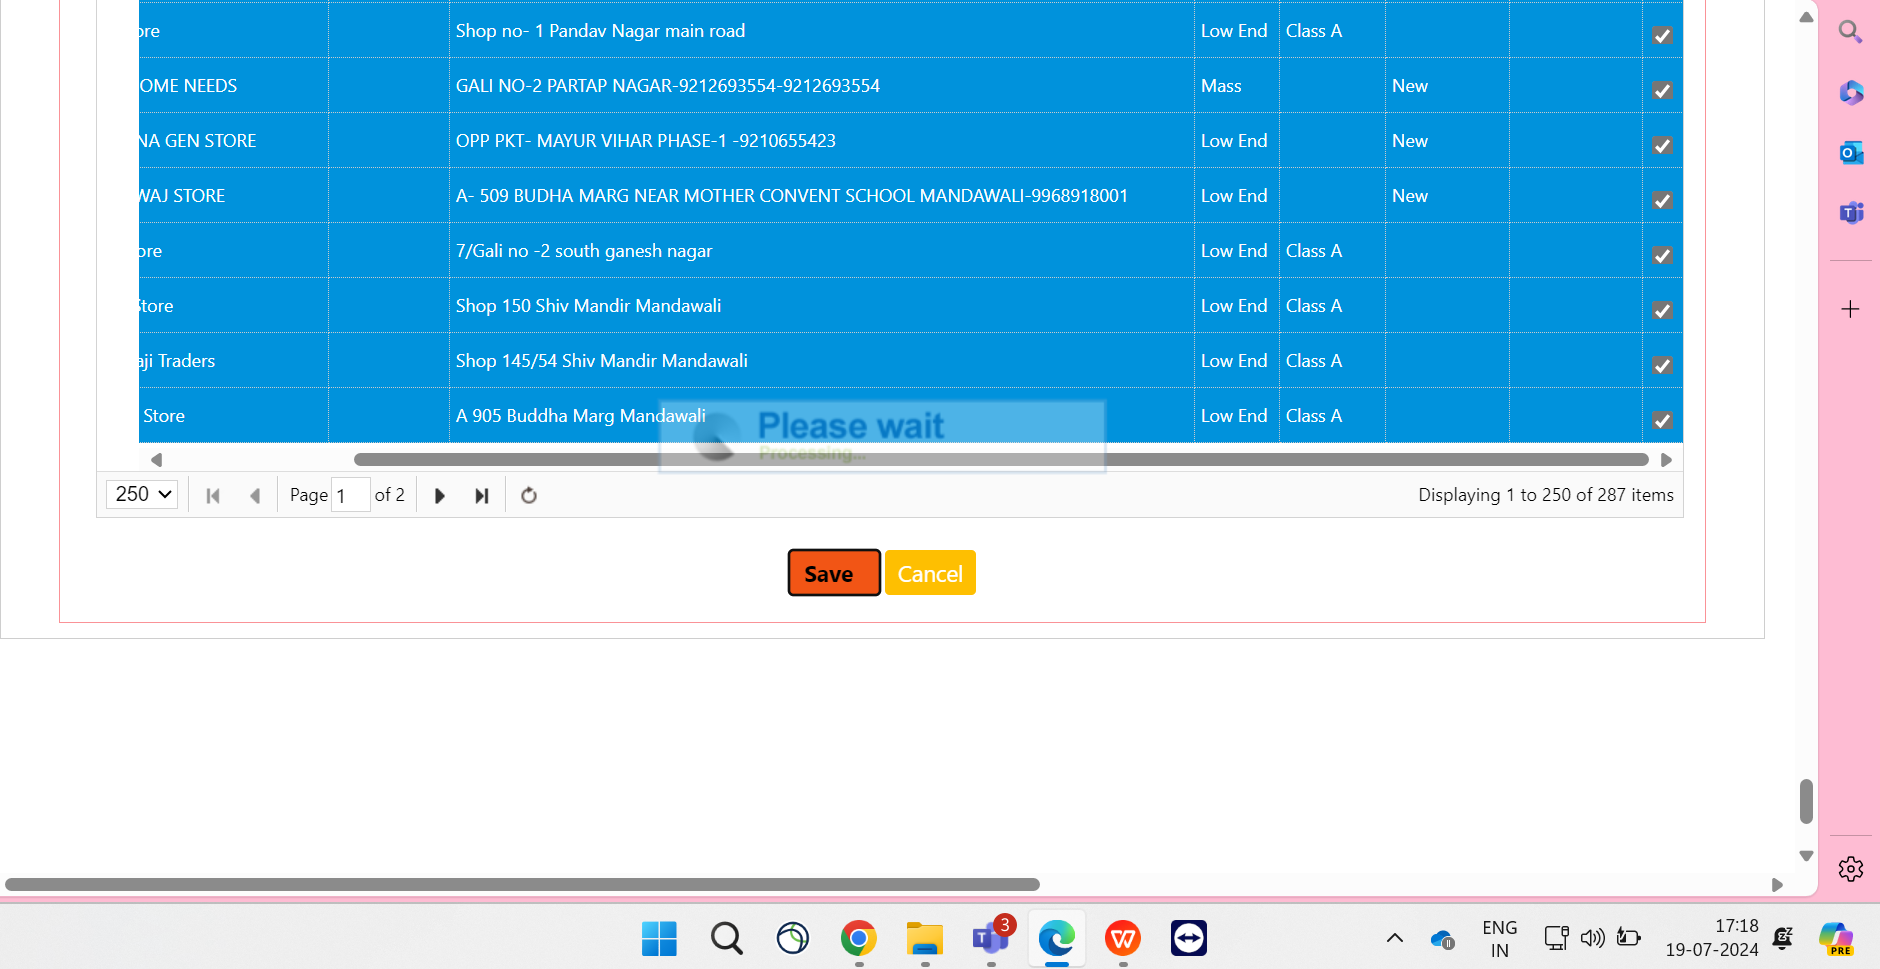
6. Check Customer Listing:
a. After entering all the details, click on populate.
b. Check if the customer islisted on the screen for realignment.
c. Compare the customer count shown in the realignment screen with the customer count in the generated report.
7. Assign to Development Team (if unresolved)
If the customer is still not listed, assign the case to the development teamfor further investigation.
Once resolved, verify the fix and respond to the customer with screenshots as proof of resolution.
2.Customer Realignment: Slowness during a realignment process
Issue Short Description : Slowness Issue Service Type : IR Problem code : Customer Master Edit
INPUTS:
1. From and To Distributor Information
2. Salesman & Beat Information
3. Error screen shot (if any)
4. Customer Realignment Report (if required)
Workflow:
Create a case in the Servicenow portal and provide the case ID to the customer.
Contact the distributor to get additional information and request for clarification if needed.
Analyse the issue using the following steps:
1. Login to the Distributor Portal: Use the provided ID and Password to access the system or use test credentials. 2. Initiate Realignment Process:
After confirming that all customers are active for the respective salesman and beat
Go to the Realignment Screen:
Navigate to the Realignment screen in the DMS portal (Corporate portal)
Go to Customers and click on Customer Realignment.
3. Initiate the Realignment:
Select the appropriate:
From Distributorand To Distributor.
From Salesmanand To Salesman.
From Beatand To Beat.
4. Monitor for Slowness:
Observe the portal's performance while searching for the mentioned customer.
Document any delays or issues encountered during this process.
5. Connect with Technical Team:
If the slowness issue persists:
Connect with the technical team.
Inquire whether any PAN India reportsre being generated in the backend that could be affecting performance.
If not assign the case to development team.
6. Document the Findings
a. Summarize the problem (slowness during realignment) and all actions taken to troubleshoot the issue.
b. Attach Recording of first level troubleshooting.
Additional Checks: 1. Clear Browser Cache and Cookies:
Instruct users to clear their cache and cookies, as stored data can sometimes slow down web applications.
2. Browser Compatibility Check:
Verify if the application is optimized for the browser in use. Try accessing it through different browsers to see if the slowness persists.
3. Network Speed Test:
Confirm that the user’s internet connection is stable and running at a sufficient speed for the application’s requirements. A slow connection can significantly impact performance.
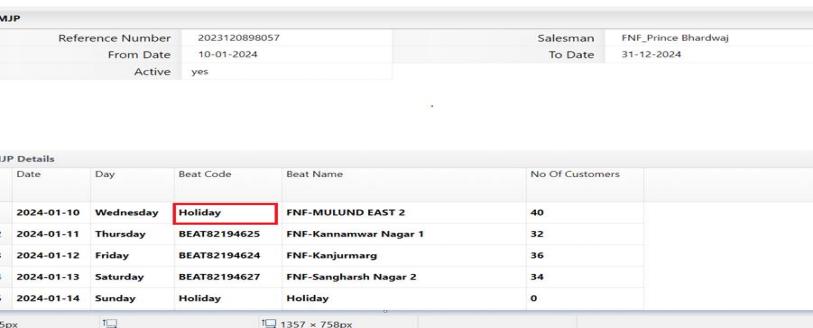
3. Customer Realignment: After realignment the customer is not showing while creating MJP
Issue Short Description : Unable to create MJP after realignment customer Service Type : IR Priority : Low Problem code : Customer Master Edit
Create a case in the Servicenow portal and provide the case ID to the customer.
Contact the distributor to get additional information and request for clarification if needed.
Analyse the issue using the following steps:
1.Login to the Distributor Portal: Use the provided ID and Password to access the system or use test credentials. (Fsupport)
2. Navigate to Salesforce
Go to the Salesforce section after logging into the DMS.
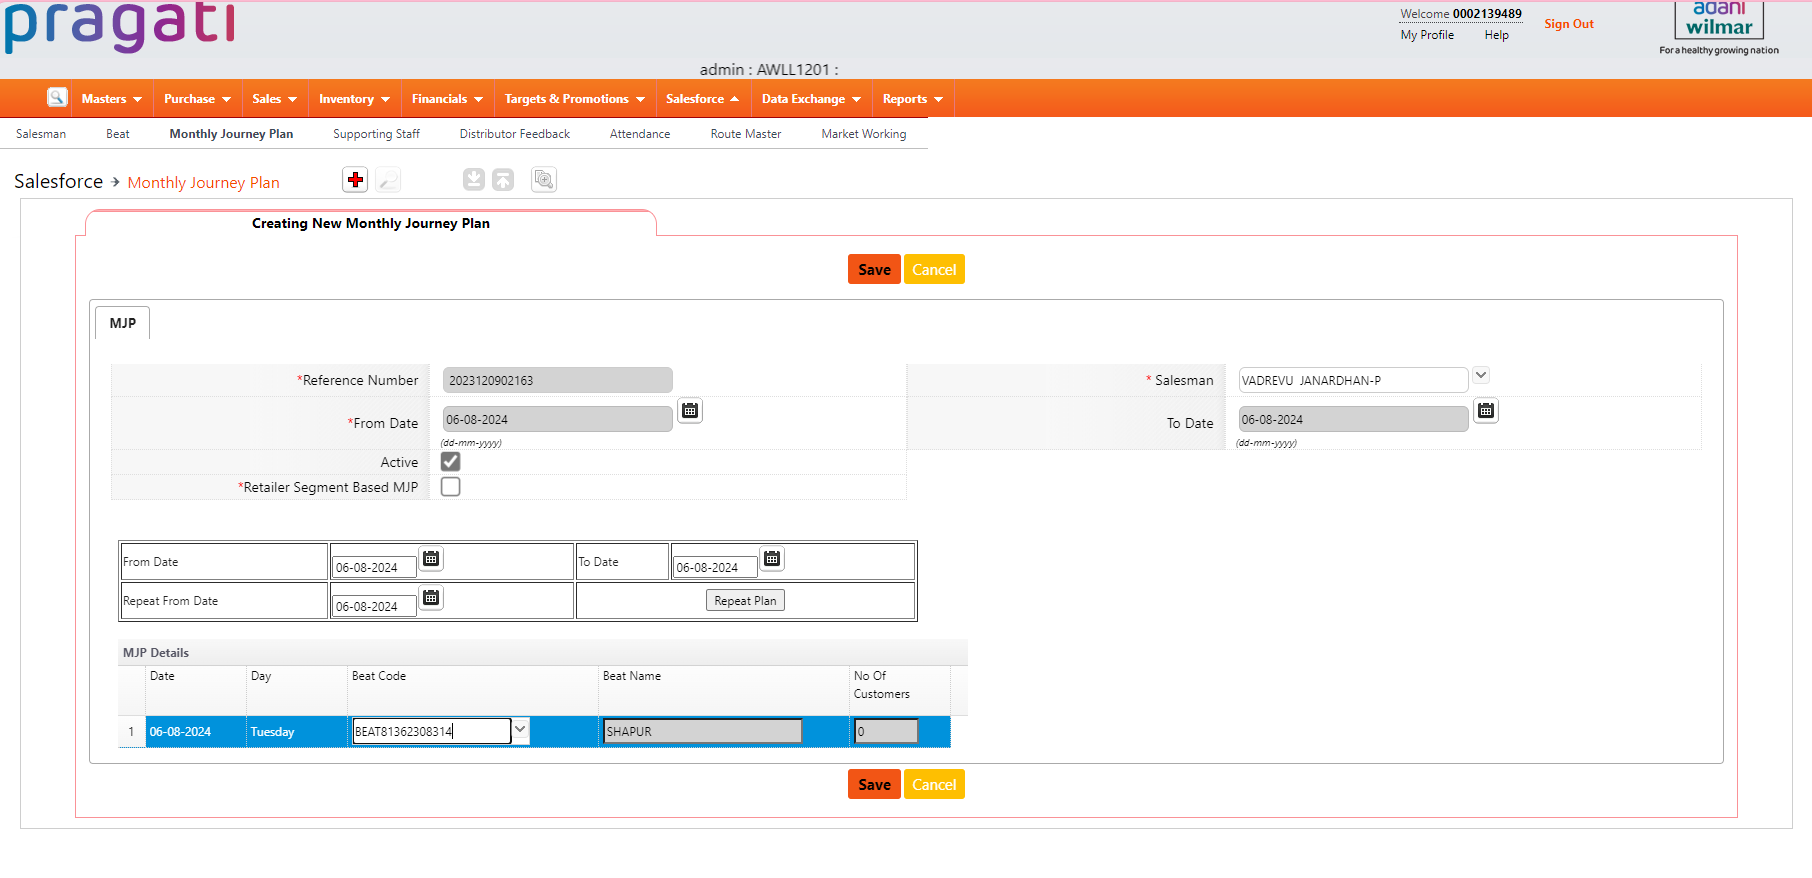
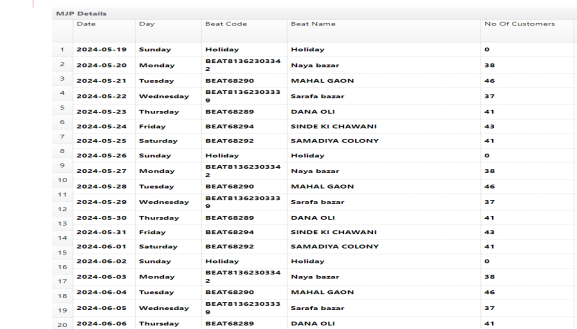
3. Create New MJP
Select the option for MJP and proceed to create a new MJP.
1. Check Customer Visibility
For the mentioned salesman, check how many customers are showing when attempting to create the new MJP. (i.e., No of Customers)
5. Generate Customer Master Report Run the Customer Master Report to verify customer mapping:
Go to the Report to verify customer mapping:
Select Customer Master Report.
Filter the report for the mentioned salesman.
Confirm that the customers are indeed mapped and visible in the report.
If the customers are mapped for the respective salesman and beat, still the no of customers is showing as “0”, assign the case to development team.
Once resolved, verify and respond to the customer with screenshots.
4. Customer Realignment: Customers not realigned properly
Issue Short Description : Customers not realigned correctly Service Type : IR Priority : Low Problem code : Customer Master Edit
INPUTS:
1. Distributor Information (From and To distributor)
2. Salesman Details
3. Error screen shot (if any)
Workflow:
Create a case in the Servicenow portal and provide the case ID to the customer.
Contact the distributor to get additional information and request for clarification if needed.
Analyse the issue using the following steps:
1.Login to the Distributor Portal: Use the provided ID and Password to access the system or use test credentials. (Fsupport)
2.Initiate Realignment Process:
After confirming that all customers are avtive for the respective salesman and beat
Go to the Realignment Screen
Navigate to the Realignment screen in the DMS portal (Corporate portal)
Go to Customers and click on Customer Realignment.
3. Initiate the Realignment:
Select the appropriate:
From Distributor and To Distributor.
From Salesman and To Salesman.
From Beat and To Beat.
4.Validation of Realignment
Realignment has been completed but when we check all the customers were not realigned properly.
This has to be validated by creating new realignment for the same distributor and customer.
If still the customers are showing, assign the case to the development team.
Once resolved, verify the fix and respond to the customer with screenshots as proof of resolution.
Version Summary
Author
Reviewer
Approver 1
Approver 2
Current Version
Current Version Published On
Maiden Version Published On
Nageena Sultana K
Nisha Bhatt
Julian Shawn Dmonte
Karthick Krishna Kumar, Subramanian, Kannan
2.1
22/11/2024
22/11/2024
OBJECTIVE:
This document provides a workflow for creating a new distributor in DMS.
Issue Short Description: New Distributor creation Request Service Type: SR Priority: Low Problem Code: Others
INPUTS:
1.Distributor Information (Name, Code, Contact Info, Address, GST Number)
Workflow:
Create a case in the Servicenow portal and provide the case ID to the customer.
Contact the distributor to get additional information and request for clarification if needed.
Here’s a step-by-step guide for creating a new distributor:
1.Log in to Corporate Portal:
Use support credentials to access the portal.
2.Go to Distributor Management:
Under the Customers section, find and select Distributors.
Click on Create New Distributor.
3.Enter Distributor Details:
Basic Information: Input the distributor’s name, contact information, and address.
Business Details: Provide the business registration number, tax details, and the type of distributorship.
Assign Territories: Specify regions or territories assigned to the distributor, if applicable.
Set Up Payment Terms: Define payment terms, credit limits, and any other financial arrangements.
Provide user details: User password is same as distributor code.
4.Submit for Approval:
Review all entered details.
Click Submit to send for approval, then approve the request.
5.Validation:
After approval, verify that the distributor can log in to the system.
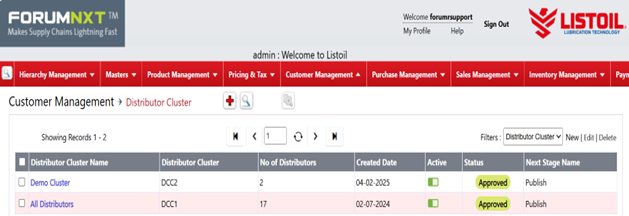
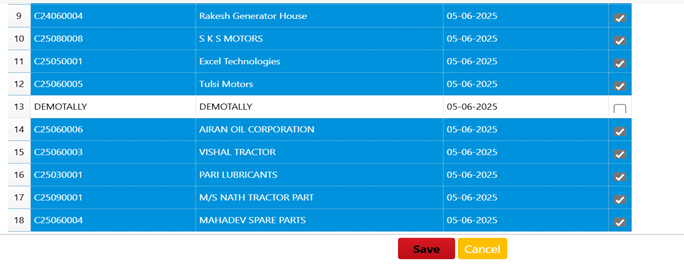
6. Cluster mapping
After creation, the distributor needs to be mapped to a cluster. To do this, navigate to Customer Management → Distributor Cluster,click on all distributors and click the 'Edit' button, select the checkbox of newly created distributor, and save the changes."
Version Summary
Author
Reviewer
Approver 1
Approver 2
Current Version
Current Version Published On
Maiden Version Published On
Pavithra M
Nisha Bhatt
Julian Shawn Dmonte
Karthick Krishna Kumar, Subramanian, Kannan
2.1
22/11/2024
22/11/2024
OBJECTIVE:
This document provides a workflow for new product creation in the DMS.
Issue Short Description: New product creation Service Type: SR Priority: Low Problem Code: Others
INPUTS:
1.Product Details.
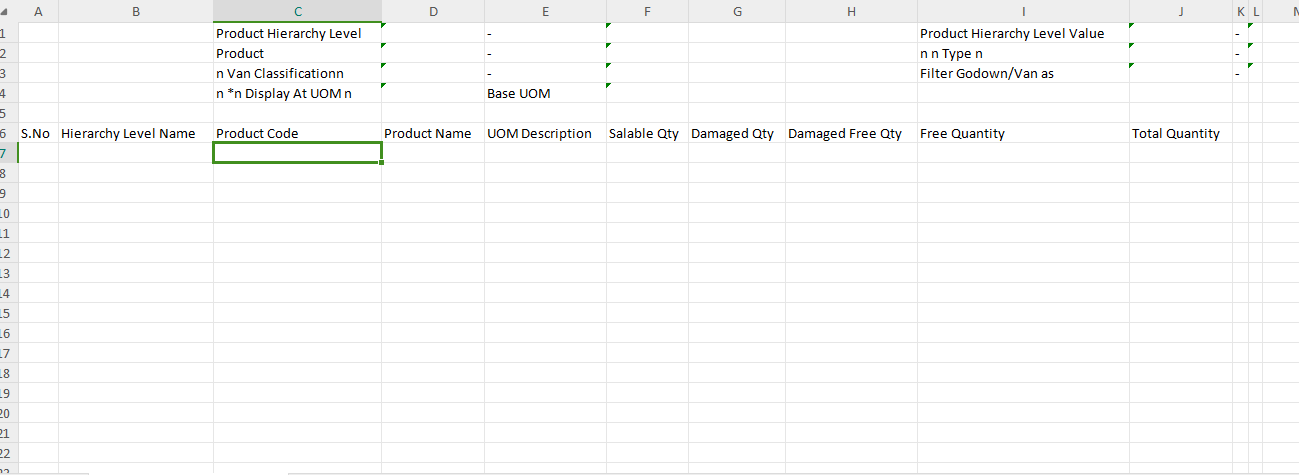
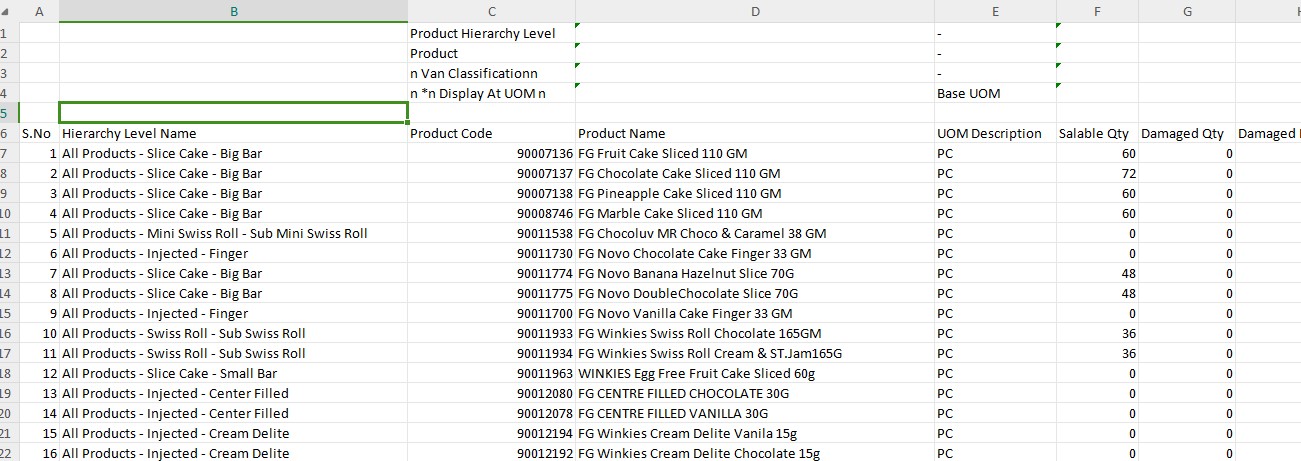
2.To update new product in DMS, we need to get the details in a structured format. Below is the format that needs to be followed.
Workflow:
Create a case in the servicenow portal and provide the case ID to the customer.
Contact the distributor to get additional information and request for clarification if needed.
New Product Update Analysis and Validation Process
Login to the Distributor Portal:Use the provided ID and Password to access the system or use test credentials.
Steps for Product Verification and Creation
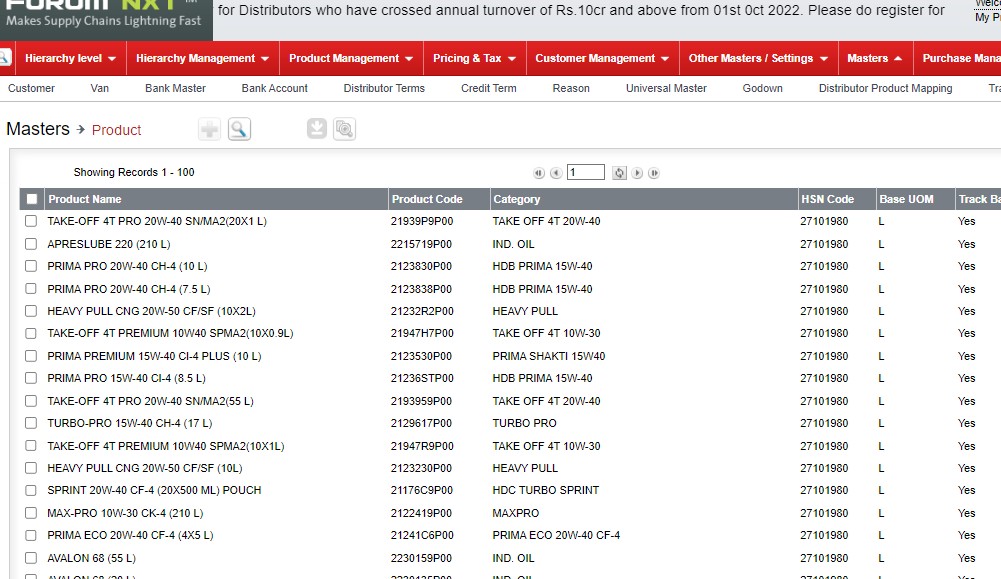
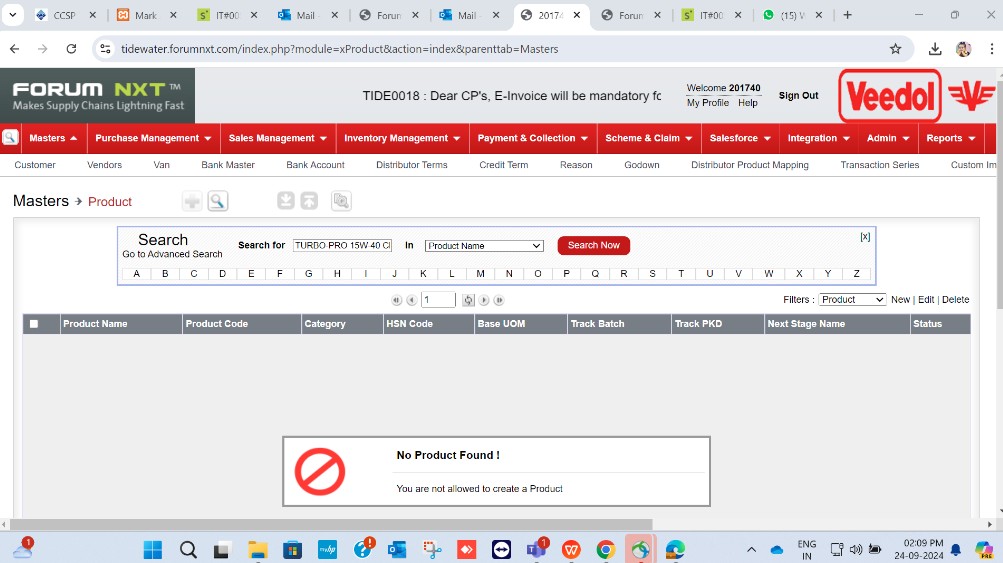
1.Check for Product in Product Master:
Go to Masters → View Product.
Use theSearchfunction with the provided product code or product name to locate the product.
Outcome:If the product is not found in the product master, proceed to the next steps.
2.Assign Ticket to DEV Team:
Open a ticket for the DEV team to create the new product in the DMS (Distribution Management System).
3.DEV Team Product Creation:
The DEV team will create the product in the system based on the inputs provided.
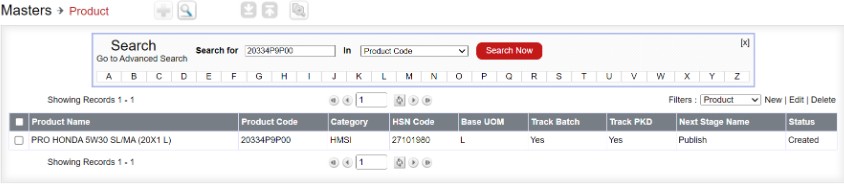
4.Post-Creation Verification:
After the product is created, go back to Masters → View Product.
Search for the newly created product using the product code to confirm it has been correctly added to the product master and inform to customer.
Version Summary
Author
Reviewer
Approver 1
Approver 2
Current Version
Current Version Published On
Maiden Version Published On
Mohammed Kashif S
Nisha Bhatt
Julian Shawn Dmonte
Karthick Krishna Kumar, Subramanian, Kannan
2.1
22/11/2024
22/11/2024
OBJECTIVE:
This document provides a structured process for handling specific service requests using the Quick Support Tool. Here's a summary of each request type and the steps involved.
Request: Update From Date and To Date for a Running Scheme
There are two types of requests related to updating scheme dates:
1. Extend the To Date in a Running Scheme: This request focuses on extending only the To Date (end date) for an ongoing scheme. Please follow the process to update the To Date and confirm that the changes have been applied in the system.
Note: When the Effective To Date is changed for a scheme, the Revoke Date must be updated. (i.e., Both To date & Revoke date must be same).
2. Update Both from and To Date in a Running Scheme: his request involves modifying both the From Date (start date) and the To Date for a running scheme. This type of update requires the same workflow but includes updating both date fields.
Service Type: SR
Priority: Low
Problem Code: Master Data Correction
Inputs:
Distributor Credentials
Scheme Details (Scheme name & Scheme code)
Dates (From Date or To Date) which need to be updated
Workflow:
Create a case in the ServiceNow portal and provide the case ID to the customer.
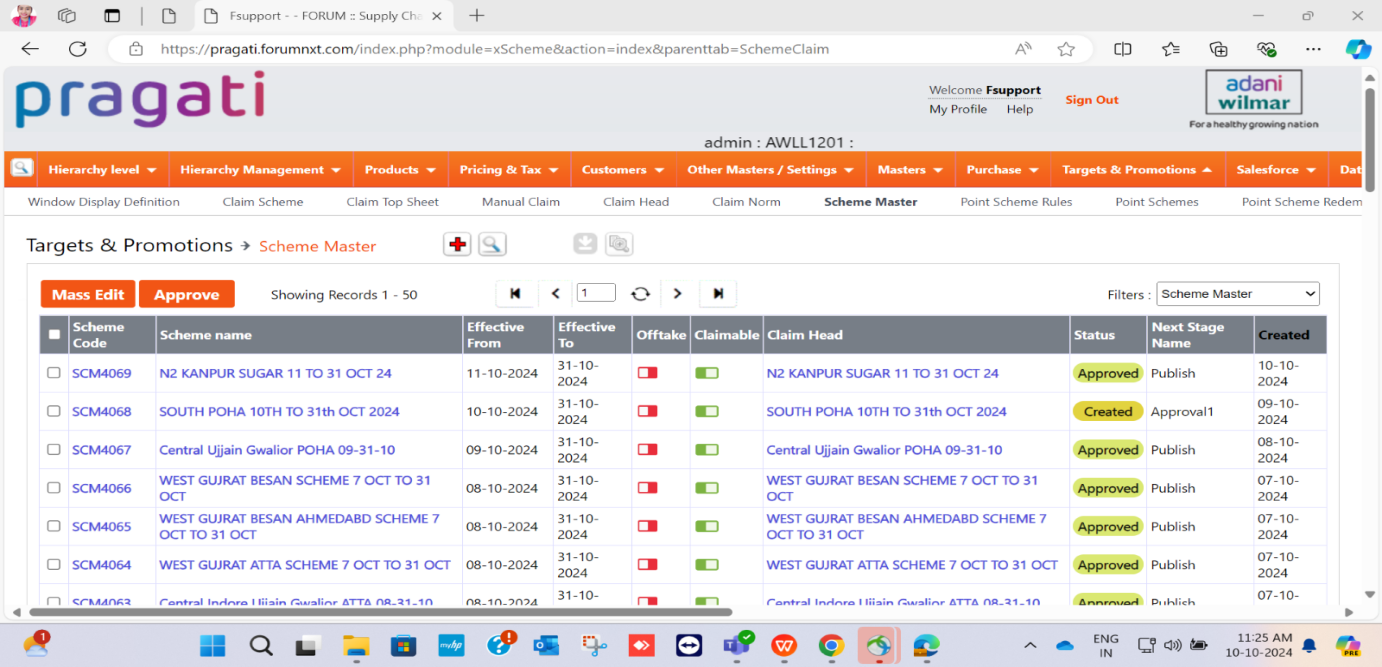
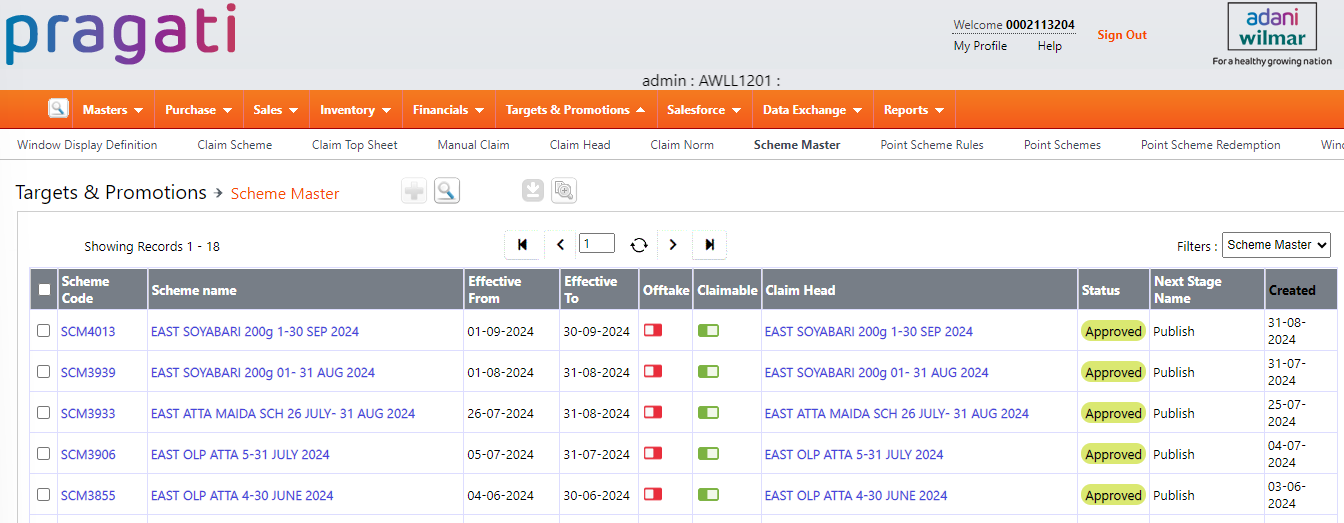
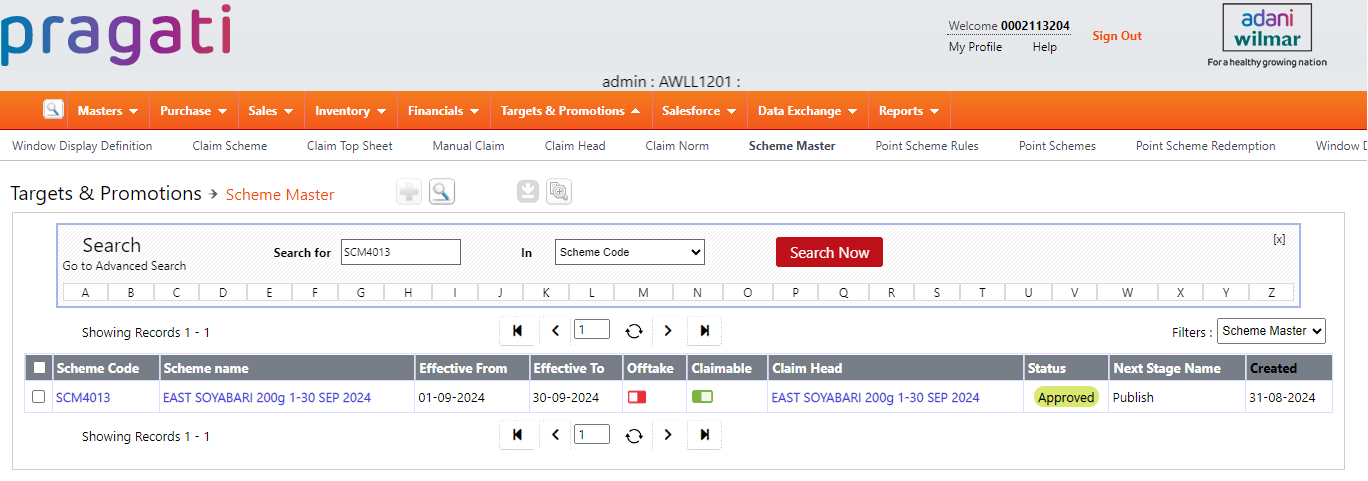
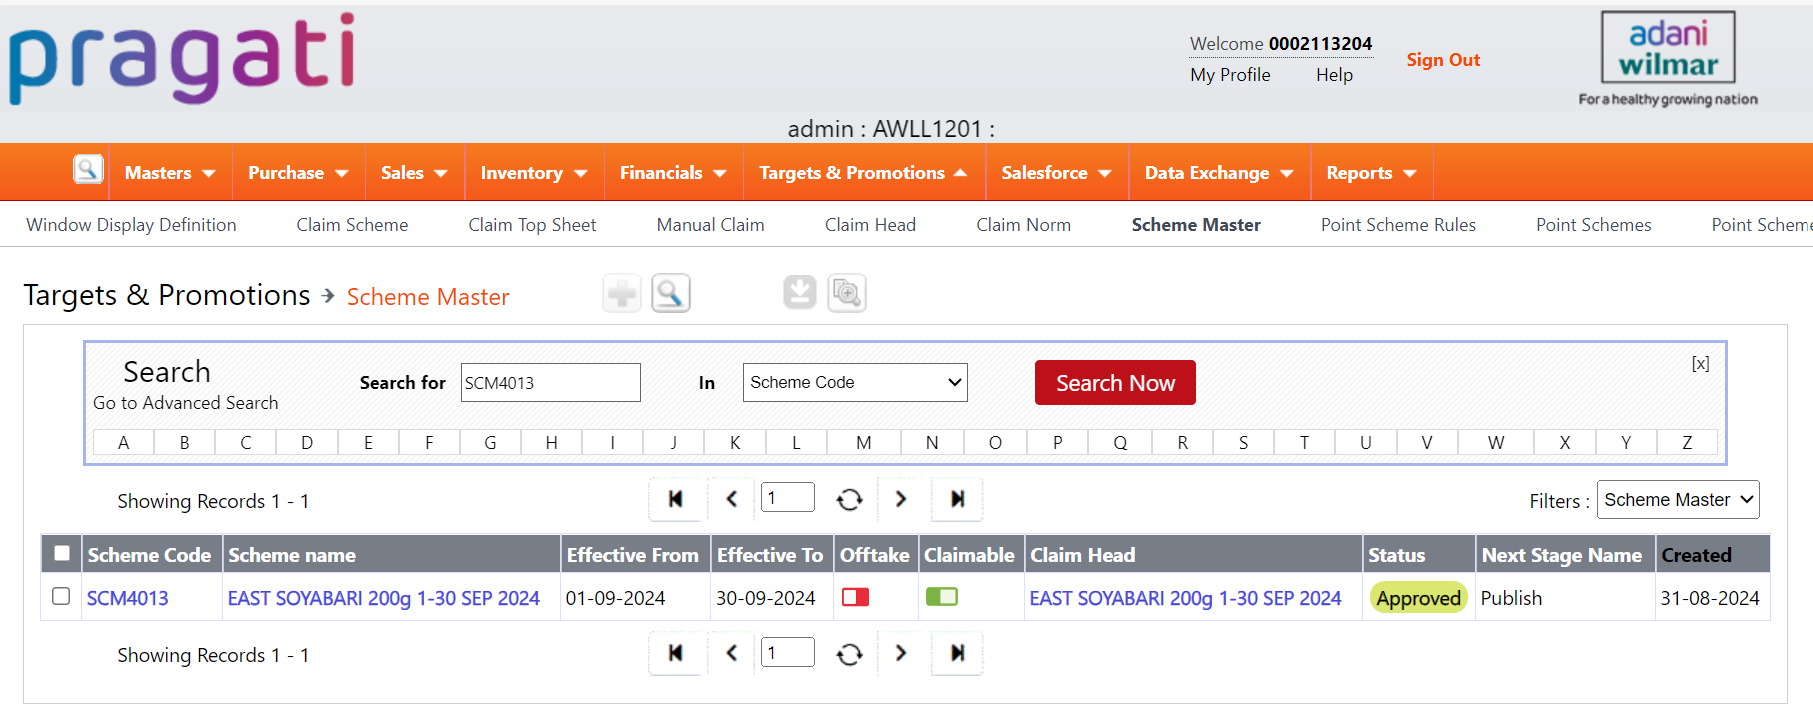
Log in to the DMS portal, navigate to Targets & Promotions → Scheme Master, and search for the scheme.
Review the Effective From Date and Effective To Date.
Confirm that the scheme is still running (i.e., the current date falls between the From Date and To Date). Only if the scheme is active, we proceed with updating the dates. Modify the From Date and/or To Date as requested with the help of quick support tool.
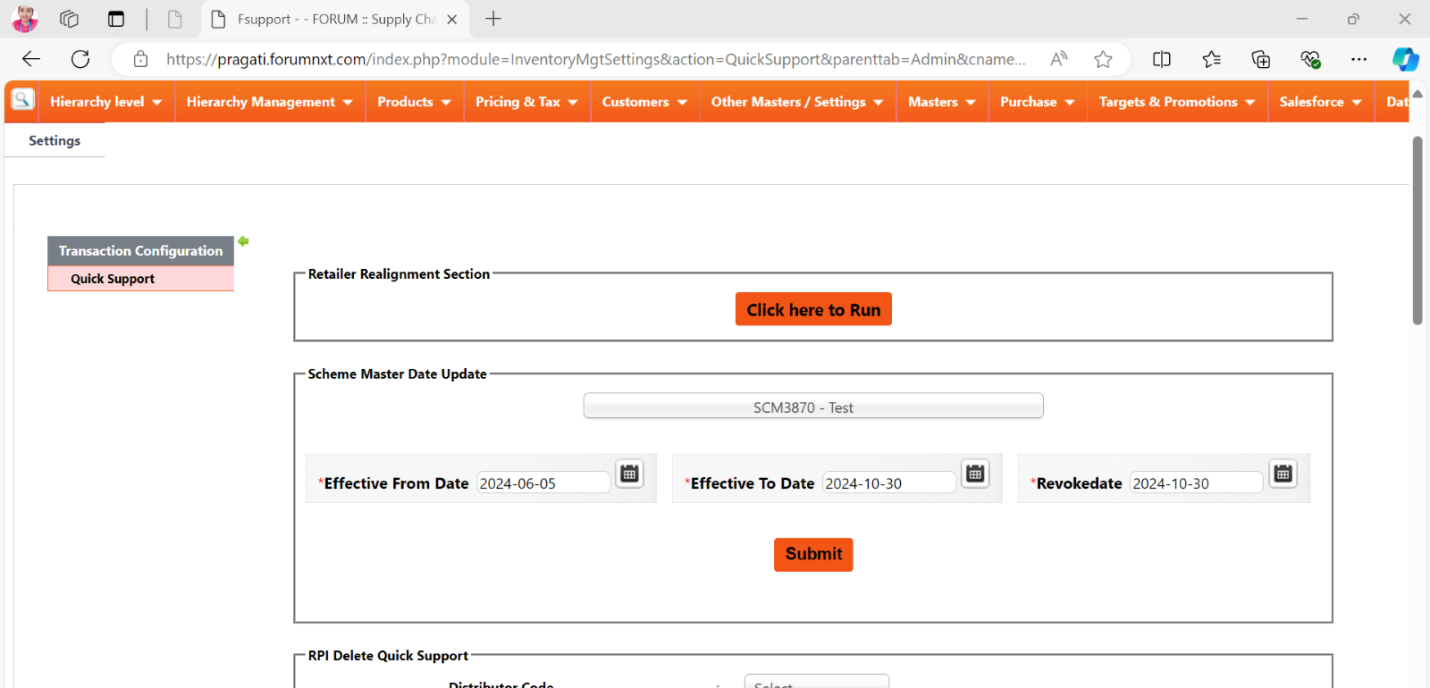
Here are the detailed steps to update the scheme dates using the Quick Support Tool on the Corporate Portal:
Steps to Update Scheme Dates via Quick Support:
1. Access the Corporate Portal:
a. Log in with User ID/Password: Fsupport
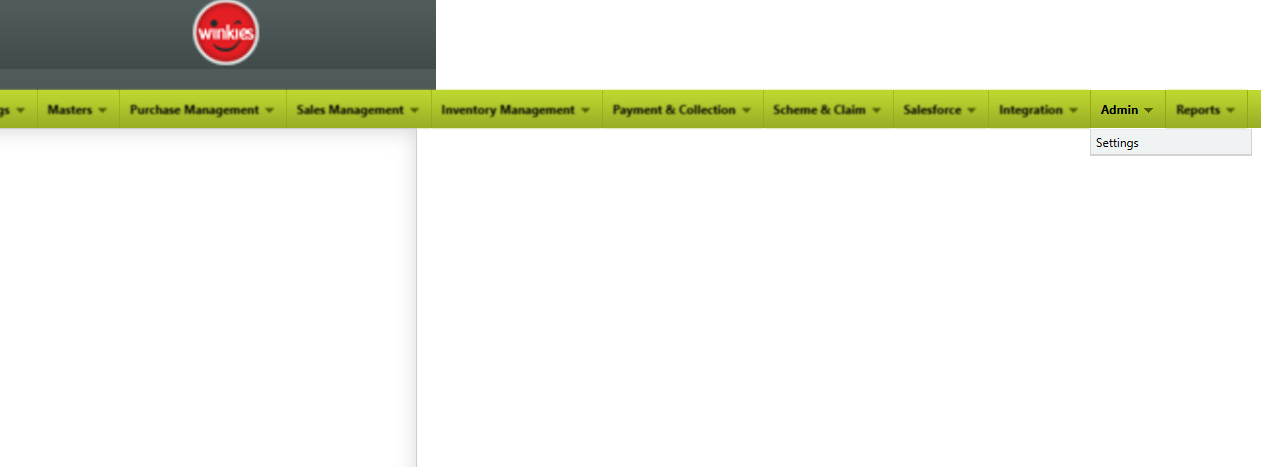
2. Navigate to the Quick Support Section:
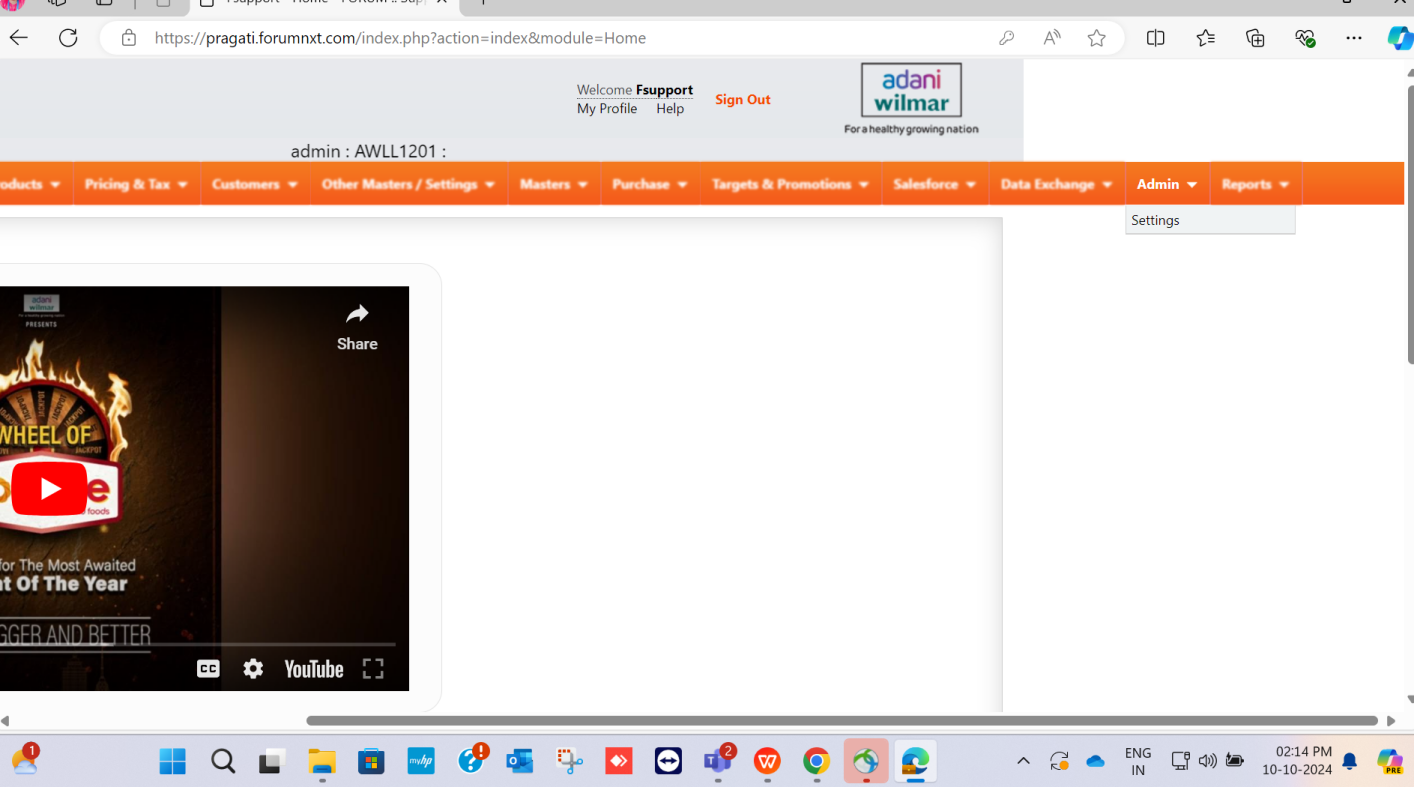
a. Once logged in, go to Admin in the main menu.
b. Select Settings.
c. Within the Settings menu, click on Quick Support.
3. Select and Update the Scheme:
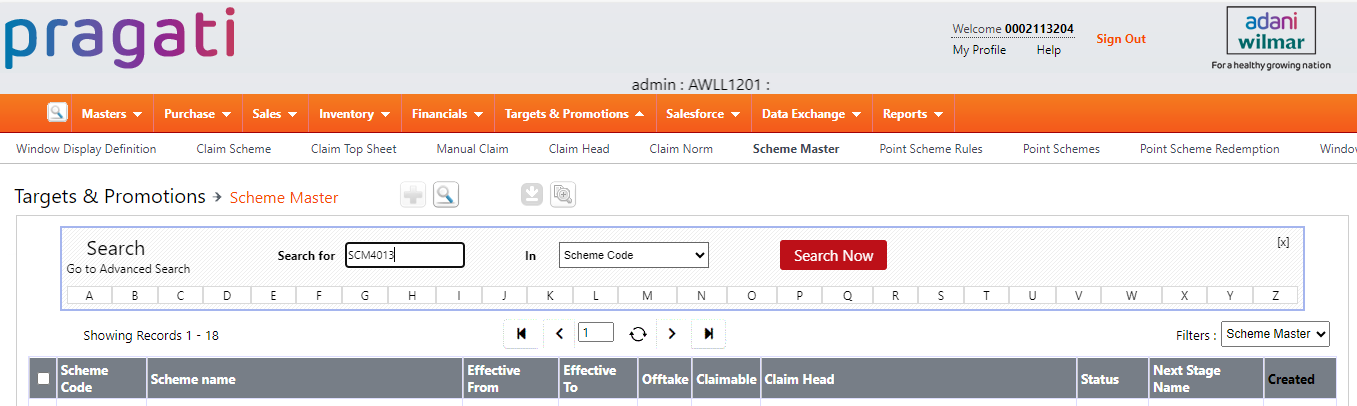
a. Click on Select to find the scheme you need to update.
b. Use the Scheme Code or Scheme Name to locate the specific scheme.
c. Update the Effective From Date and Effective to Date as required.
d. Once the dates are entered, click Submit
Password Verification from PMO:
a. After submitting, a password will be generated for PMO verification.
b. Collect the password from the PMO team to proceed.
5. Confirm Updates:
a. Log back into the DMS portal, navigate to Targets & Promotions → Scheme Master, and verify that the Effective From Date and Effective To Date have been updated successfully.
b. Take a screenshot of the updated dates for record-keeping and customer confirmation.
6. Notify Customer and Update Tracker:
a. Send an email to the customer with the updated details and attach the screenshot.
b. Update the Quick Support Tool Tracker with the completion details for this request.
Request: Remove or Delete a Received Purchase Invoice (RPI) from DMS
Service Type: SR (Service Request)
Priority: Low
Problem Code: Transaction Data Correction
Inputs:
Distributor Credentials
RPI Details: (RPI Number, RPI Date)
If the distributor details are not provided, collect the RPI Number and Date (via Call)
Workflow:
Create a case in the ServiceNow portal and provide the case ID to the customer.
Log in to the DMS Portal using the Distributor Credentials provided by the customer.
■ If the Distributor Credentials are not available, use the Corporate Portal with User ID/Password:FsupportMD
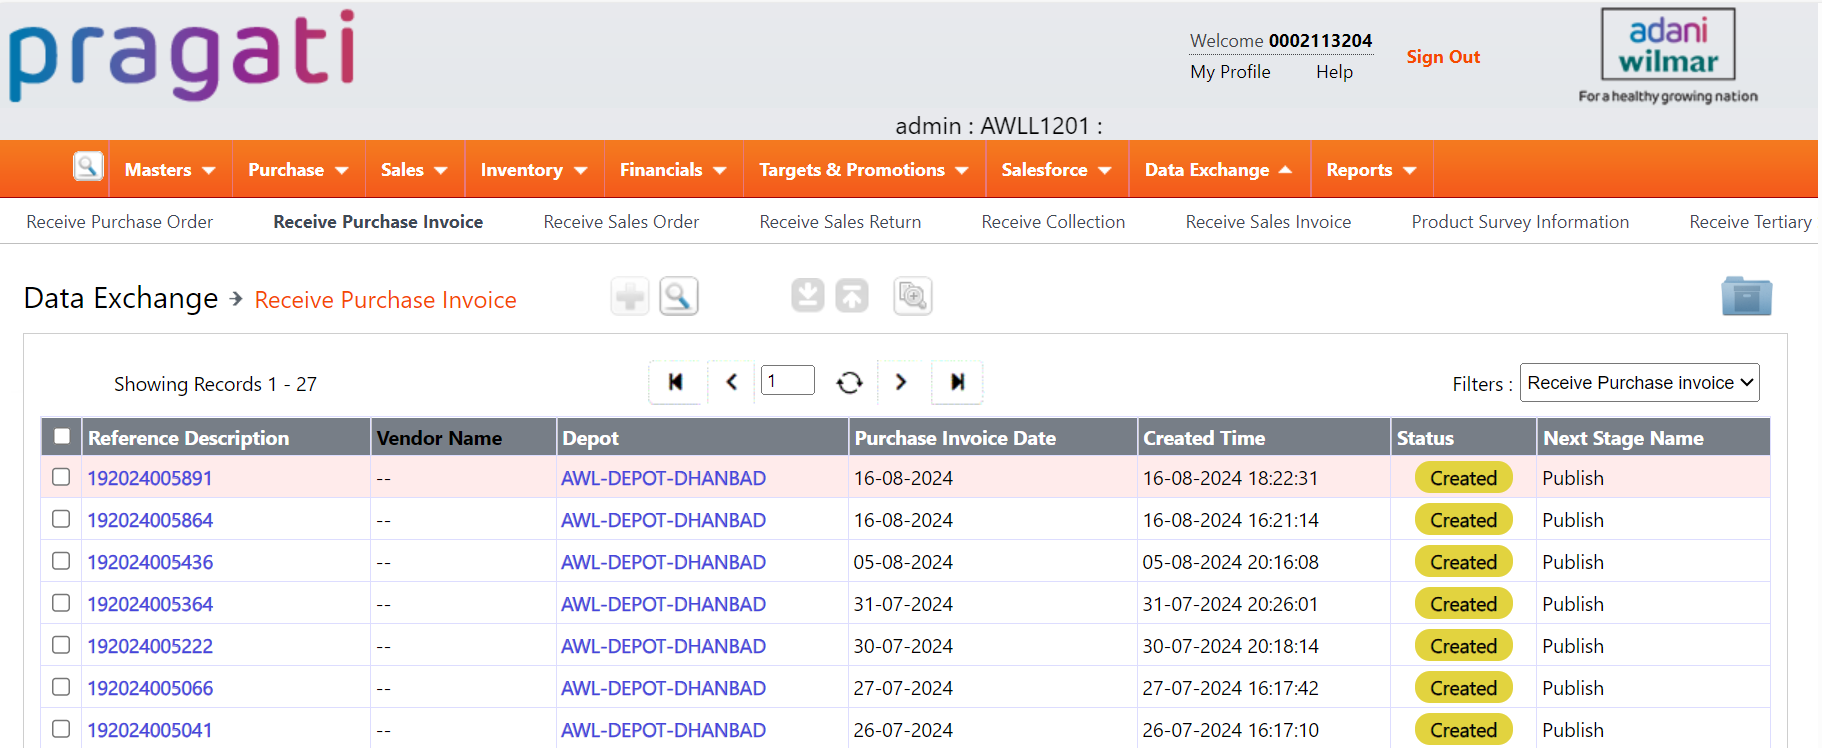
Once you’re logged into the DMS portal, follow these steps to locate the Received Purchase Invoice (RPI):
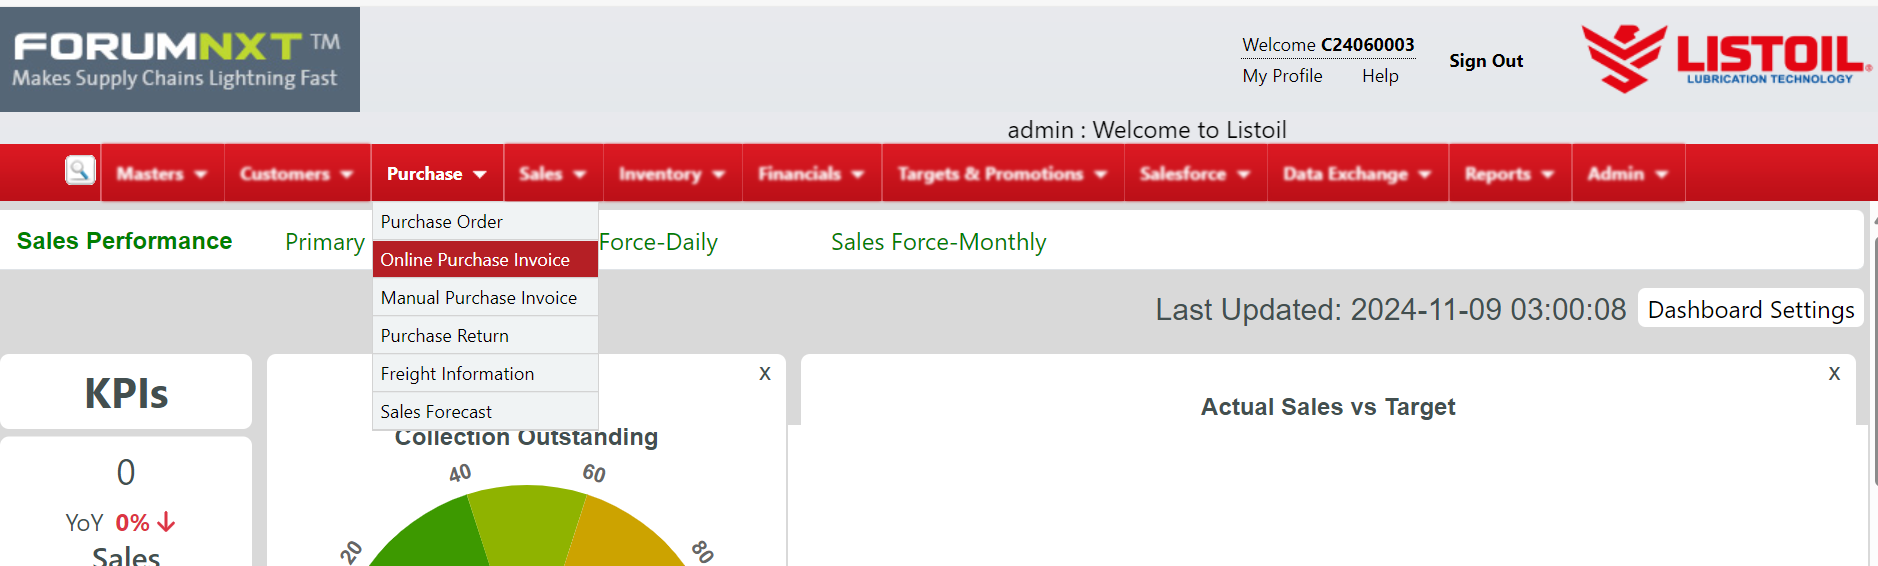
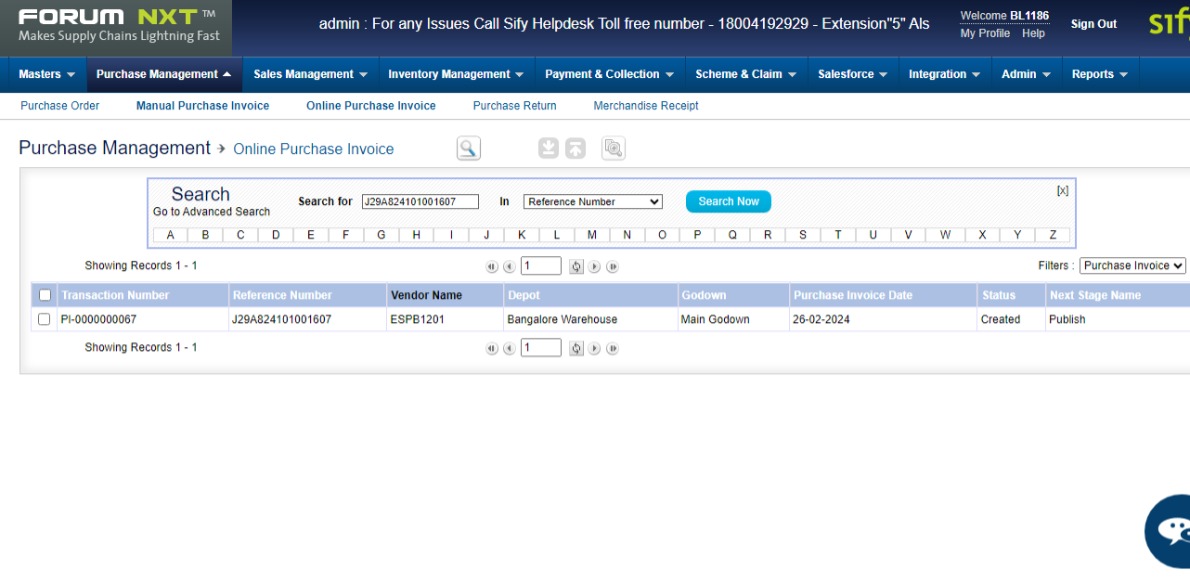
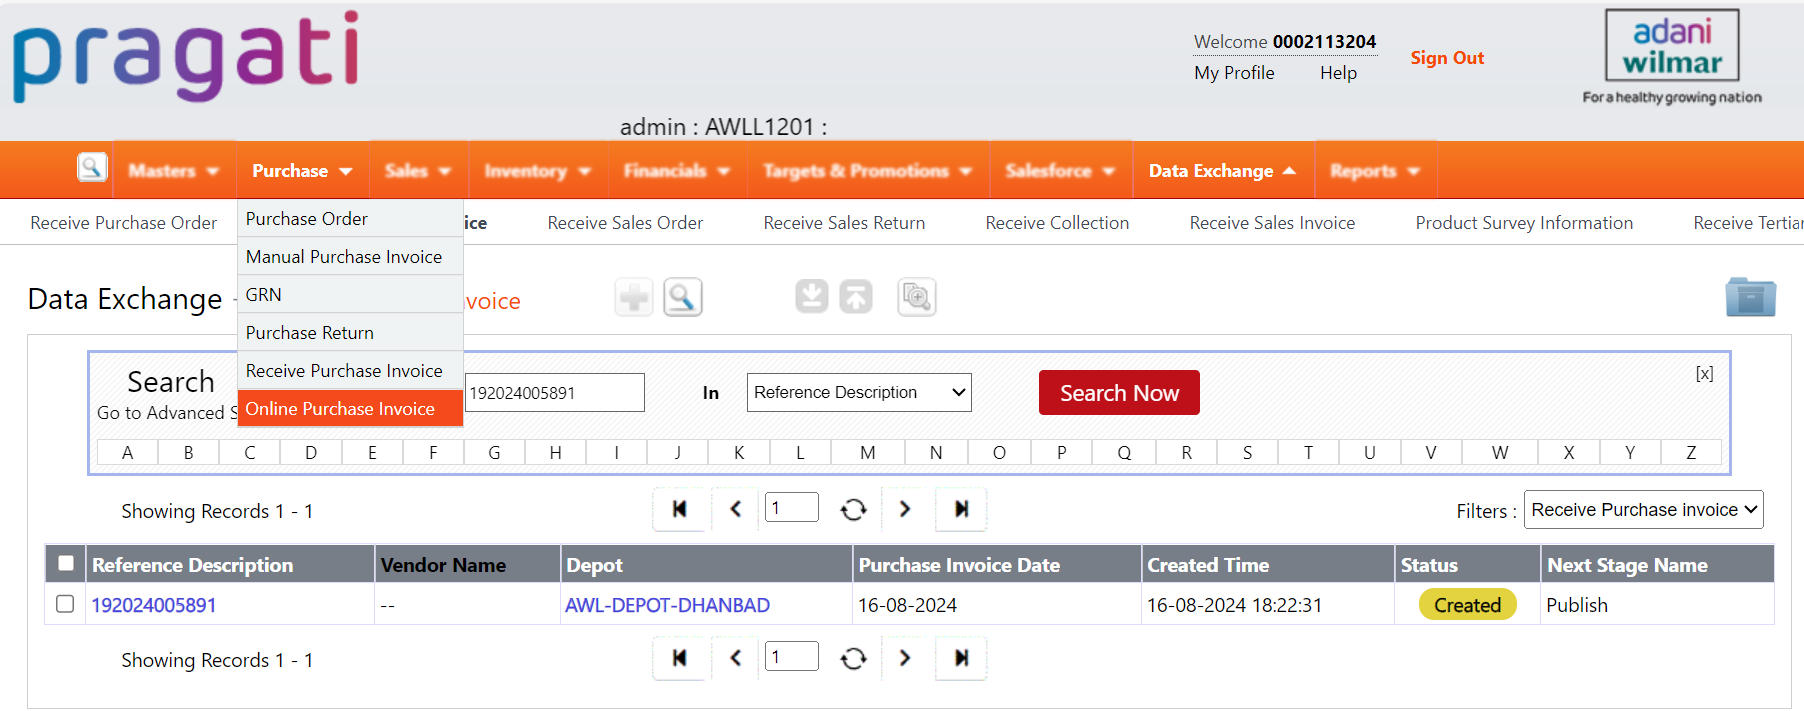
1. Navigate to the Purchase Section:
From the main menu, go to Purchase.
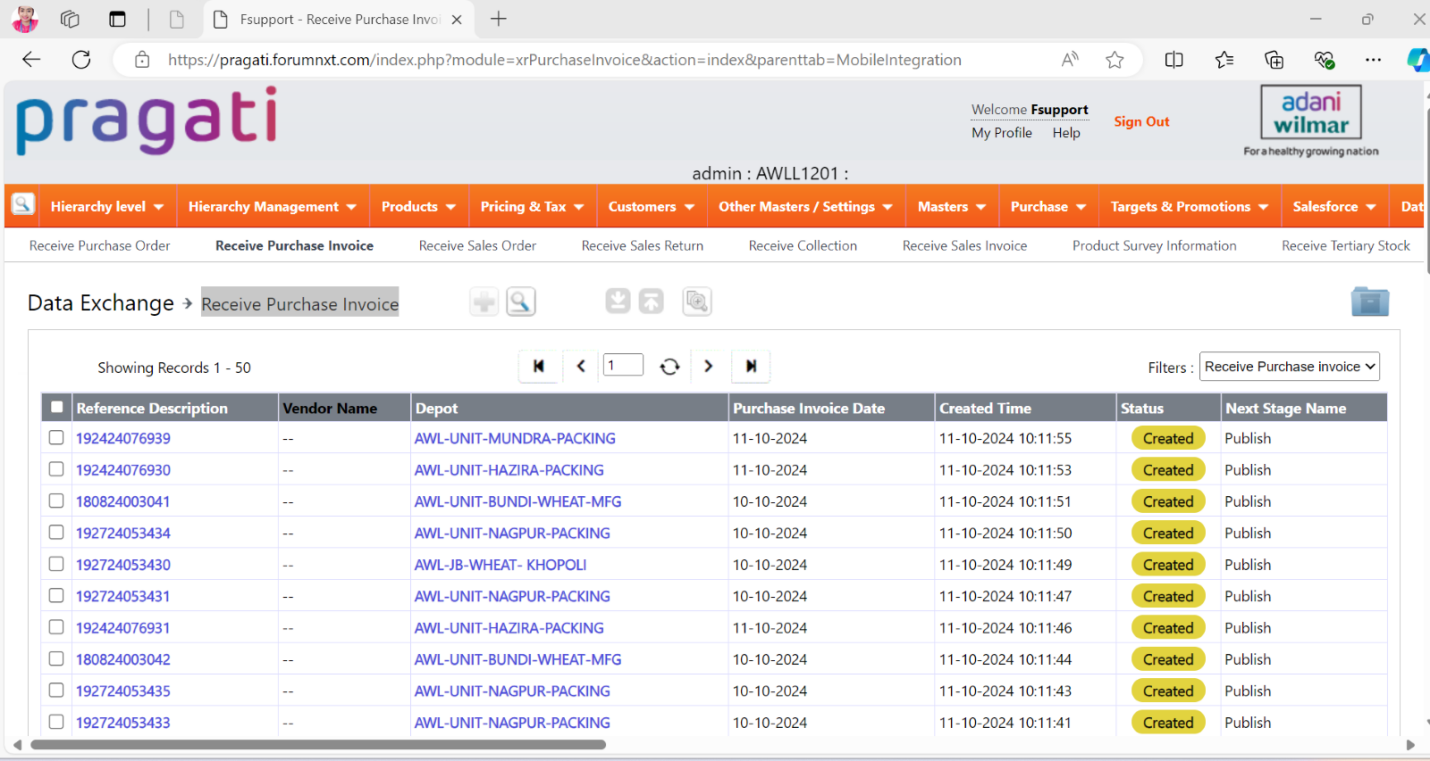
2. Access the Receive Purchase Invoice:
Under Purchase, select Receive Purchase Invoice.
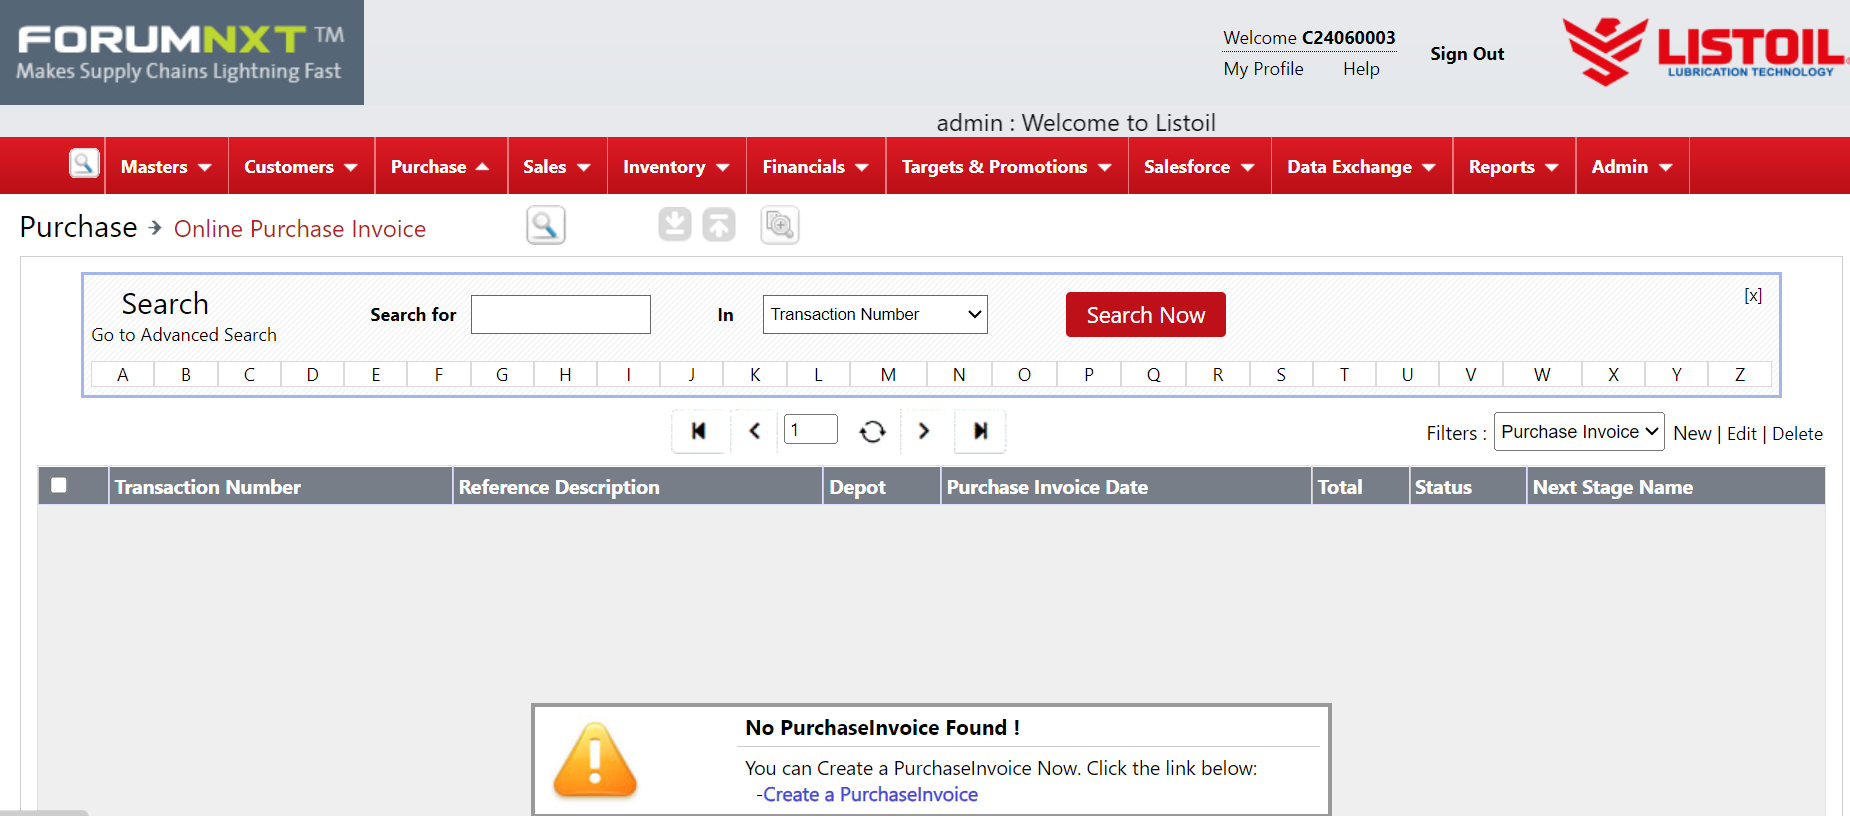
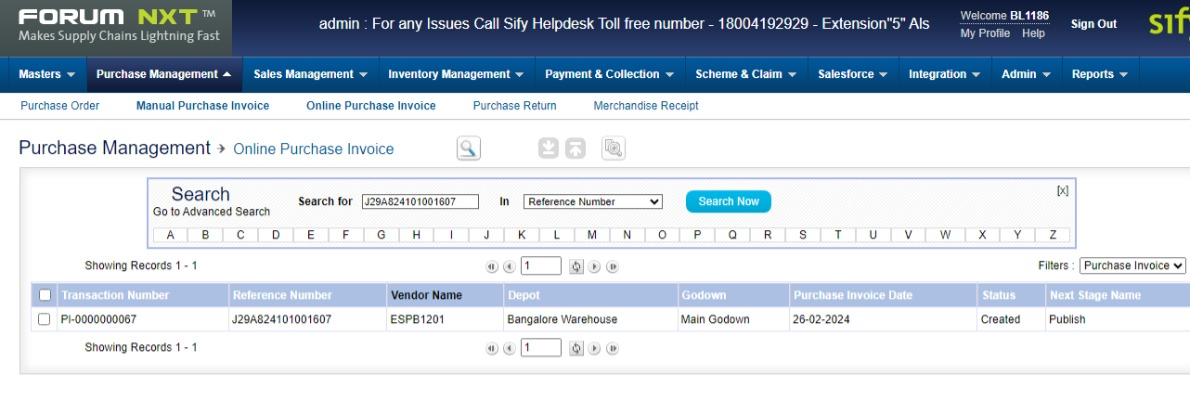
3. Search for the RPI:
In the search bar, enter the Reference Description Number(e.g., 190724004878).
Click on the Search button to locate the specific invoice.
Note down the purchase invoice date and ensure that we have the necessary information related to RPI delete request.
If you're unable to find the Received Purchase Invoice (RPI) using the Reference Description Number in the DMS portal, you can follow these alternative steps:
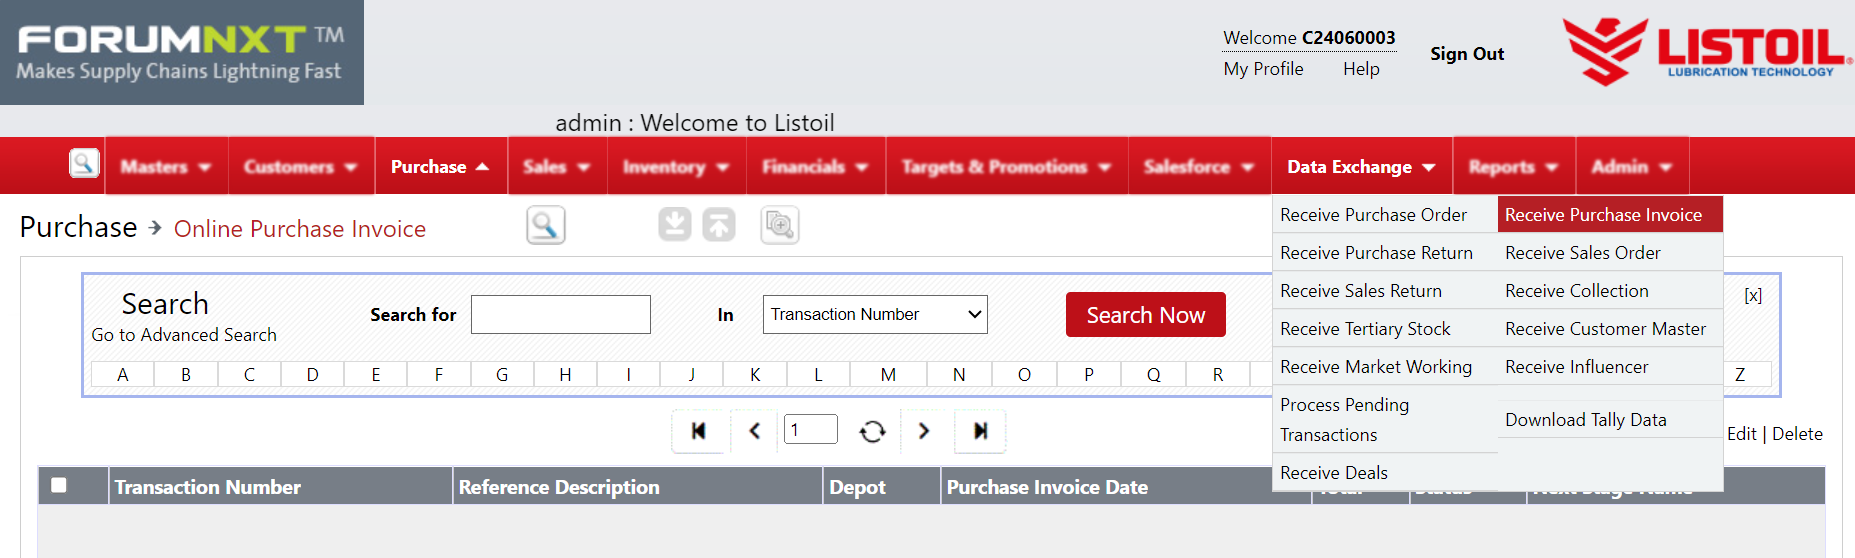
Steps to Find RPI via Data Exchange
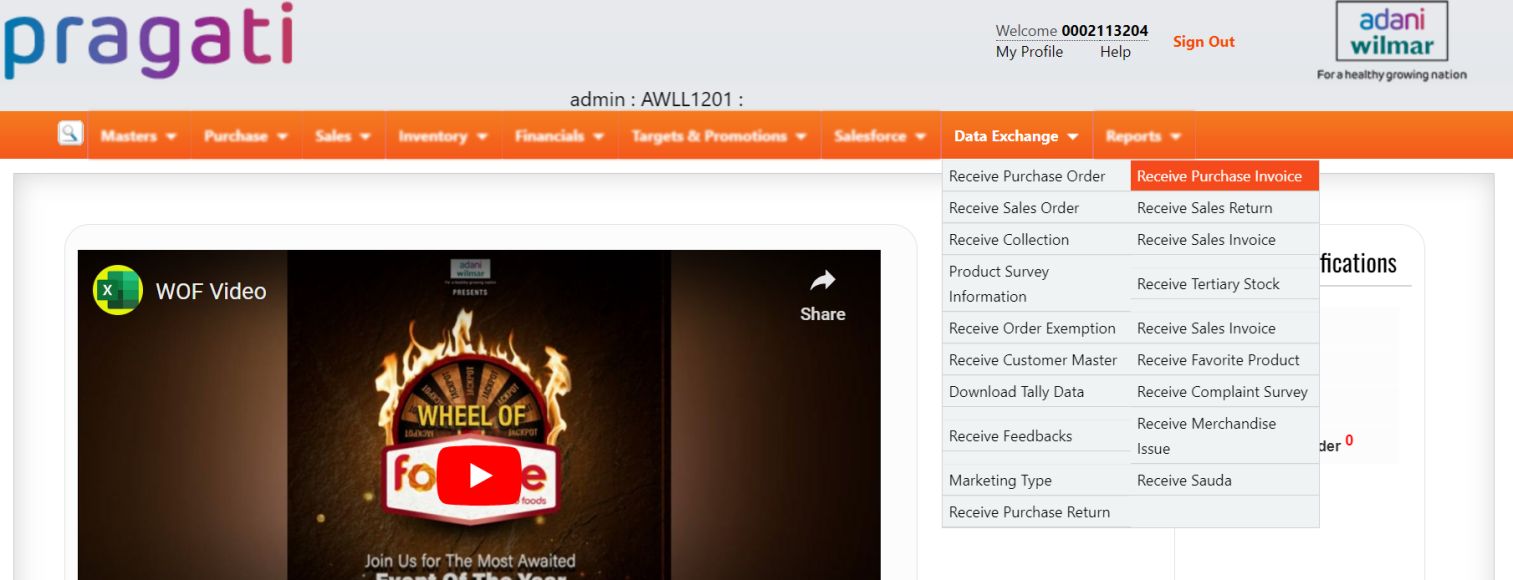
Navigate to Data Exchange:
a. From the main menu, go toData Exchange.
Access Receive Purchase Invoice:
b. Under the Data Exchange section, select Receive Purchase Invoice.
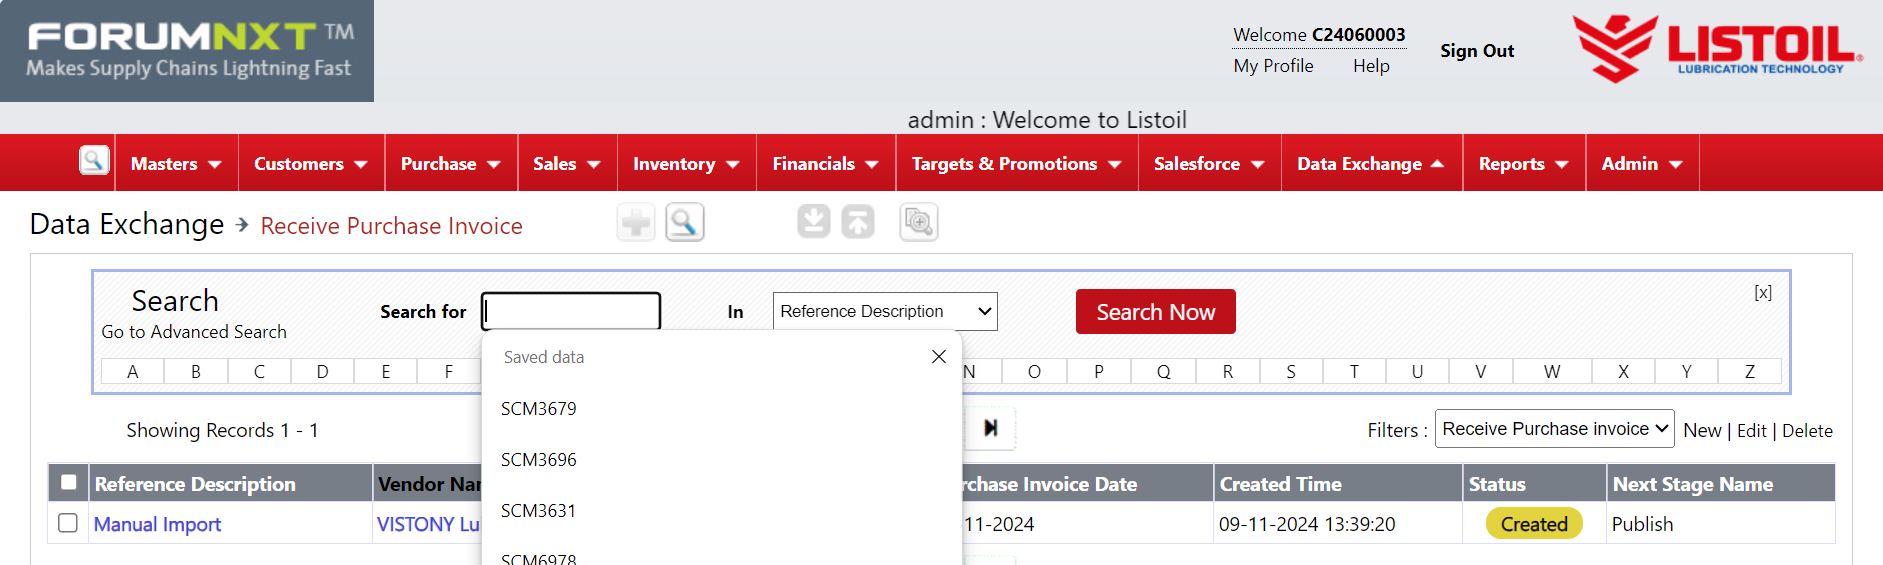
Search for the RPI:
c. In the search field, enter the Reference Description Number (for example, 190724004878).
d. Click on the Search button to locate the specific invoice.
e. Note down the purchase invoice date and ensure that we have the necessary information related to RPI delete request.
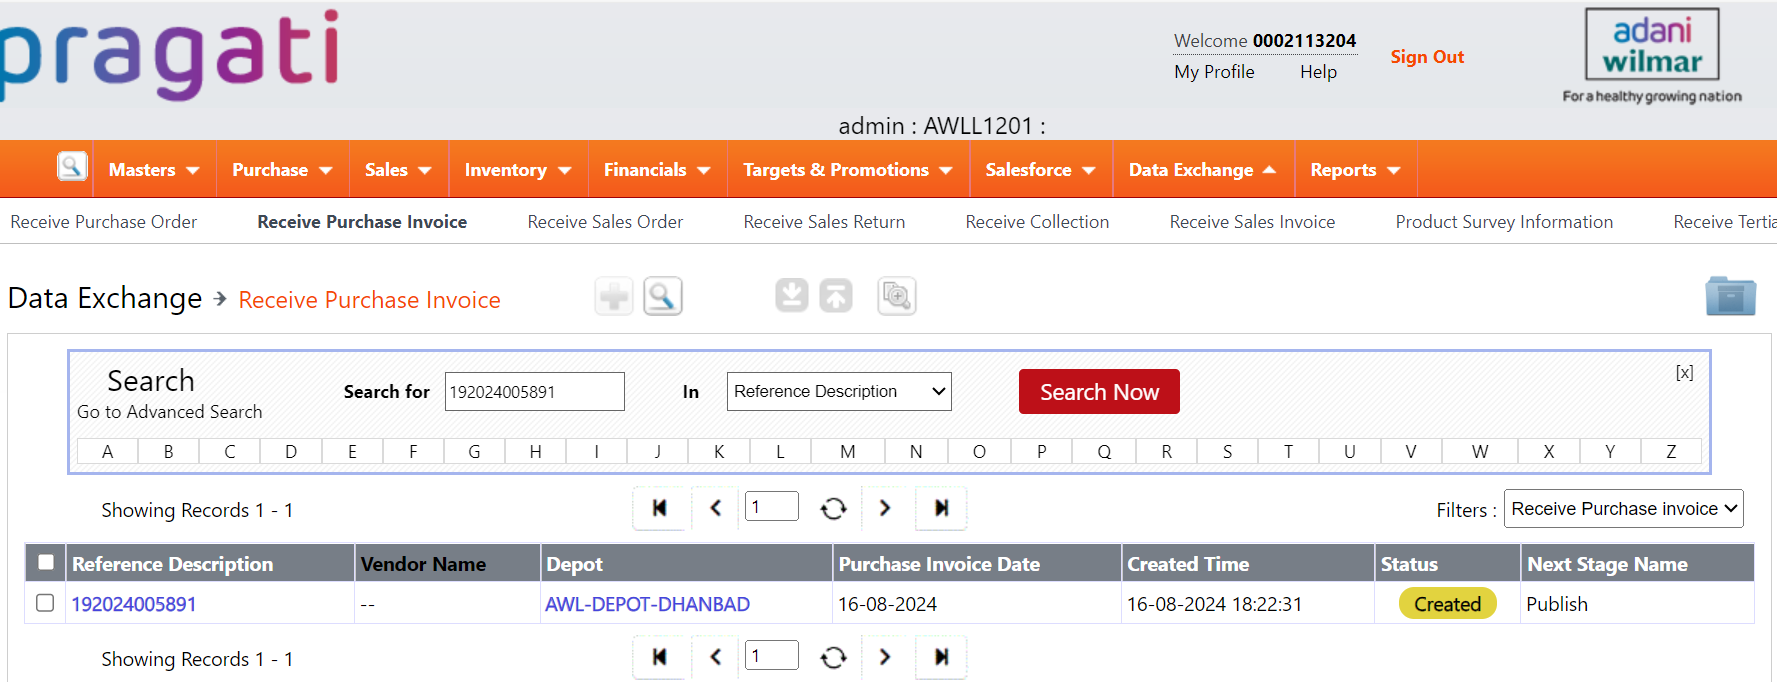
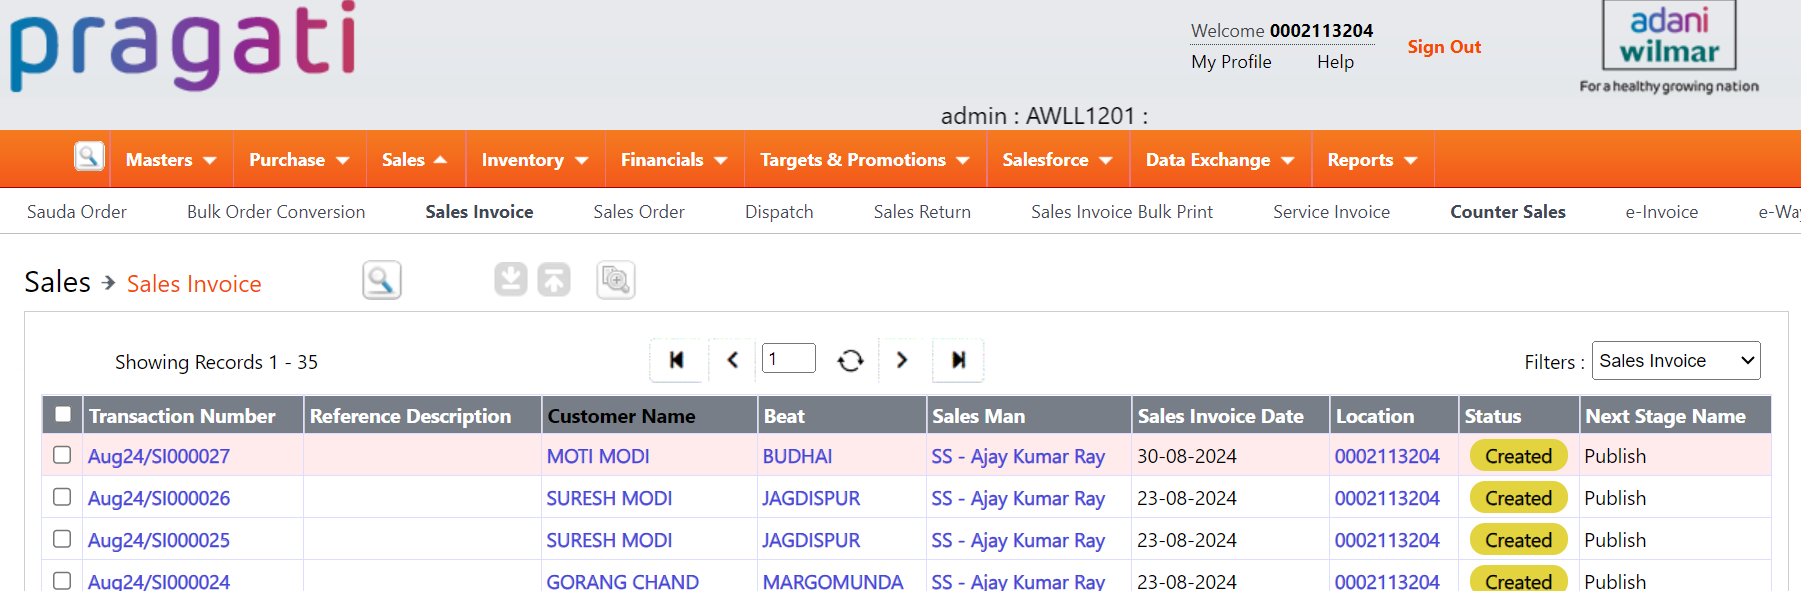
To check the status of the Received Purchase Invoice (RPI) and confirm.
Check RPI Status:
In the RPI details screen, look for the Status field and ensure that the Status is marked as Created.
Verify Next Stage Name:
Look for a field labeled Next Stage Name and Confirm that it is set to Publish
Note:If the customer provides only the RPI number, please follow these steps to identify the distributor details and the RPI date:
Steps to Identify Distributor Details and RPI Date
Log in to the Corporate Portal:
Use the User ID/Password: Fsupport to access the Corporate Portal.
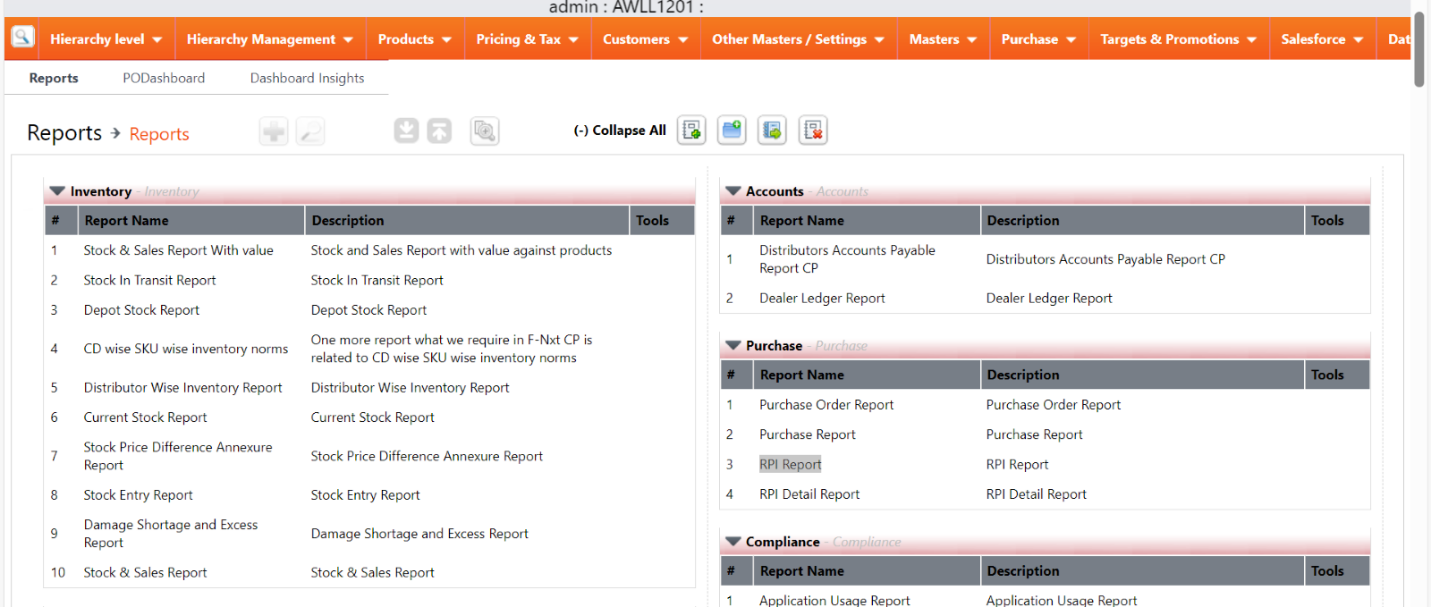
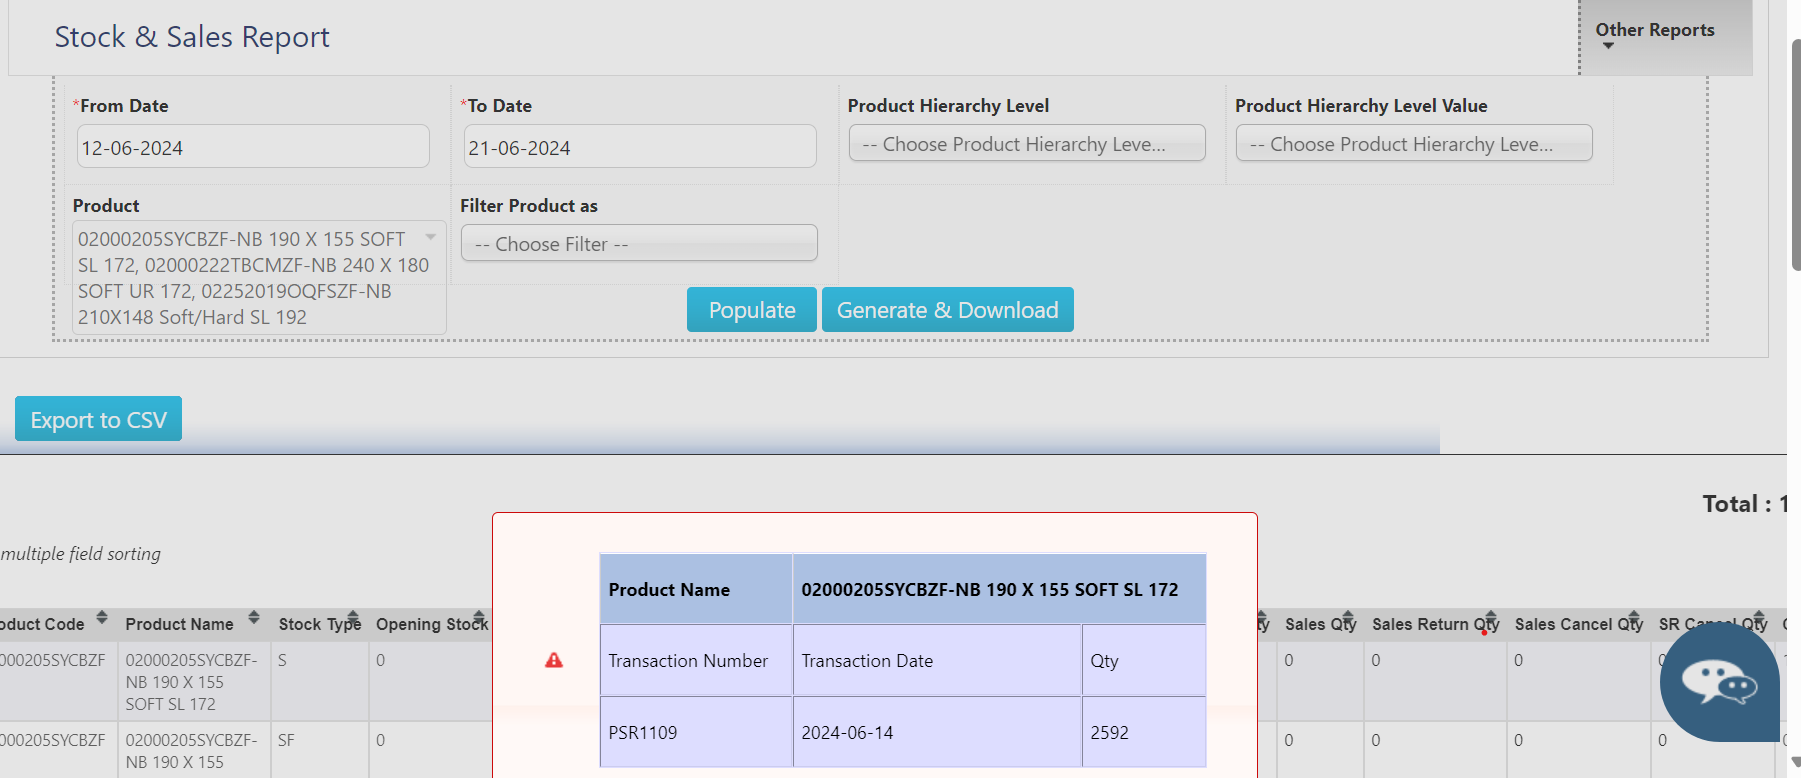
Access the RPI Report:
Navigate to Reports.
Select Purchaseand then go to RPI Report.
Set Up Search Parameters:
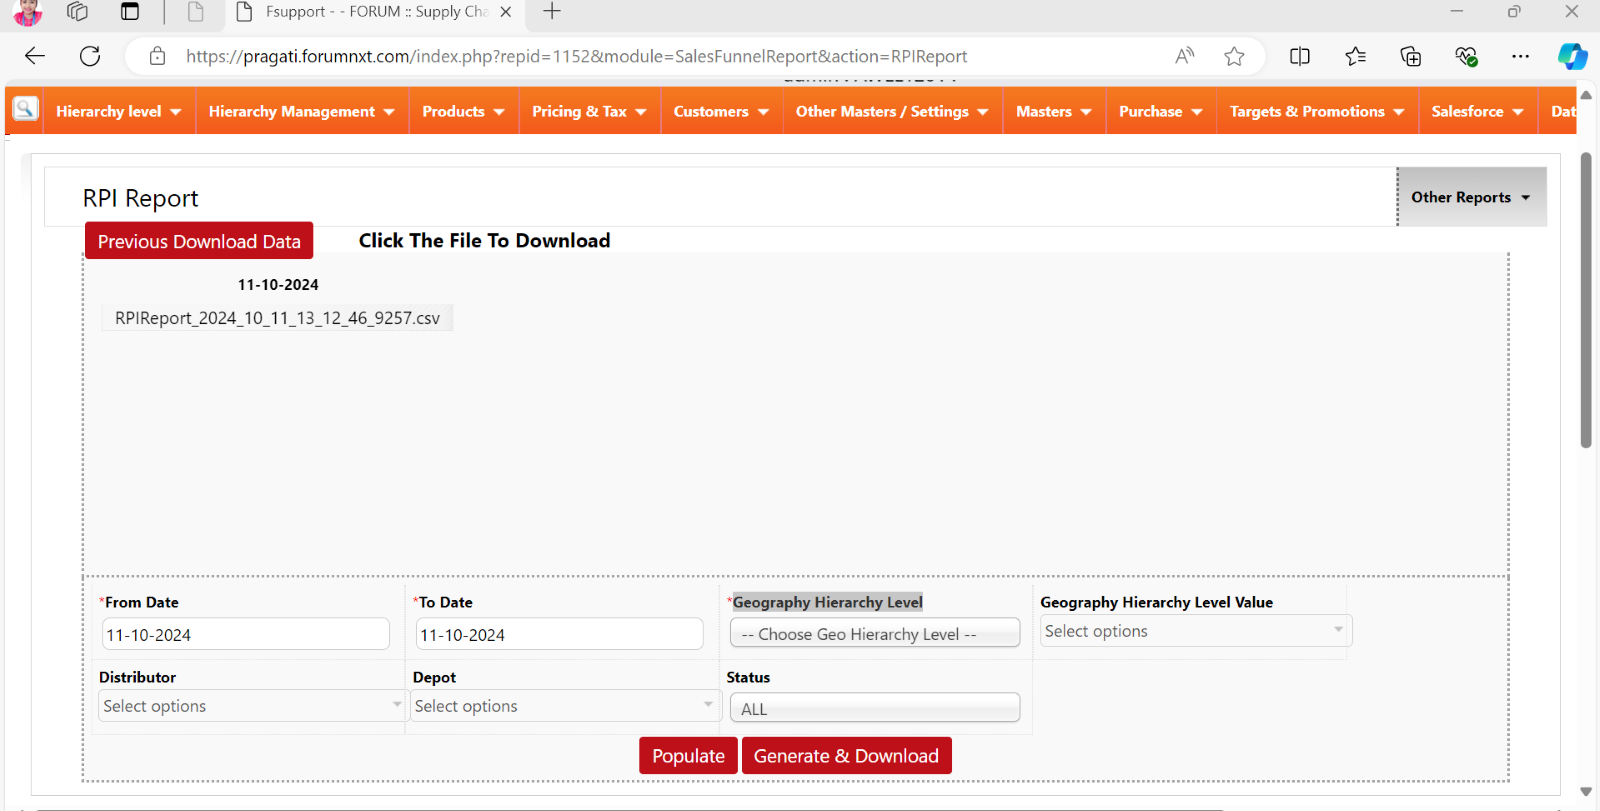
Clickon the RPI Report to open
Select the Date Range:
■ From Date: Choose the starting date for the report. ■ To Date: Choose the ending date for the report.
Choose Geography Level:
After setting the date range and geography level, click on the Generate & Download button.
Wait for the report to be generated, then download it to your device.
Open the Report:
Navigate to your downloads folder and open the downloaded report file.
Next Steps
Use the search function (Ctrl + F) to find the specific RPI number provided by the customer.
Review the report to find the relevant Distributor Details and RPI Dateassociated with that RPI number.
Here’s a detailed guide on how to remove a Received Purchase Invoice (RPI) using the Quick Support tool in the Corporate Portal:
Steps to Remove RPI Using Quick Support
1. Log in to the Corporate Portal:
a. Use the User ID/Password: Fsupport to access the portal. 2. Navigate to Admin Settings:
a. Click on the Admin section from the main menu.
3. Access Quick Support Settings:
a. Under Admin, go to Settings.
b. Click on Settings again to open the settings options.
c. Select Quick Support from the list.
4. Go to RPI Delete Quick Support:
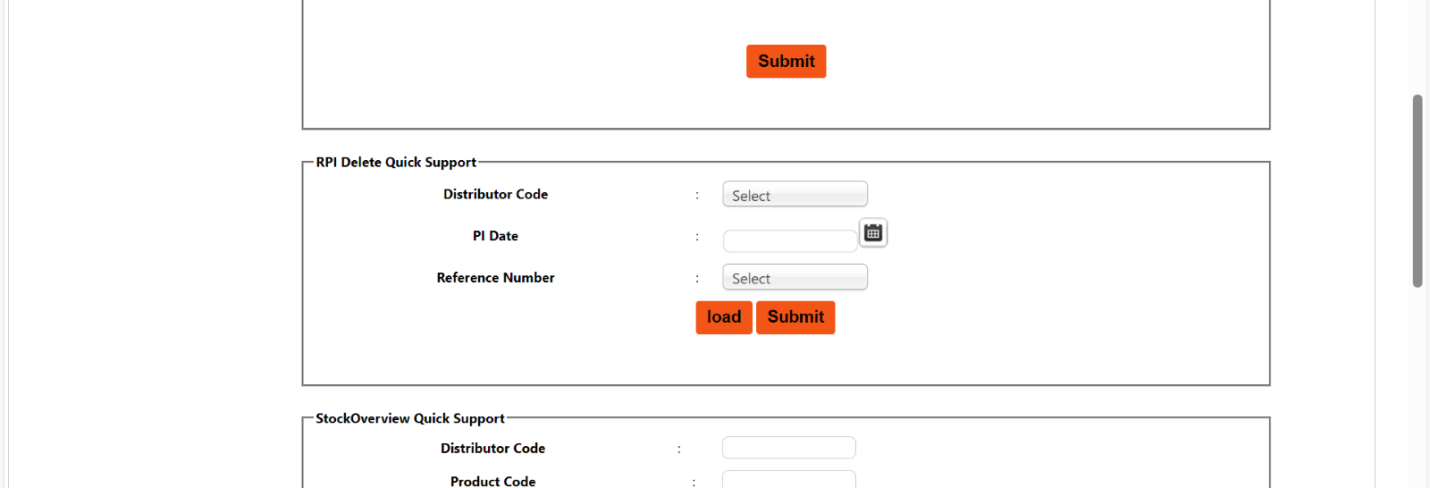
a. Once in the Quick Support section, find and click on the option for RPI Delete Quick Support.
5. Enter RPI Details: a. Distributor Code: Enter the relevant distributor code for the invoice you want to remove. b. PI Date: Enter the exact Purchase Invoice Date. Ensure the date is accurate. Reference Number: Enter the RPI reference number.
6. Load RPI Details:
a. After filling in the required fields, click on Load.This will retrieve the RPI details associated with the information provided.
7. Submit for Removal:
a. Review the information to ensure it’s correct.
b. Click on Submit to proceed with the removal of the RPI.
8. Verify the Deletion:
a. Log back into the DMS portal using the appropriate credentials.
b. Navigate to Purchase → Receive Purchase Invoice.
c. Search for the RPI using the Reference Description Number or any relevant details to confirm that it has been successfully removed.
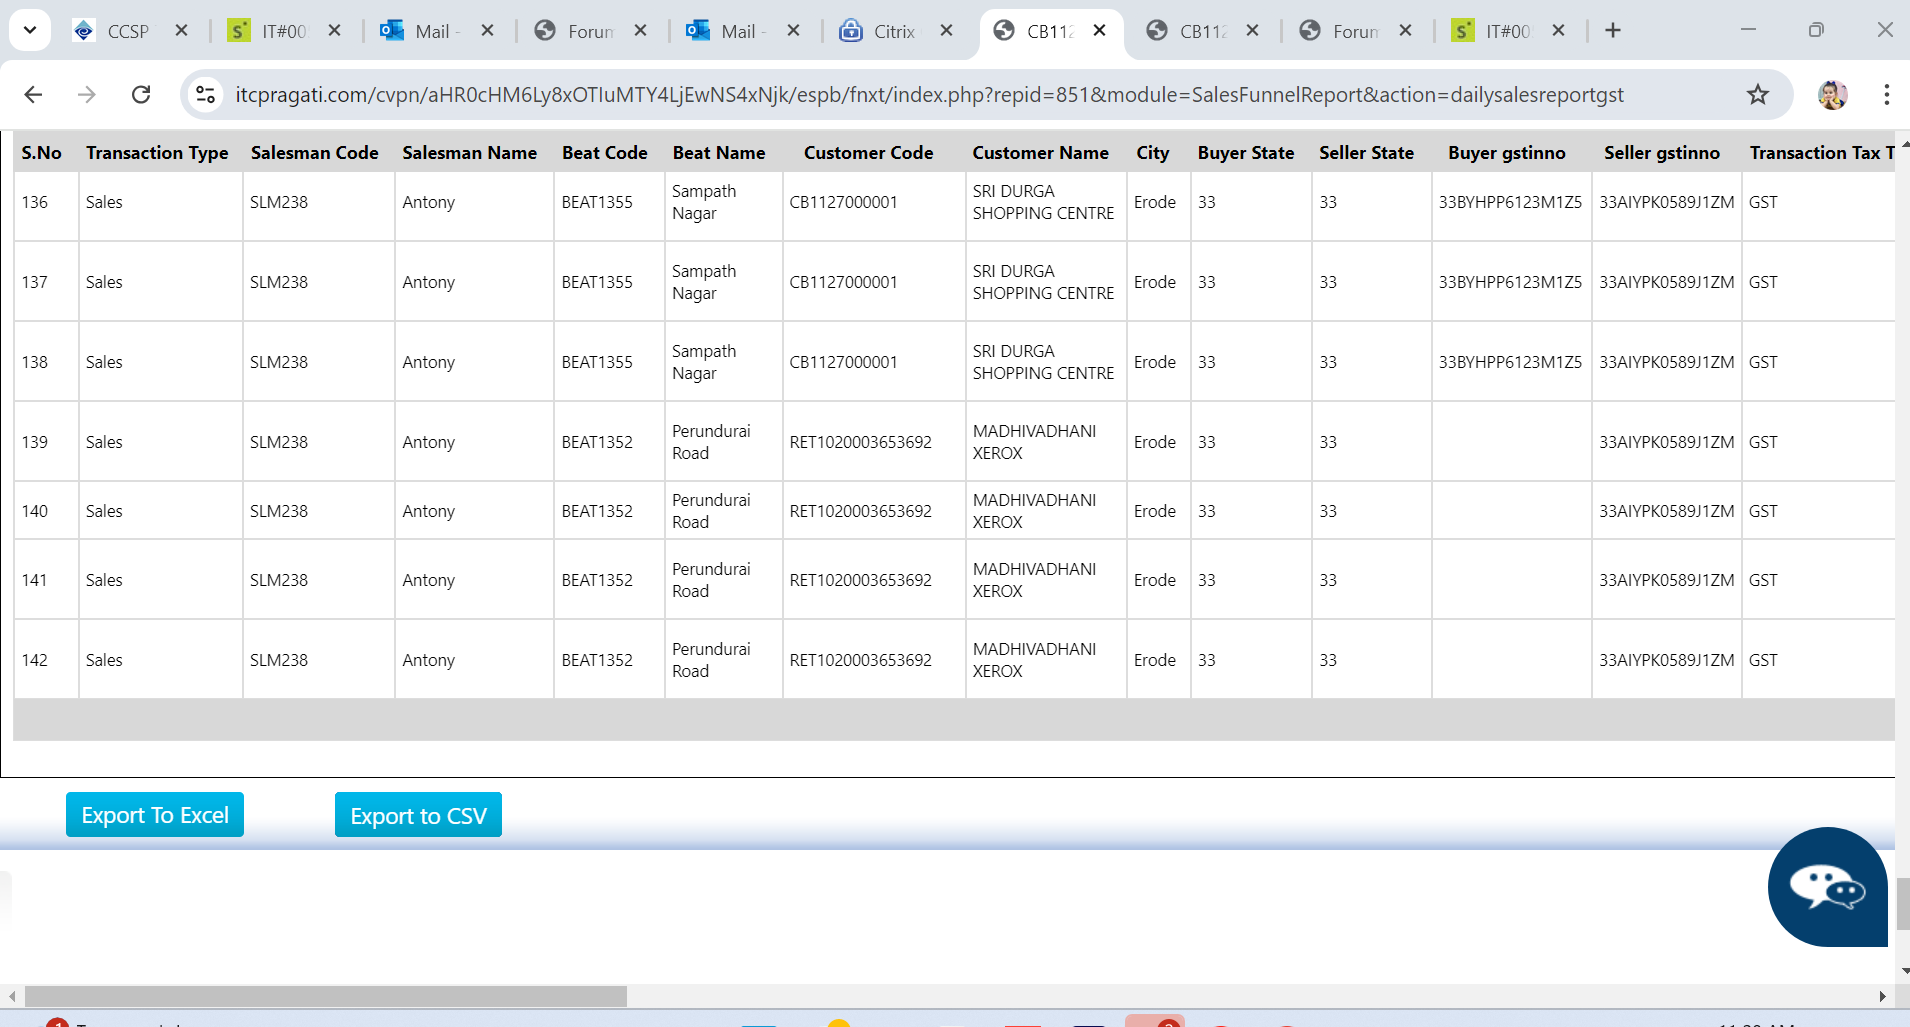
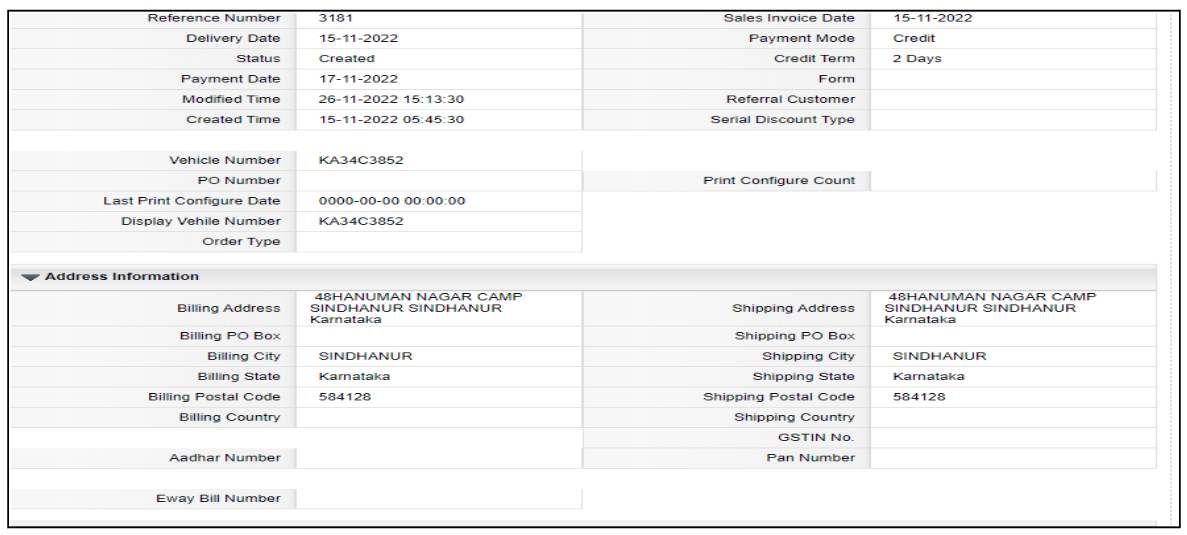
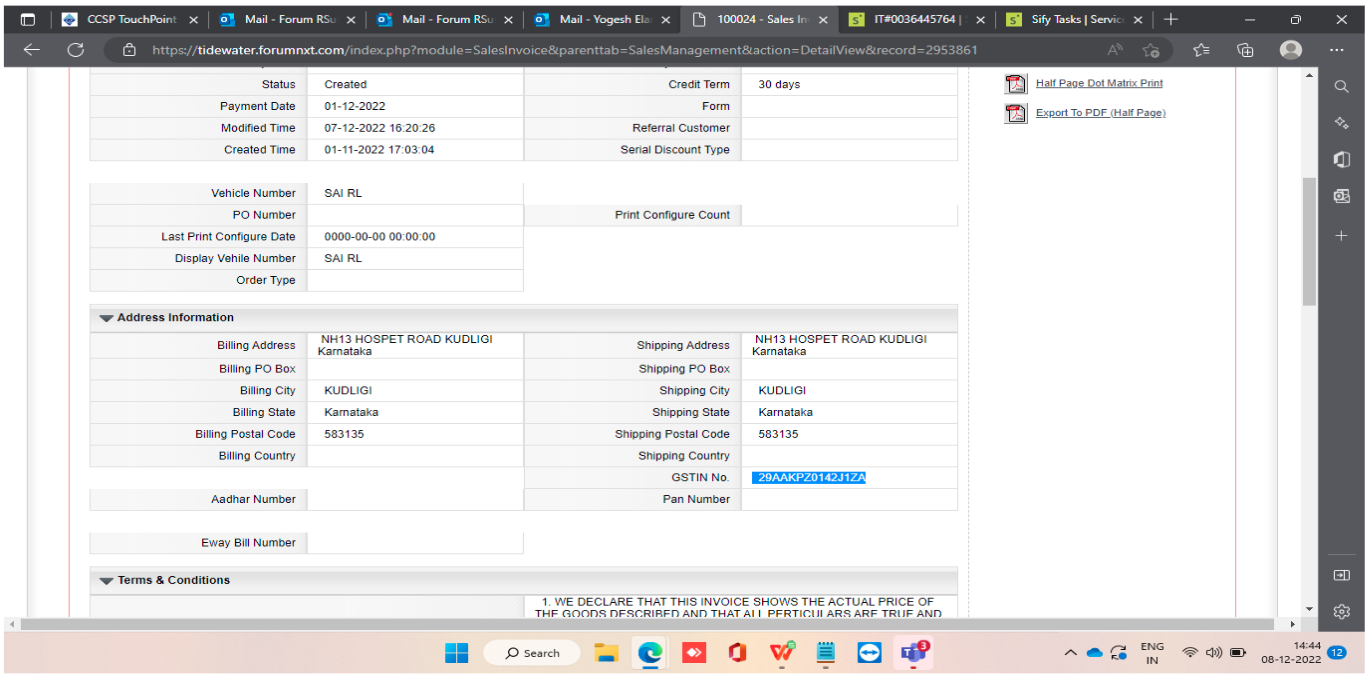
Request: Update GST Number for a Sales Invoice in DMS
Service Type: SR (Service Request)
Priority: Low
Problem Code: Transaction Data Correction
Inputs:
Distributor Credentials
Sales Invoice Number, Sales invoice Date
GST Number & Customer name.
Workflow:
Create a case in the ServiceNow portal and provide the case ID to the customer
Log in to the DMS Portal using the Distributor Credentials provided by the customer. (or) Use Test Credentials.
1. Validate GSTIN Number in DMS:
Login to DMS Portal with your credentials (Login ID and Password).
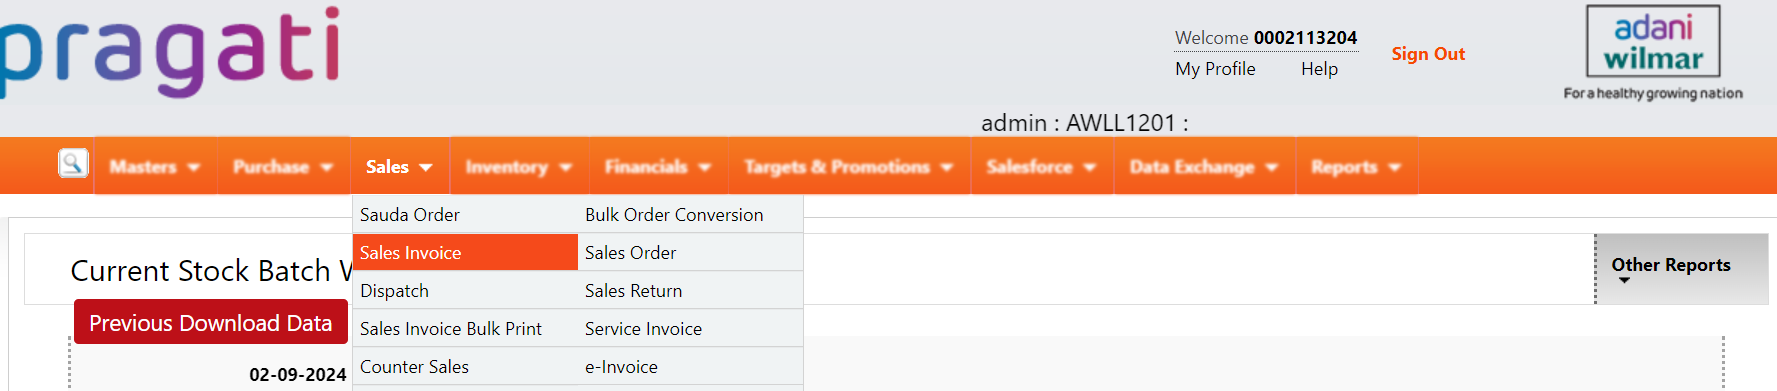
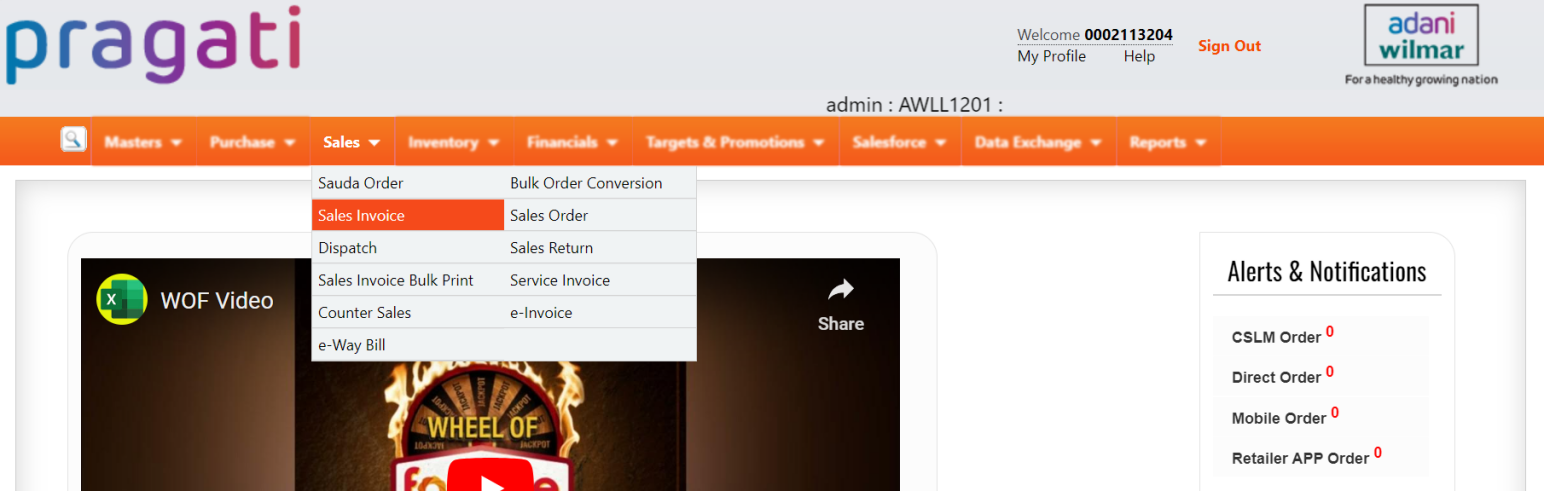
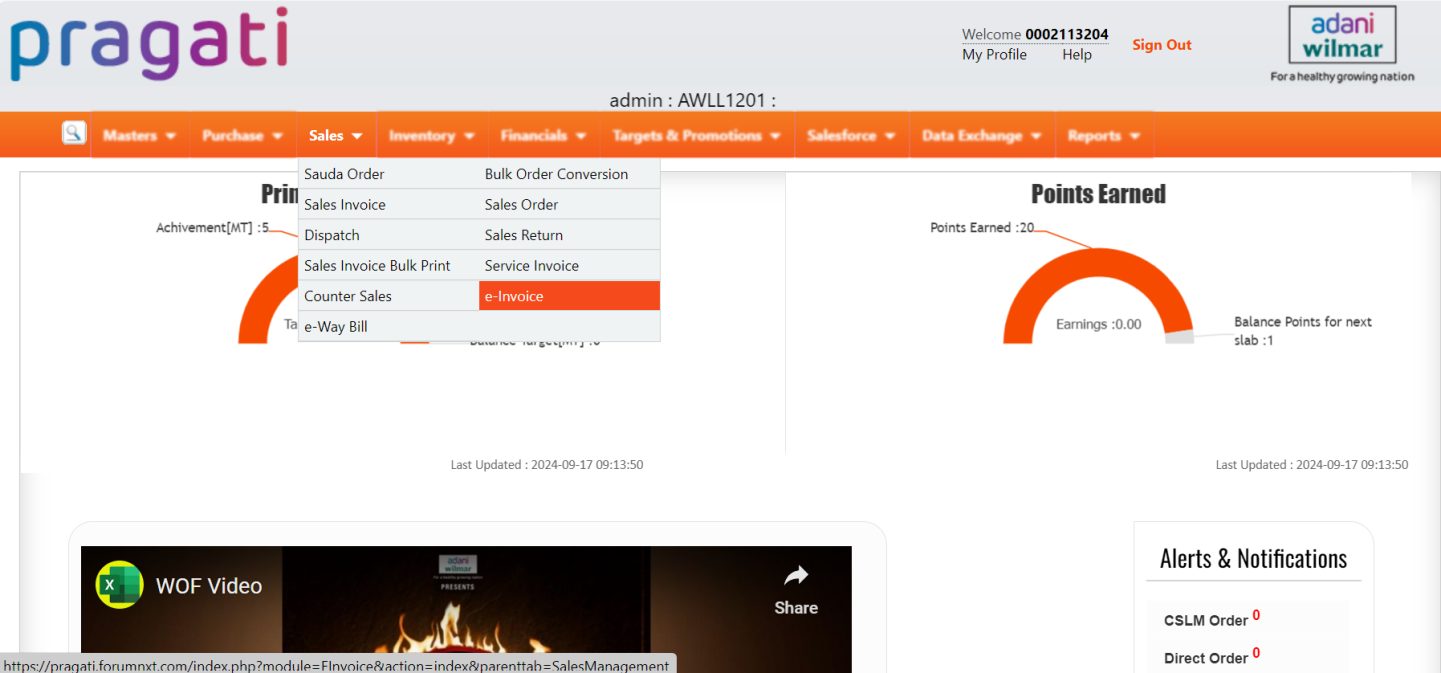
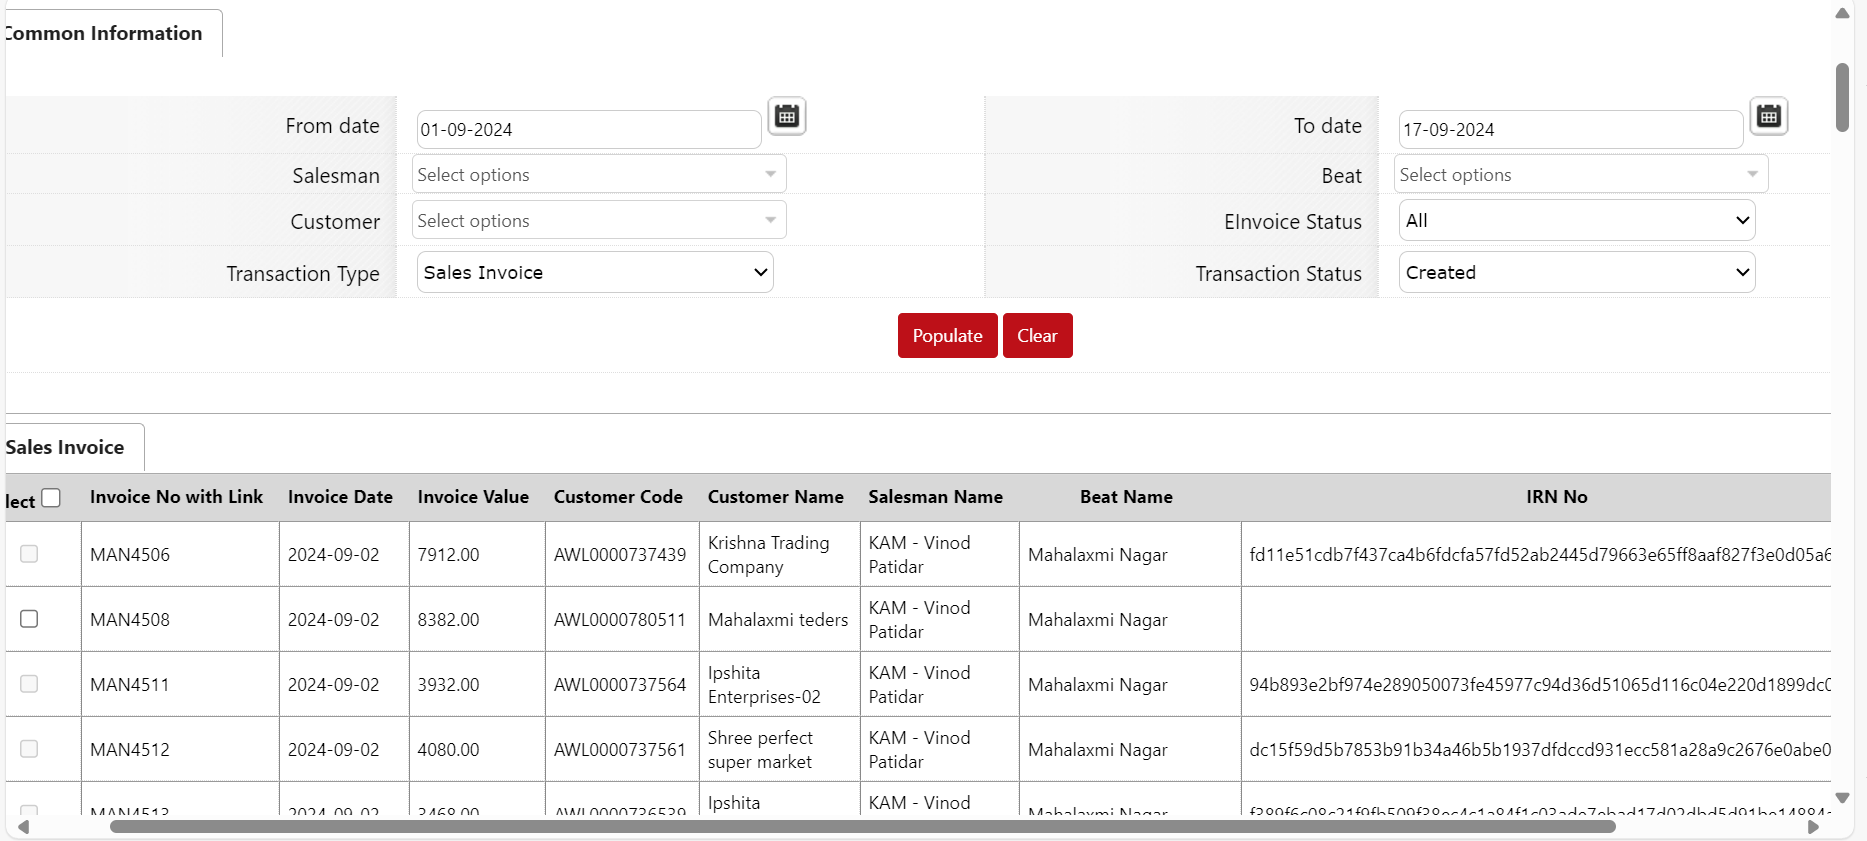
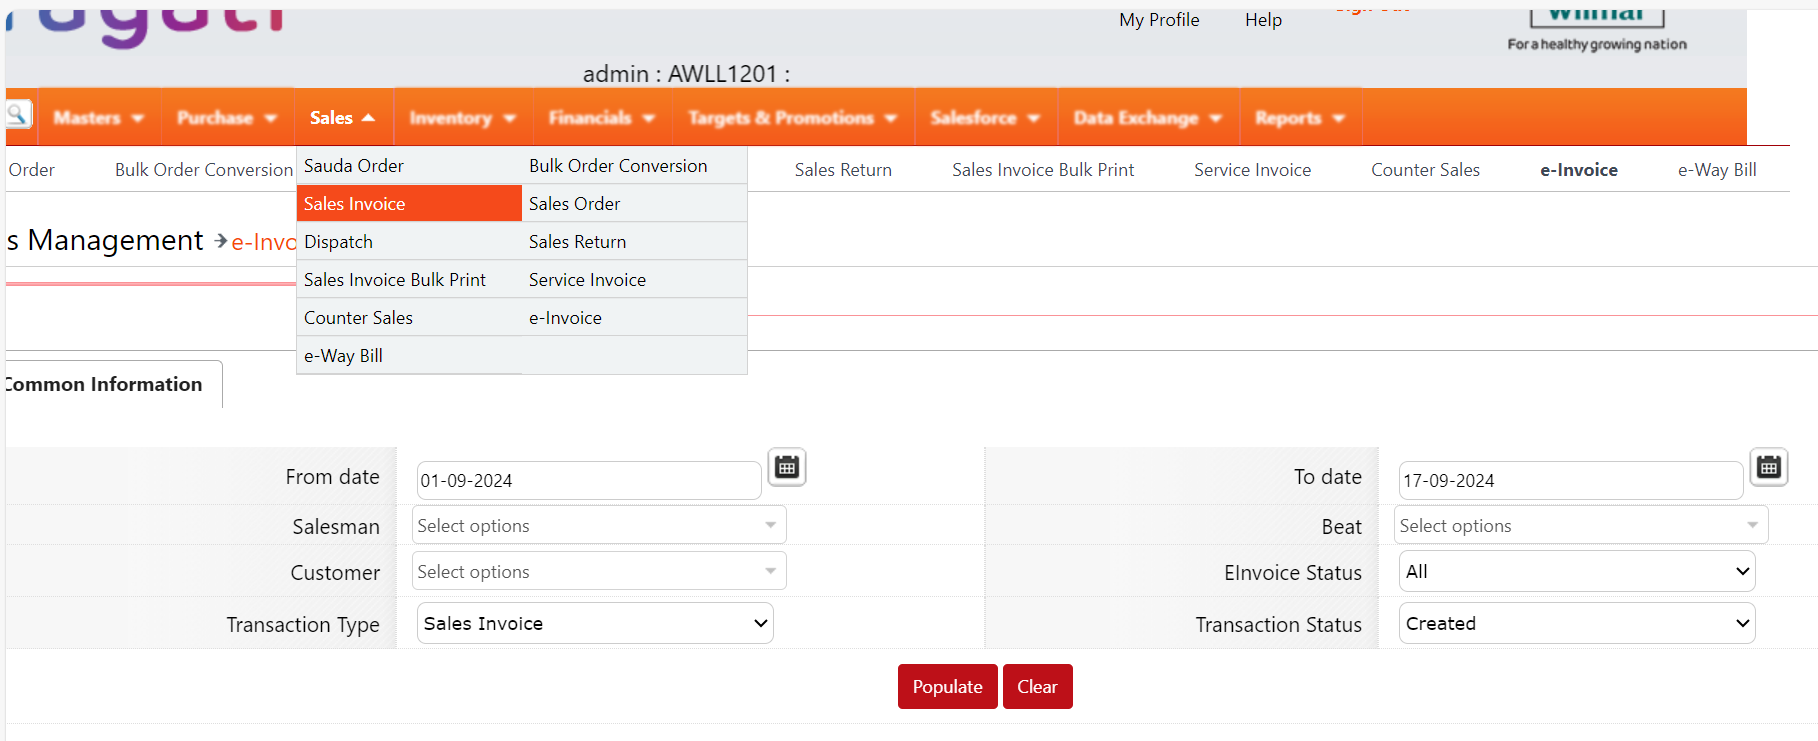
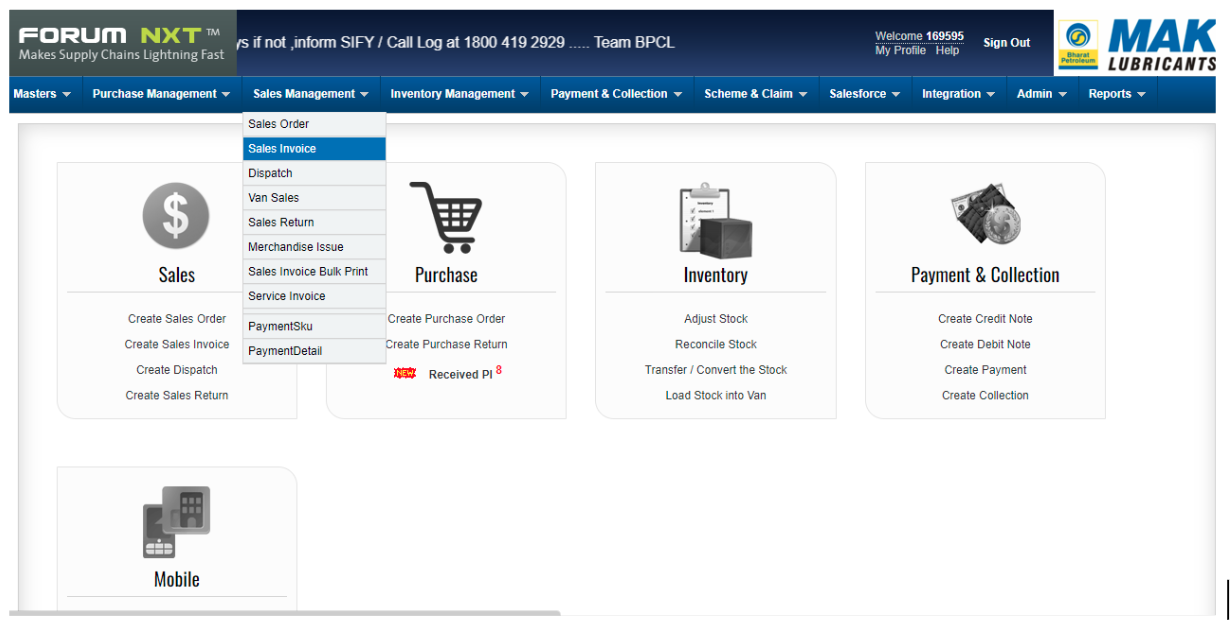
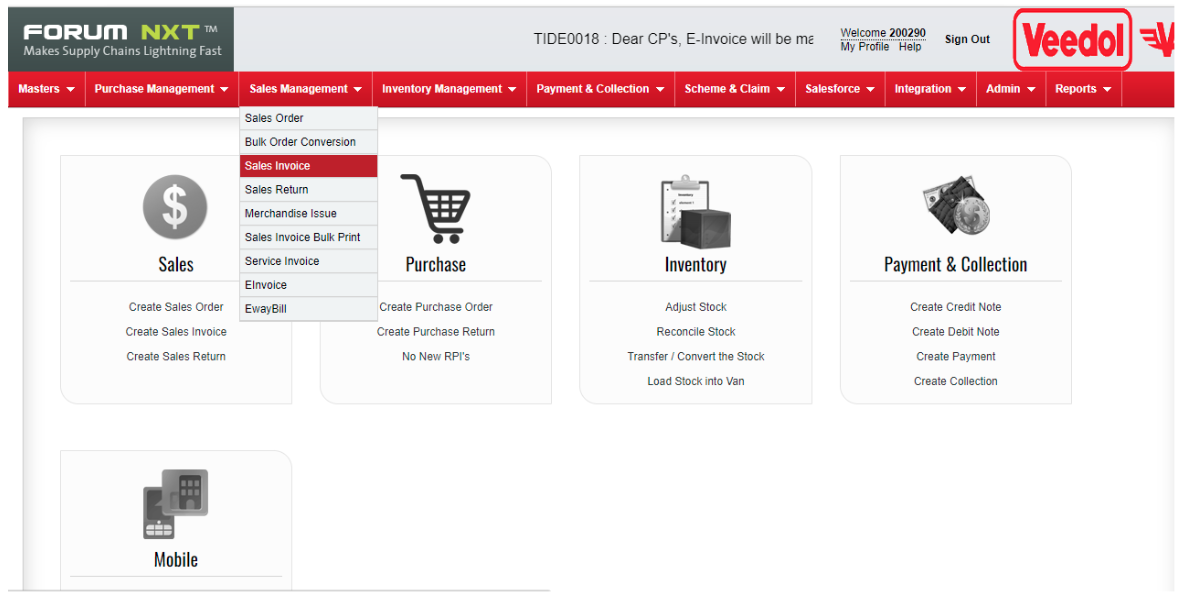
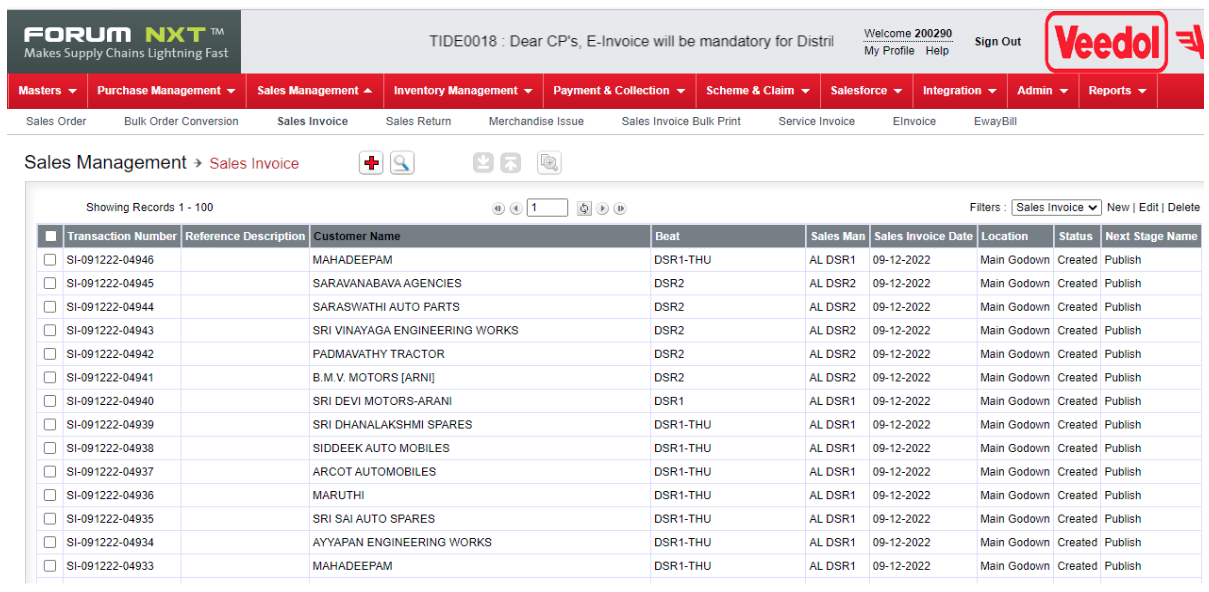
Navigate to Sales Invoice:
Go to Sales → Sales Invoice.
Search for the invoice using the provided invoice number.
Check whether the GSTIN is already updated in the invoice.
2. If GSTIN Not Updated (Blank):
You can update the GST number using the Quick Support Tool, but first, we need to validate the GSTIN number.
Go to Masters:
Navigate to Masters → Search for Customer by their name.
Note down the GSTIN number listed in Masters.
Cross-verify the customer-provided GSTIN with the one in Masters. If they match, you can proceed with updating the GST number.
Steps to Update GSTIN Using Quick Support Tool:
Step 1: Access the Corporate Portal
Go to the Corporate Portal and log in using:
User ID: Fsupport
Password: Provided credentials for Fsupport login.
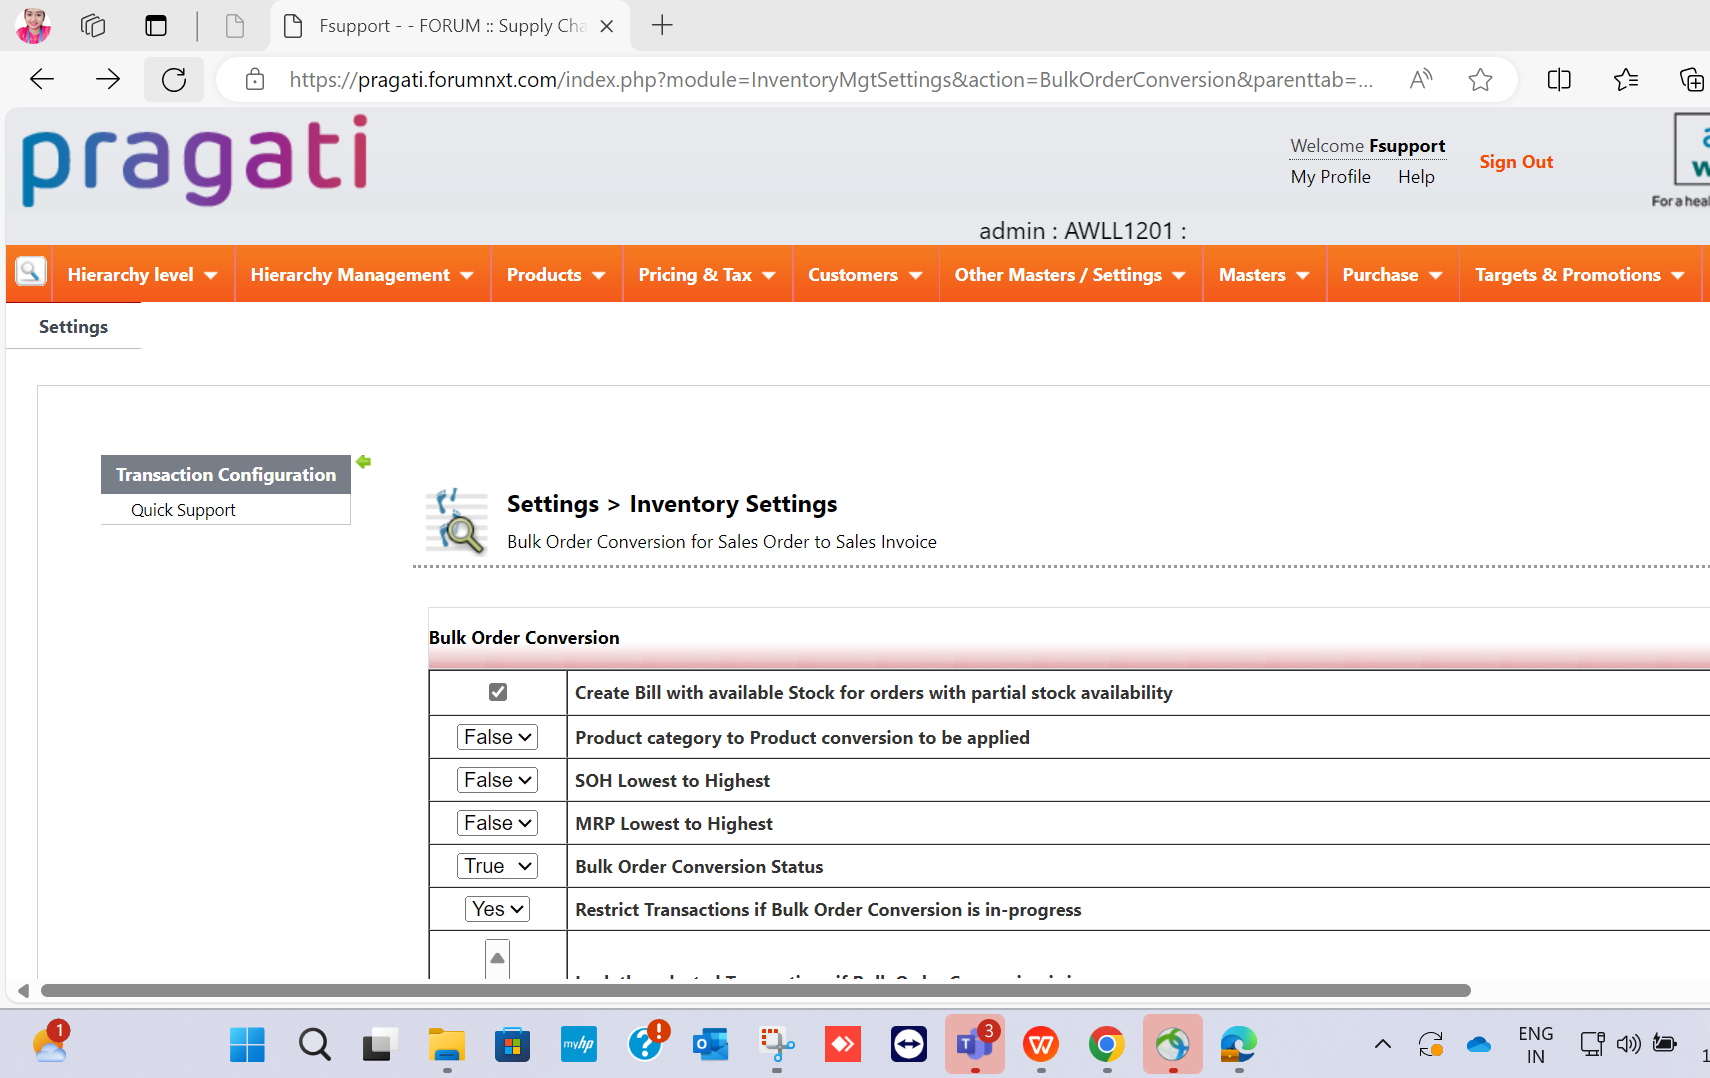
Step 2: Navigate to Quick Support
Go to Admin → Settings → Click on Settings → Click on Quick Support.
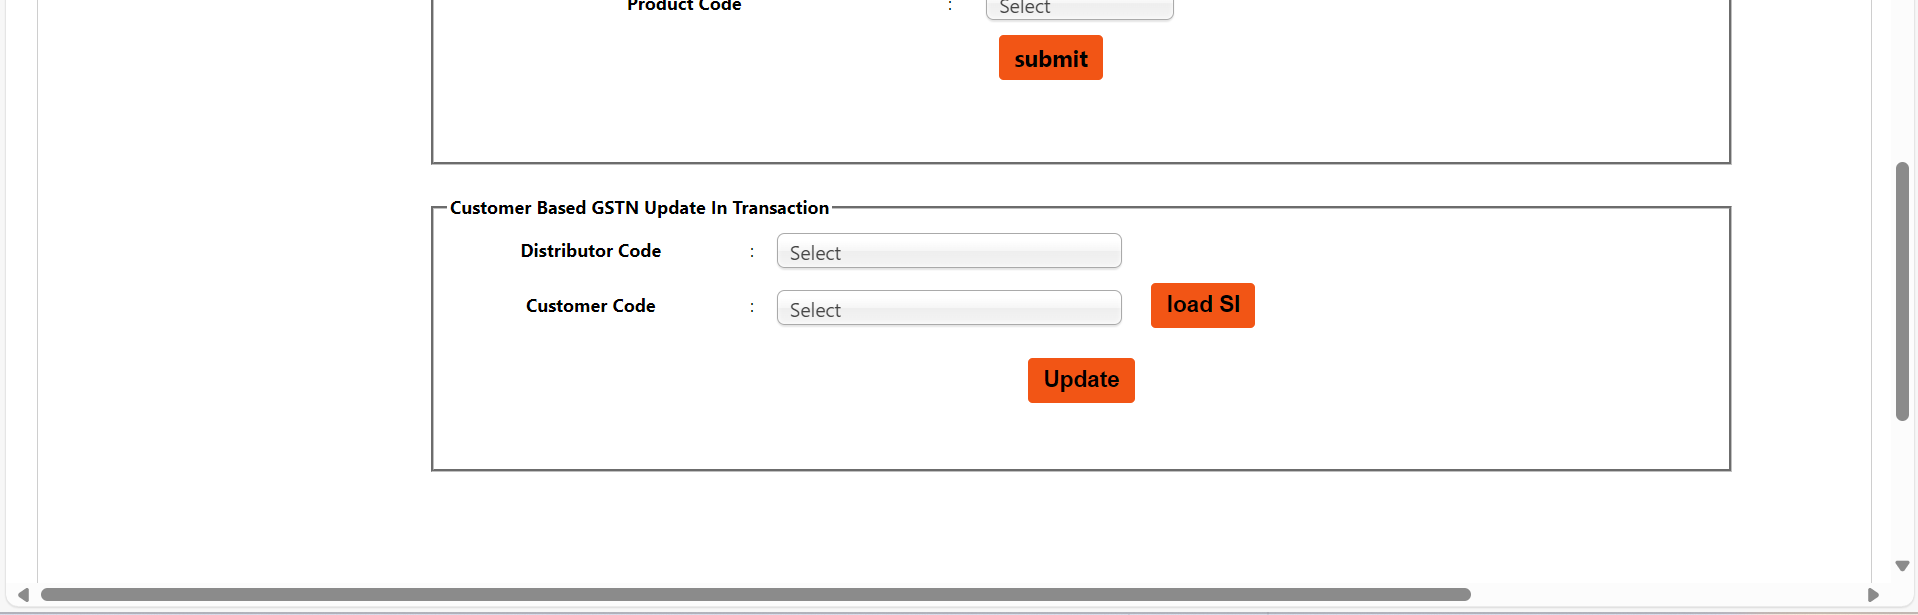
Step 3: Use the Customer-Based GSTIN Update Tool
Look for Customer-Based GSTIN Update in Transaction via the Quick Support Tool.
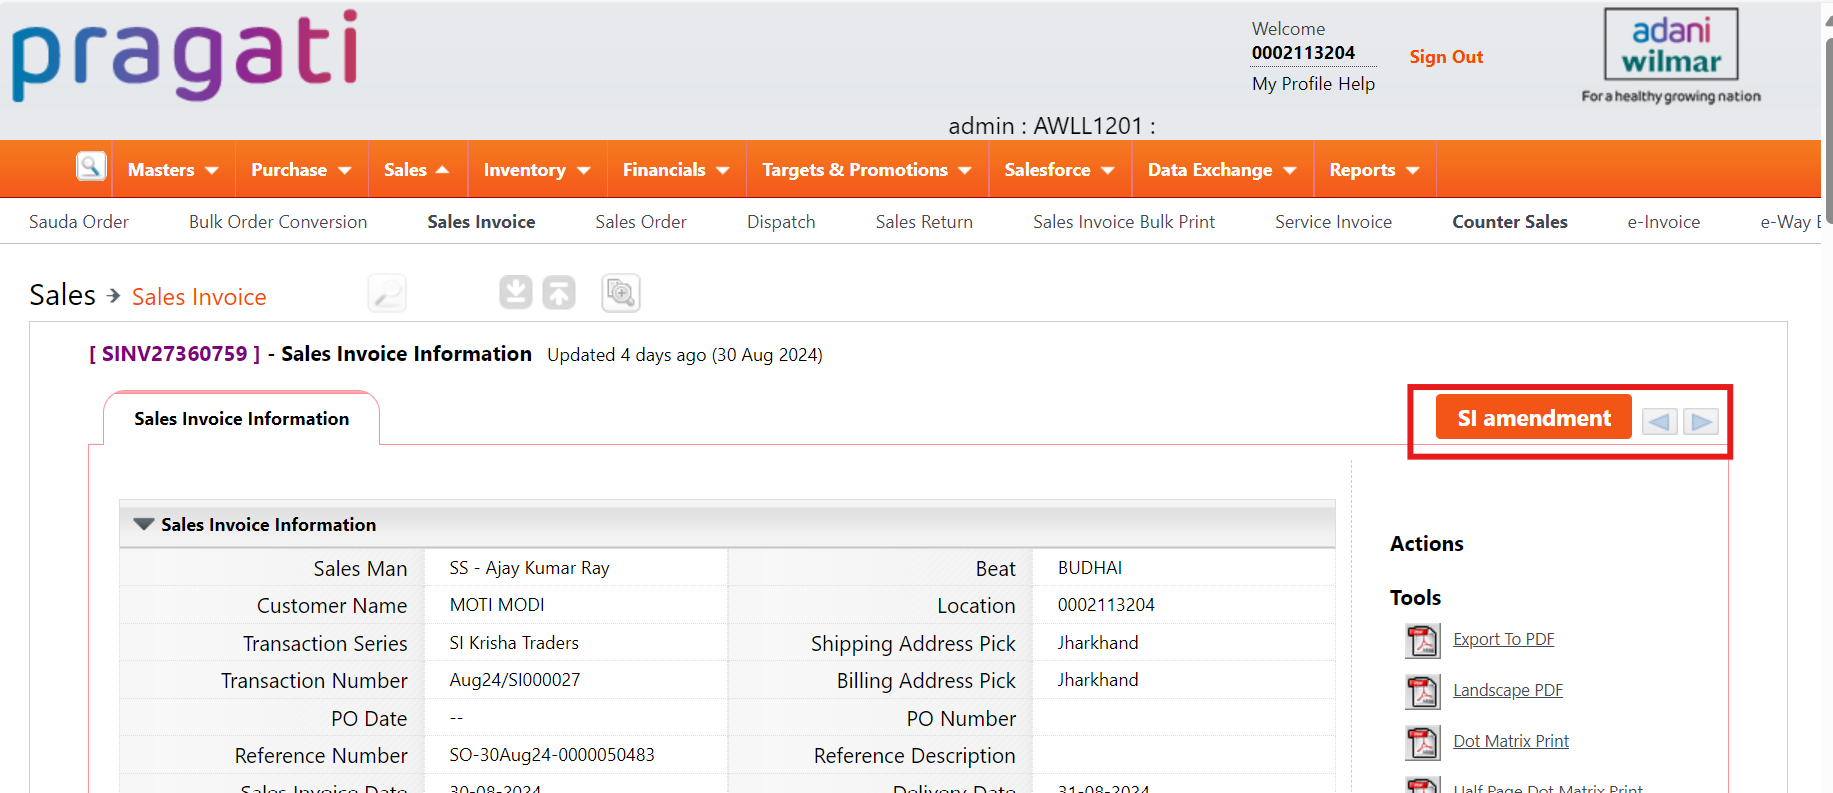
Step 4: Load Sales Invoice (SI)
Enter the Distributor Code and Customer Code.
Click on Load SI to load the relevant sales invoice.
Step 5: Update GSTIN Number
Once the sales invoice is loaded, click on the Update button.
This will update the GSTIN Number in the sales invoice based on the distributor’s GSTIN number.
Post-Update Tasks:
1.After updating the GST number in the DMS:
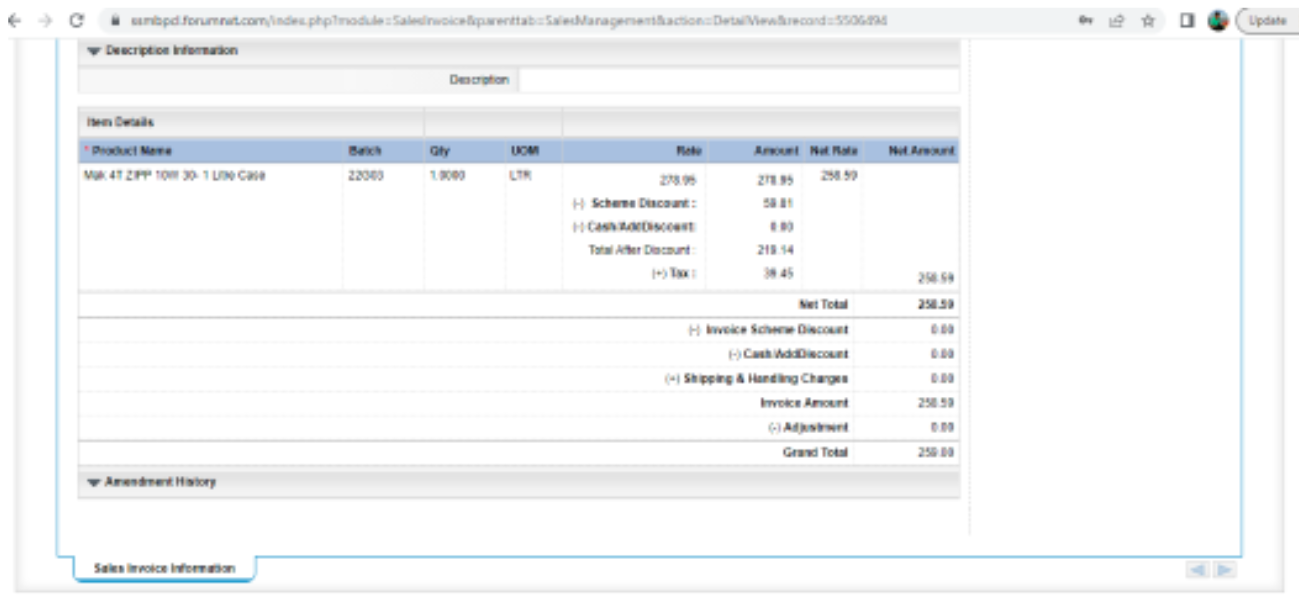
Navigate back to the DMS portal →Go to Sales → Sales Invoice.
Search for the sales invoice using the transaction number.
Verify whether the GSTIN number has been updated.
If the update is successful, take a screenshot and revert with an email to the customer.
2.Notify Customer and Update Tracker:
Send an email to the customer with the updated details and attach the screenshot.
Update the Quick Support Tool Tracker with the completion details for this request.
Request : Processing the complimentary invoices in ZFRG batch especially for DBPL.
Service Type : IR
Priority : Medium
Problem Code : Stock not getting updated in Purchase Invoice for a user
Inputs Required :
Distributor Code
Invoice Details
Workflow :
Important Notes :
Duplicate Invoices : Ensure invoice numbers are not repeated to avoid duplicates.
Invoice Limit : If there are more than 10 invoices, process 10 invoices per batch.
Focused Task : Avoid performing other activities while processing the invoice request.
Resolution Email : Ensure that resolution email includes detailed information of invoices processed in the ZFRG batch.
Case Tracker Update : Update the case details in the Quick Support Tool Tracker.
Slowness or Issues : If you encounter any slowness or technical issues, coordinate with the development team to resolve them.
Create a case in the ServiceNow portal and provide the case ID to the customer.
1. DMS Portal Validation :
Log in to the DMS portal
Navigate to Integration → Receive Purchase Invoice.
Verify whether all invoices are visible in the RPI menu.
2. Processing Steps (if invoices are visible in the RPI menu) :
Step 1 : Log in to the corporate portal (FSupport).
Step 2 :Go to Admin → Settings → Quick Support.
Step 3 : Locate the RPI to PI ZFRG batch process in Quick Support.
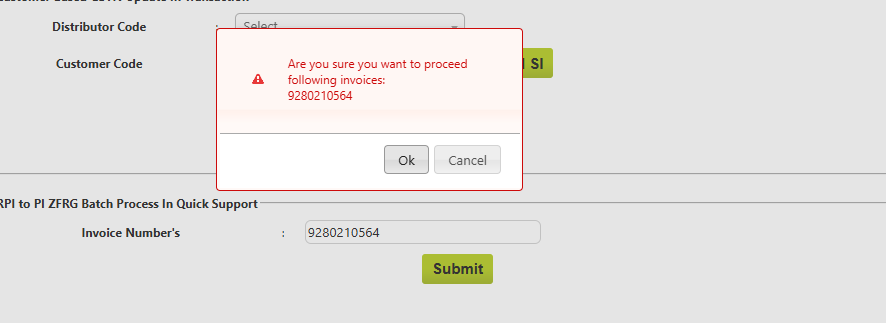
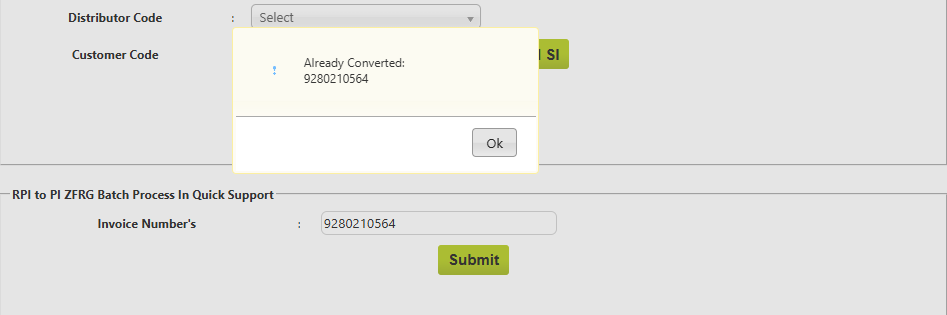
Step 4 : Enter the invoice numbers (separated by commas) and submit them.
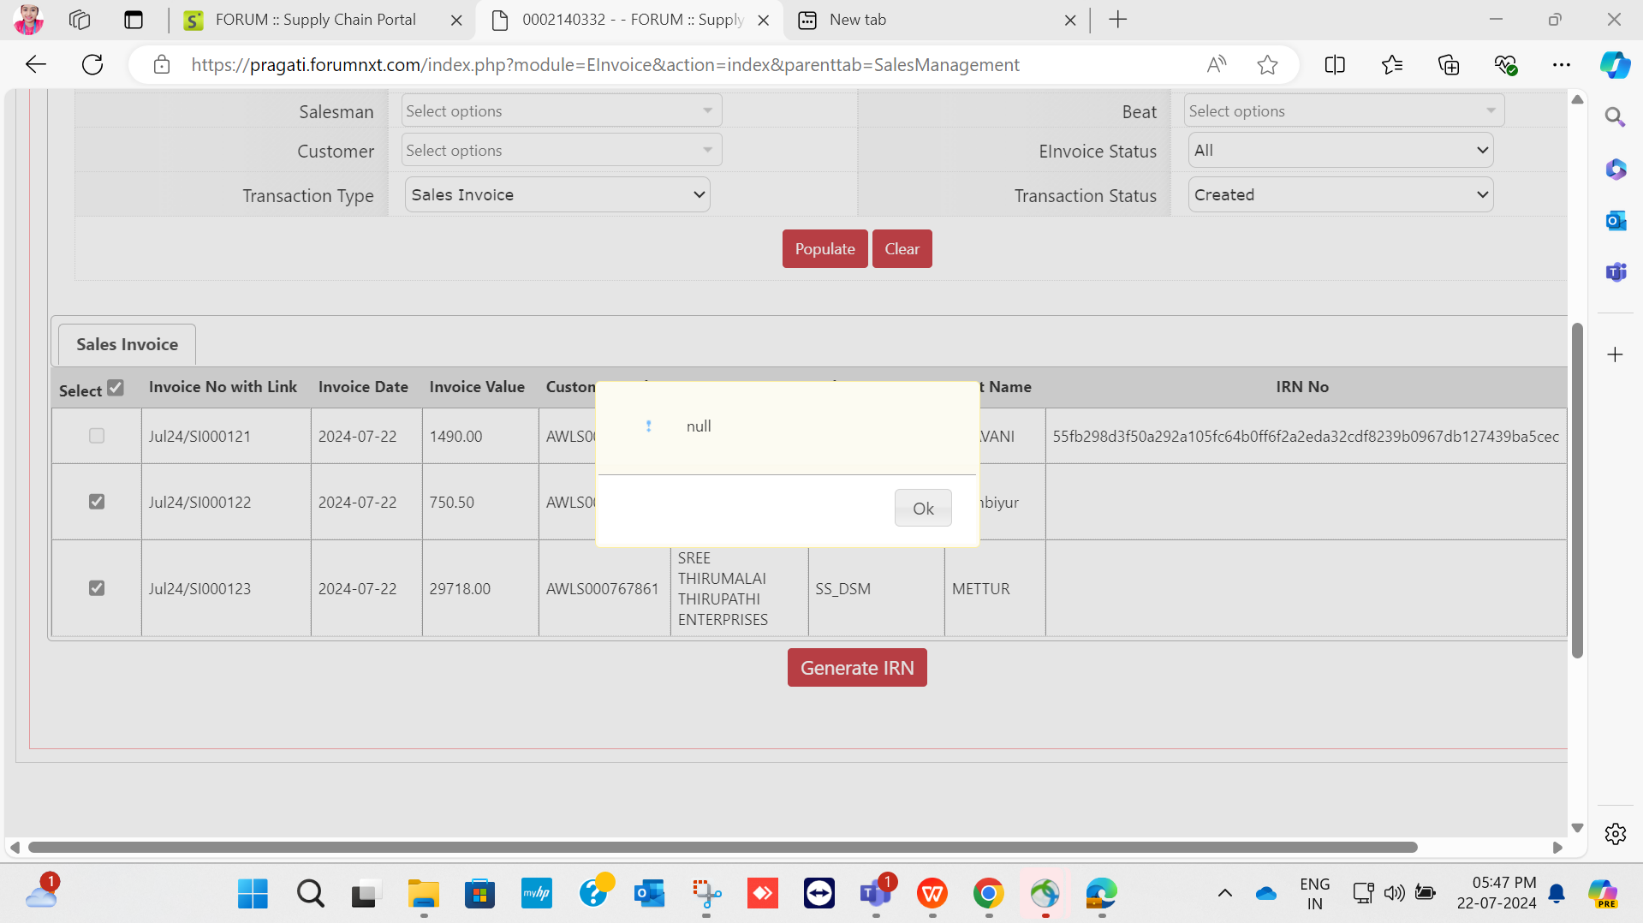
Step 5 : Confirm and validate the data, then click "OK".
Step 6 : All invoices will be processed in the ZFRG batch.
Note : If an invoice is already converted to PI, a validation message stating "Already converted" will be displayed.
3. Post-Processing Validation :
Log in to the Fsupport MD portal.
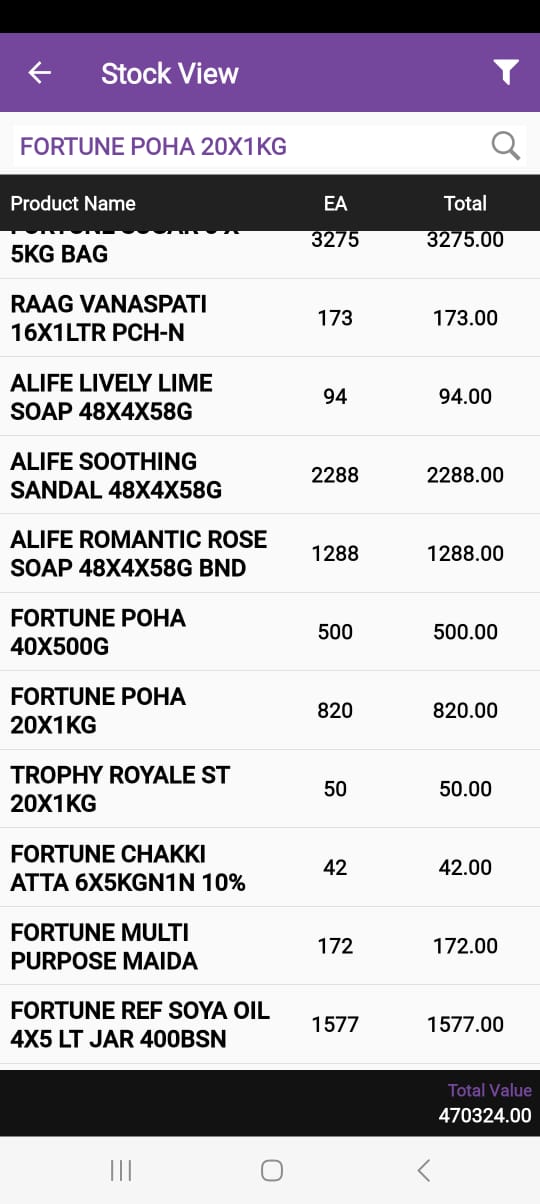
Select the respective distributor and download the current stock batch-wise report.
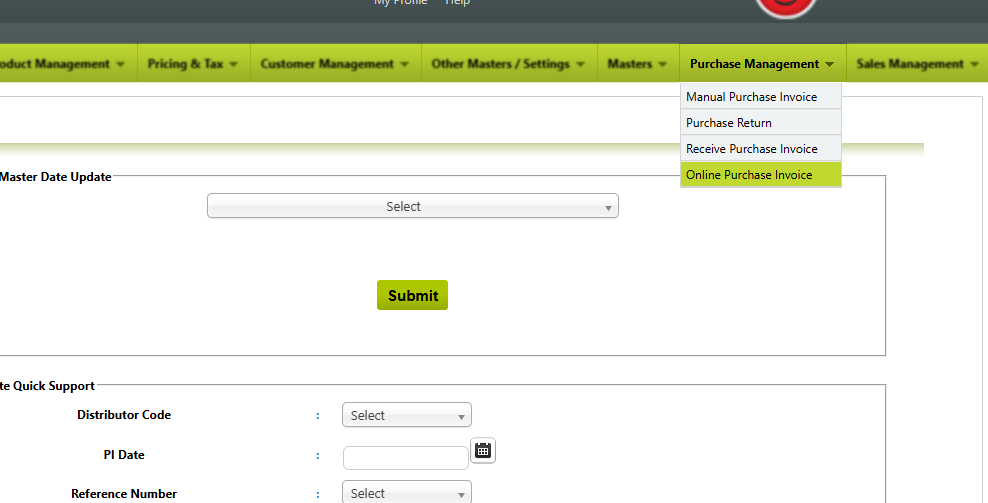
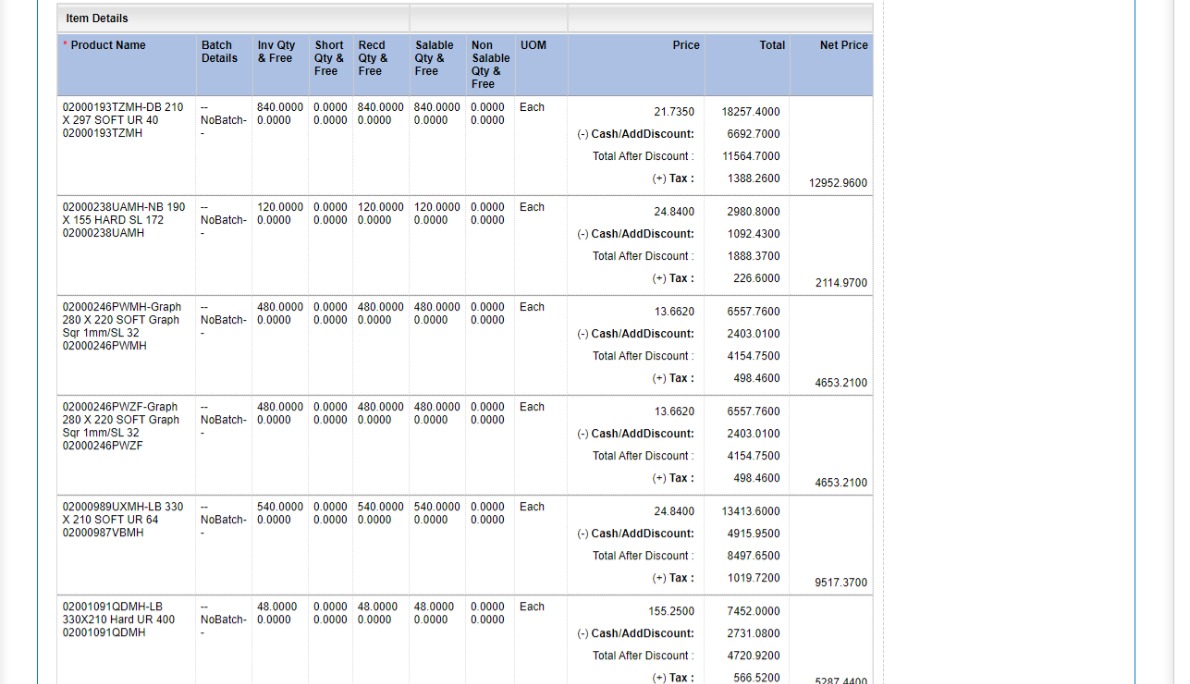
Navigate to Purchase Management → Online Purchase Invoice.
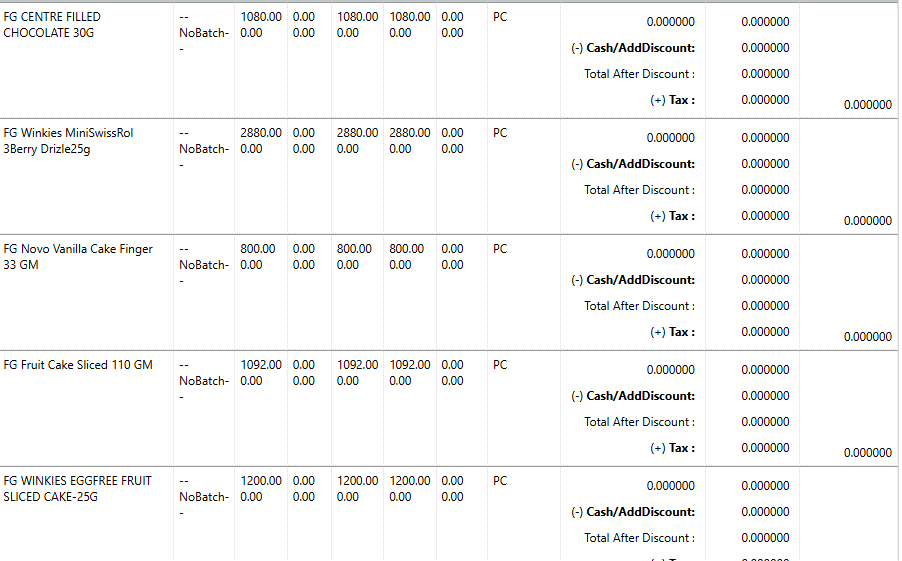
Open the relevant invoice and
Note down the product name and quantity.
Verify that the invoice amount for the respective product is "zero."
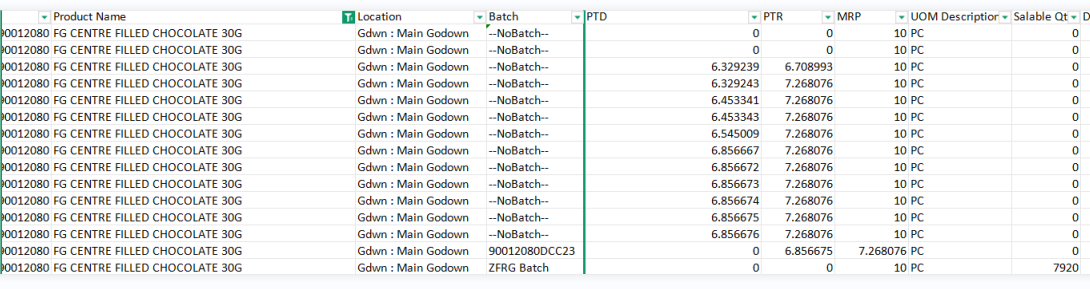
Go to Reports and validate the product details (batch and quantity) whether it has been added to saleable qty.
Send an email to the customer, attaching the invoice details and current stock report.
4. If invoices are NOT visible / Already Converted in the RPI menu :
Note down the invoice numbers.
Respond to the client with detailed information in the resolution email.
Version Summary
Author
Reviewer
Approver 1
Approver 2
Current Version
Current Version Published On
Maiden Version Published On
Pavithra M
Nisha Bhatt
Julian Shawn Dmonte
Karthick Krishna Kumar, Subramanian, Kannan
2.2
12/05/2025
22/11/2024
Surekha
Nisha Bhatt
Julian Shawn Dmonte
Karthick Krishna Kumar, Subramanian, Kannan
2.1
22/11/2024
22/11/2024
OBJECTIVE:
This document provides a workflow for updating receive purchase invoice in DMS.
Issue Short Description: Update invoice in distributor portal Service Type: SR Priority: Low Problem Code: Others
Note: If distributor code is not provided, find the Distributor Code associated with that distributor in corporate portal.
Workflow:
Create a case in the Servicenow portal and provide the case ID to the customer.
Contact the distributor to get additional information and request for clarification if needed.
To validate whether the RPI is already available in the system, follow these steps:
Log in to the Distributor Portal:
Use credentials to access the distributor portal.
Step 1: Check for Existing RPI in Online Purchase Invoice
1. Go to Purchase Module
In the distributor portal, navigate to the Purchase section.
2. Select Online Purchase Invoice
o Under Purchase, select Online Purchase Invoice.
3. Search with Invoice Number
Enter the relevant invoice number in the search bar and look up the invoice.
4. Check for RPI
Validate if the RPI information is visible for this invoice. If it’s available, no further action is required.
Step 2: Check in Data Exchange if RPI is Unavailable in Online Purchase Invoice
If the RPI is not showing in the Online Purchase Invoice, proceed with these steps:
1. Navigate to Data Exchange
Go to the Data Exchange section in the portal.
2. Select Receive Purchase Invoice
Under Data Exchange, choose Receive Purchase Invoice.
3. Search with Invoice Number
Search again using the invoice number to check if the RPI data is available here.
4. Check for RPI
Verify if the RPI is visible in this section.
Step 3: Proceed to RPI Import if Not Available in Both Locations
If RPI information is not found in either Online Purchase Invoice or Receive Purchase Invoice, proceed with the following steps to import it:
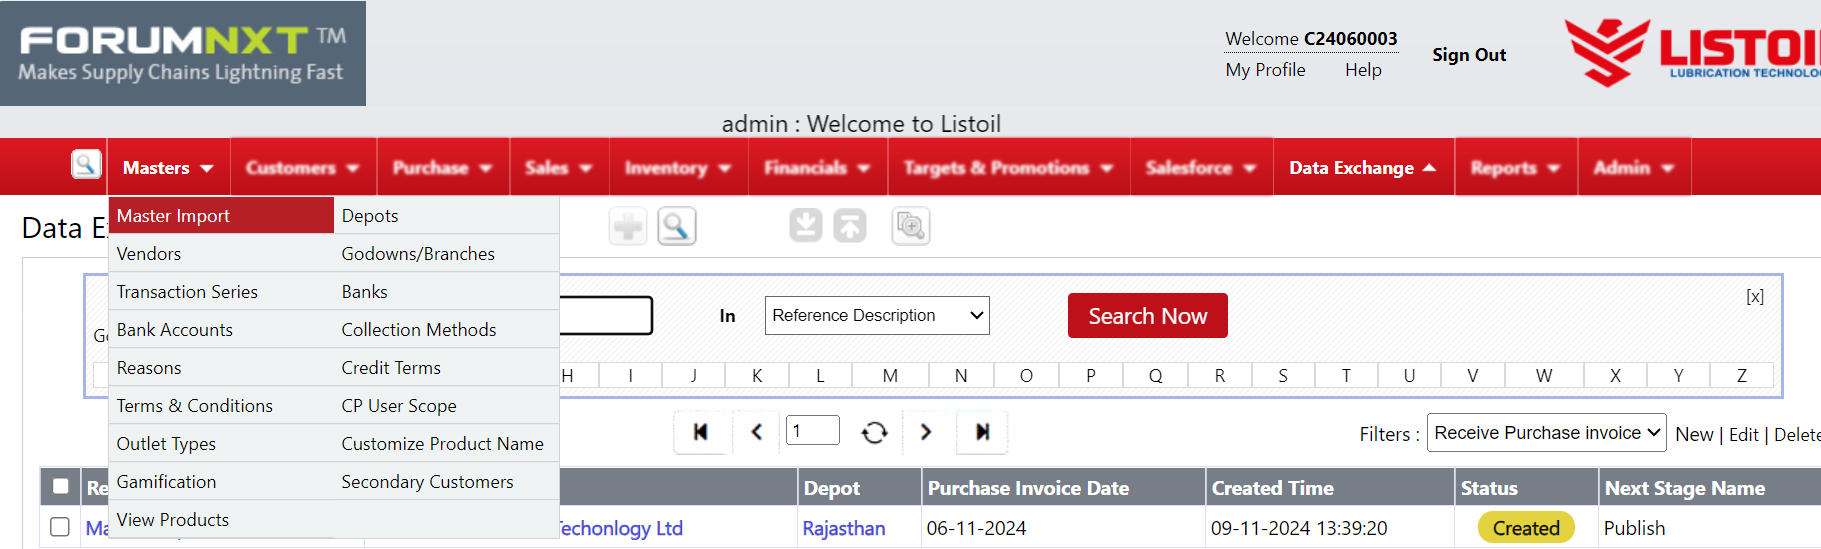
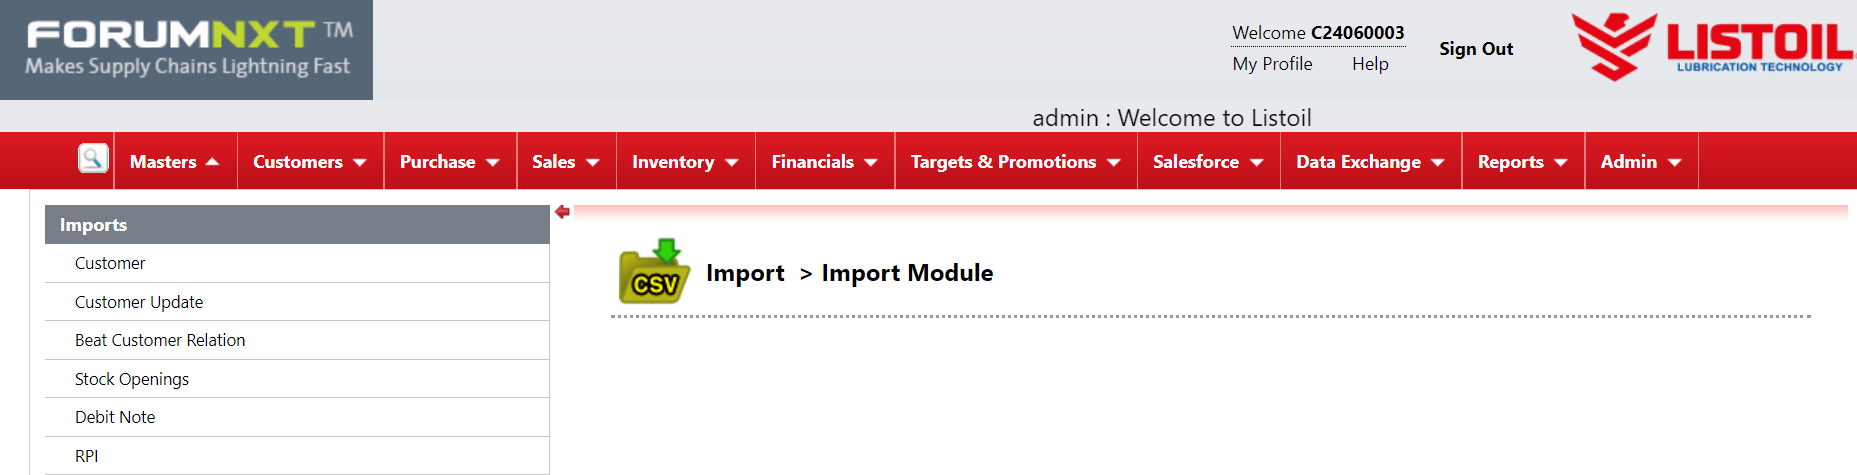
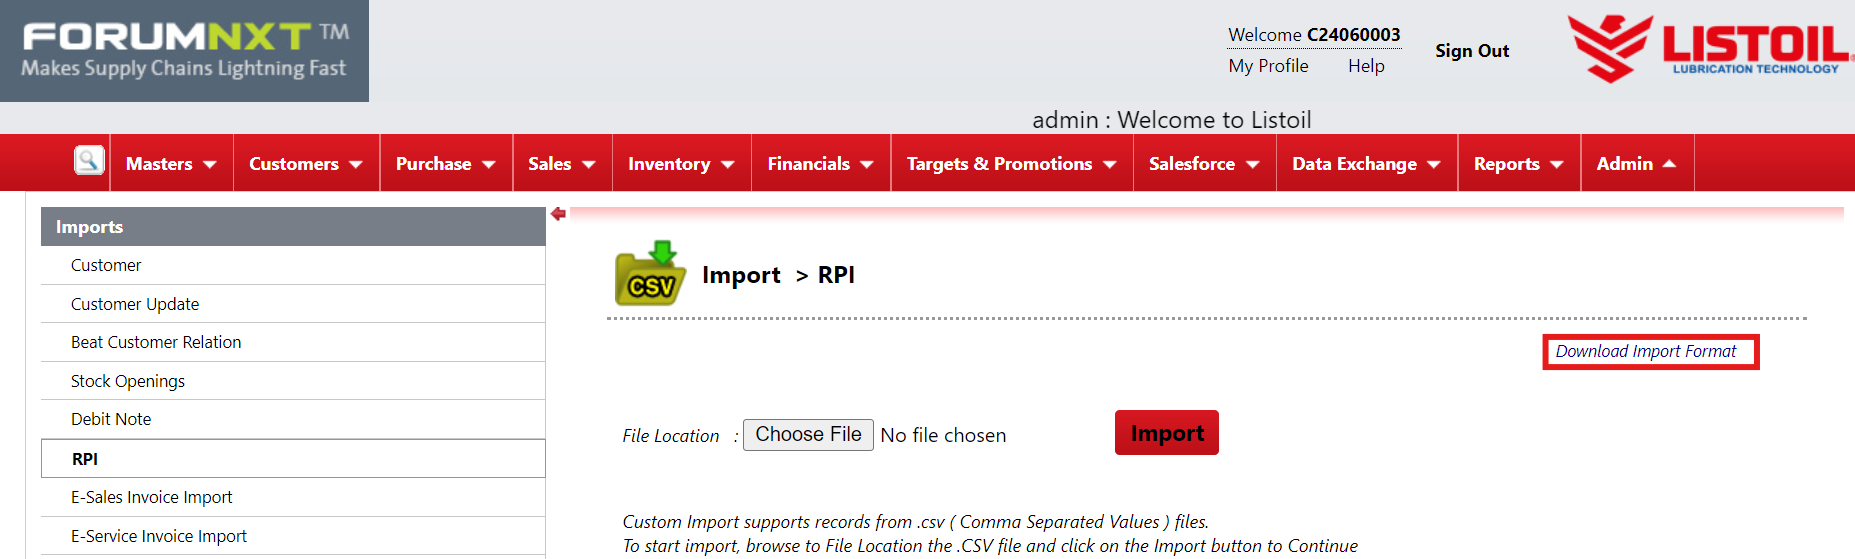
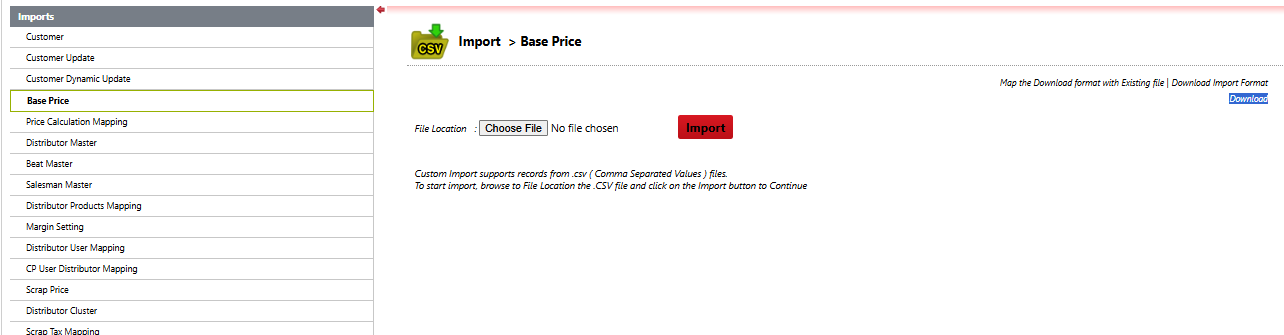
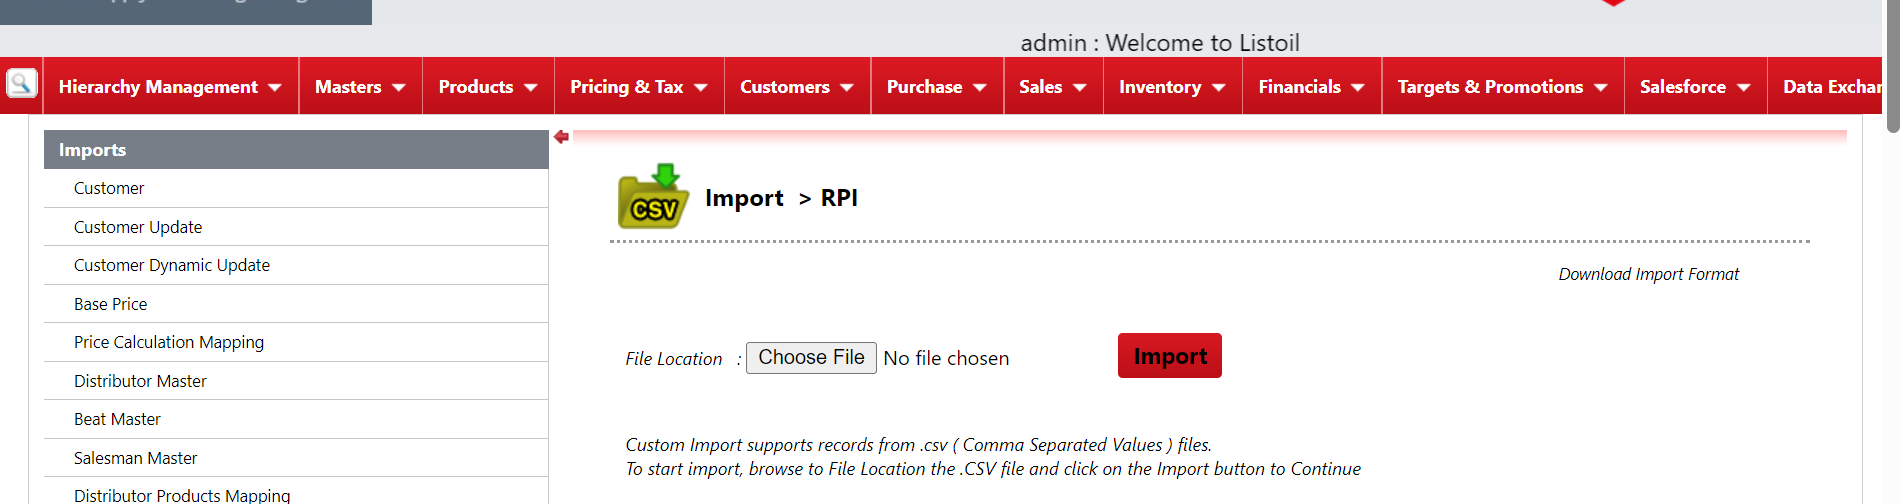
1. Go to Masters → Master Import → RPI
2. Download the Import Format
3.Fill in the Required RPI Data and upload it back to the portal.
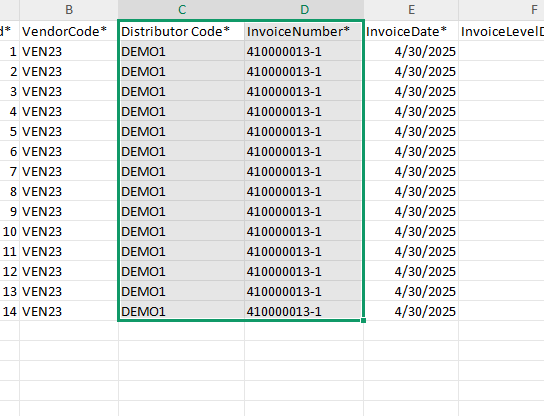
Vendor Code: Default code for all distributors (VEN23)
Distributor code: Enter the respective distributor code
Invoice Number: Enter the respective invoice number
Invoice Date: Enter the respective invoice Date
Invoice level discount: Overall discount applicable to the entire invoice
Depot code (DPT1)
SKU code: Fill in the SKU code for each item as listed
TUOM: Units by default
Reference description: Manual Import by default
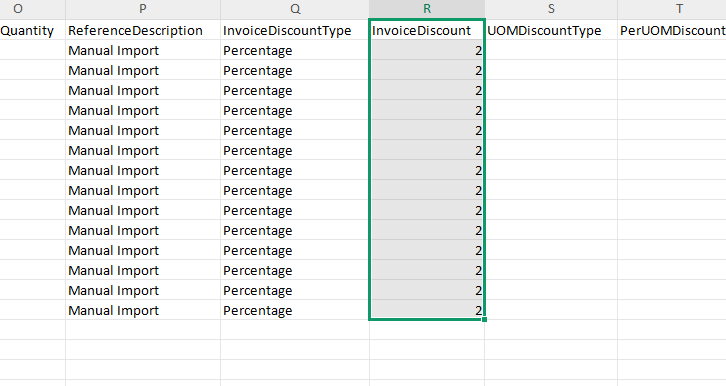
Invoice discount: It refers to the SKU wise discount amount
PTS - Price Per unit
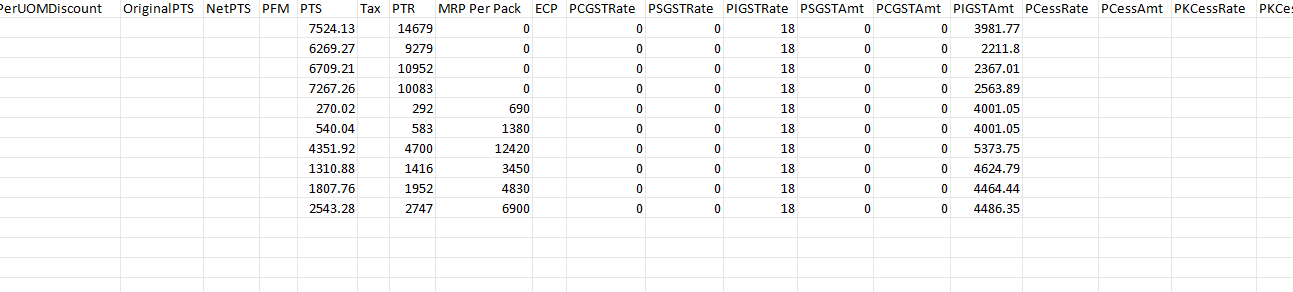
PTR, MRP - Download the base price data from corporate portal and update the same to import.
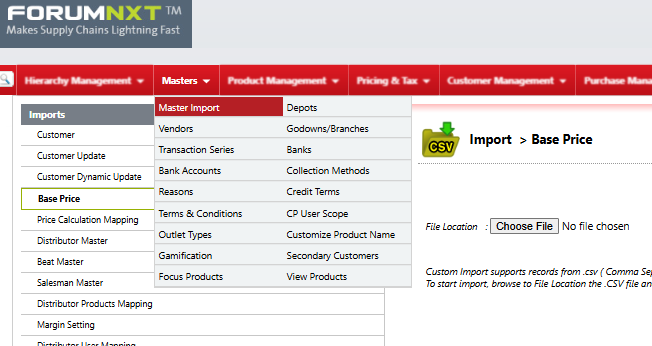
Kindly find the Steps to download the base price data from the CP portal :
Step 1 : Log in to the Fsupport CP portal.
Step 2 : Masters ---> Master import
Step 3 : Base Price ---> Click on download.
Step 4 : Fill the latest updated PTR and MRP values.
Finally update the GST Percentage & Amount- Based on the Percentage and amount mentioned in the invoice
Note: Ensure that the RPI file is saved in CSV format before uploading it to the system.
There is a set of default values for fields like Vendors, Depot Code, TUOM (Total Units of Measure), and Reference Description that apply to all distributors. Refer to the document while filling out the RPI import template file.
If we encounter an error during upload, such as "SKU is not mapped to the distributor," follow these steps to resolve it by mapping the SKU to the respective distributor in distributor cluster.
1.Log in to the Corporate Portal
Access the corporate portal using your credentials.
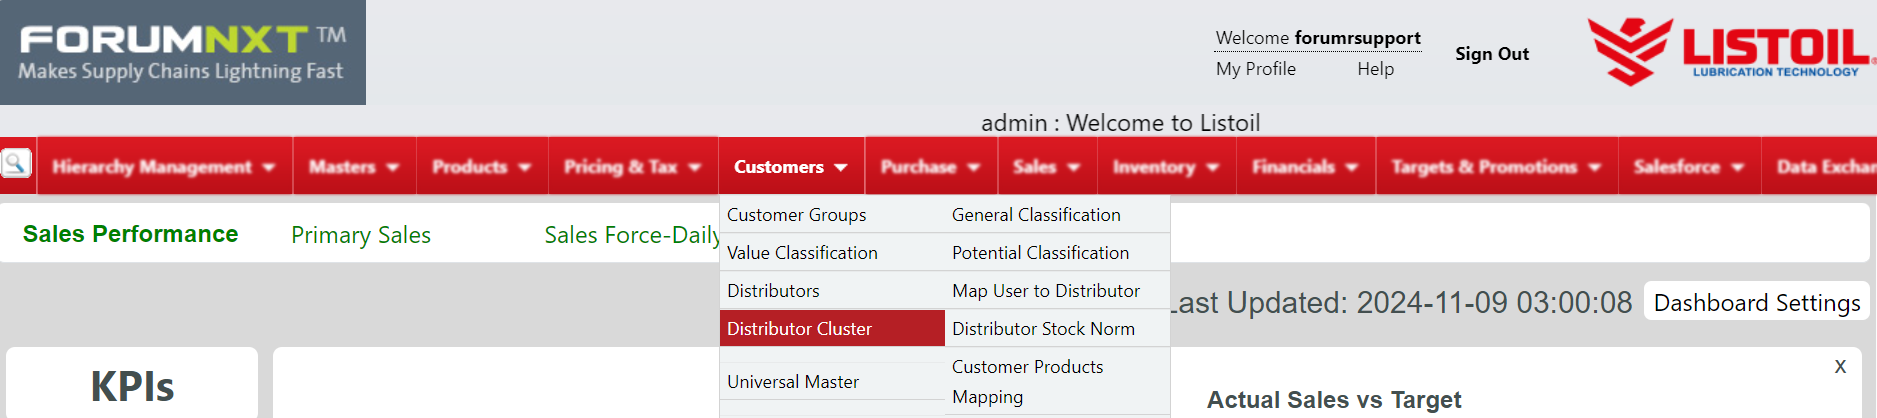
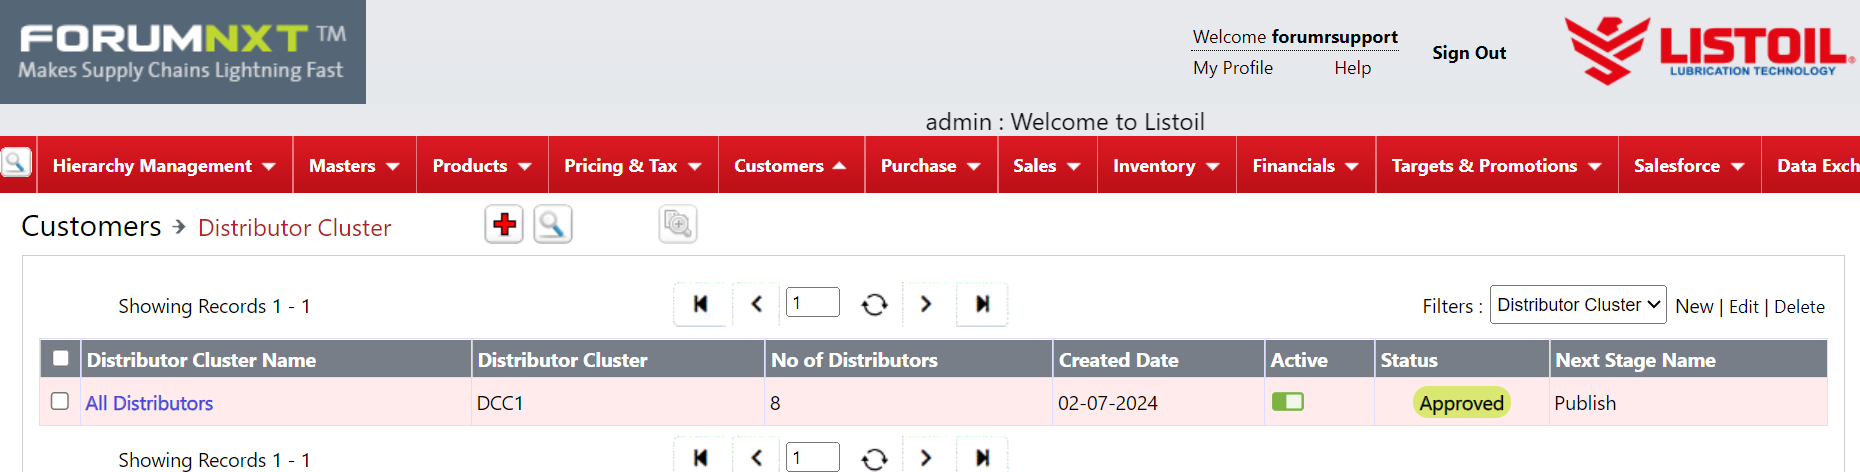
2.Navigate to Customer > Distributor Cluster
Go to theCustomer section and select Distributor Cluster.
3.Select All Distributors
In the Distributor Cluster,choose All Distributors to see a list of all distributors in the system.
Validate the respective distributor is mapped or not. If not map the distributor.
Once mapped, save the changes and approve.
4.Re-import the File in the Distributor Portal
Return to the distributor portal.
Re-import the RPI file under Masters → Master Import → RPI.
When ever the RPI import request is raised by HO, Confirm with them if 2% product level discount should be applied.
If there is no 2% product level discount follow the ABOVE procedure to import the RPI.
If the 2%product level discount to be applied, then follow the BELOW mentioned procedure to import RPI.
If the percentage discount is not been applied in the given RPI, then confirm with the customer if there is any percentage discount to be applied in the RPI.
Get the percentage details from the customer to get applied in the RPI and then import in DMS to get the exact amount.
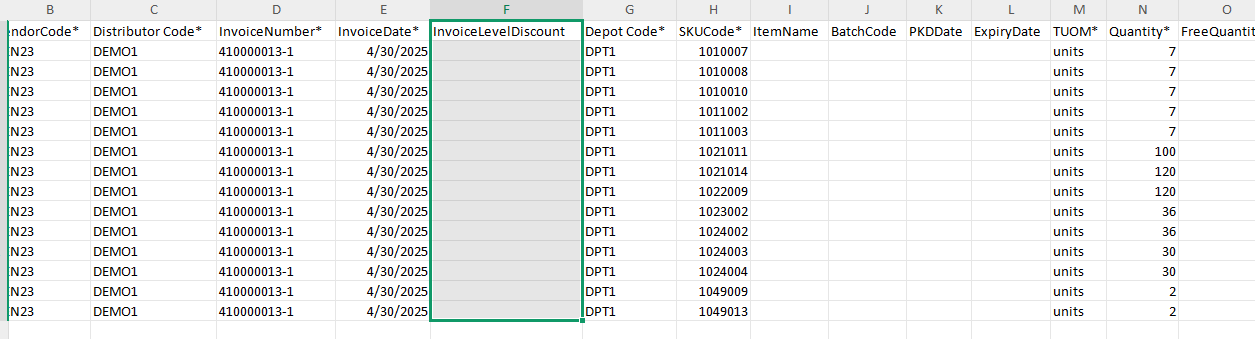
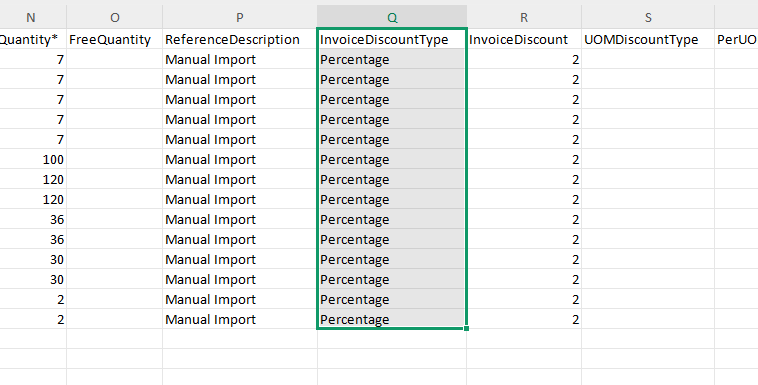
Follow the below mentioned steps to apply the product level percentage discount in the RPI :
Step 1 : Remove the invoice level discount given in the RPI for all the products.
Step 2 : Fill the Invoice discount type column using “Percentage”.
Step 3 : Fill the number of percentage to be applied at product level in invoice discount column.
Step 4 : Save the file in CSV format to import in DMS.
Before importing the RPI file in the distributor portal check once in the test distributor portal.
Test Distributor ID & Pass - DEMO1.
To import in Demo distributor portal, change the Distributor code as DEMO1and also change the invoice number.
(Note : This is only to check if we have given the inputs correctly)
Note : If the file is imported correctly without any price mismatch in the DEMO distributor, then correct the actual distributor code and invoice number in the RPI import file and import the same file in the appropriate distributor portal.
After importing the RPI in actual distributor portal, Check once if it is correctly imported.
Version Summary
Author
Reviewer
Approver 1
Approver 2
Current Version
Current Version Published On
Maiden Version Published On
Mohammed Kashif
Doppa Alekya
Julian Shawn Dmonte
Kannan
2.2
20/05/2024
22/11/2024
Pavithra M
Nisha Bhatt
Julian Shawn Dmonte
Karthick Krishna Kumar, Subramanian, Kannan
2.1
22/11/2024
22/11/2024
OBJECTIVE:
This document provides a structured workflow for resolving the issue when a scheme is not applying correctly in a sales invoice for a user:
ISSUE DETAILS:
Issue Short Description for ref : Scheme not applying correctly Service Type : IR Priority : Critical Service Req Type : Schemes Not Applying in Sales Invoice for a user
INPUTS:
1. Request the customer to explain the issue via call or remote session if needed.
2. Error screenshot (if any).
3. Distributor Information.
4. Scheme details.
5. Product details (if the issue is related to a specific product).
6. Customer name (if specific to a customer).
Workflow:
Create a case in the ServiceNow portal and provide the case ID to the customer.
Reach out to the customer to gather more information about the issue, if required.
Need to analyze the issue based on the following steps:
■ Log in to the DMS Portal using the Distributor Credentialsprovided by the customer. ■ If the Distributor Credentials are not available, use the Corporate Portal with User ID/Password: FsupportMD or Fsupport.
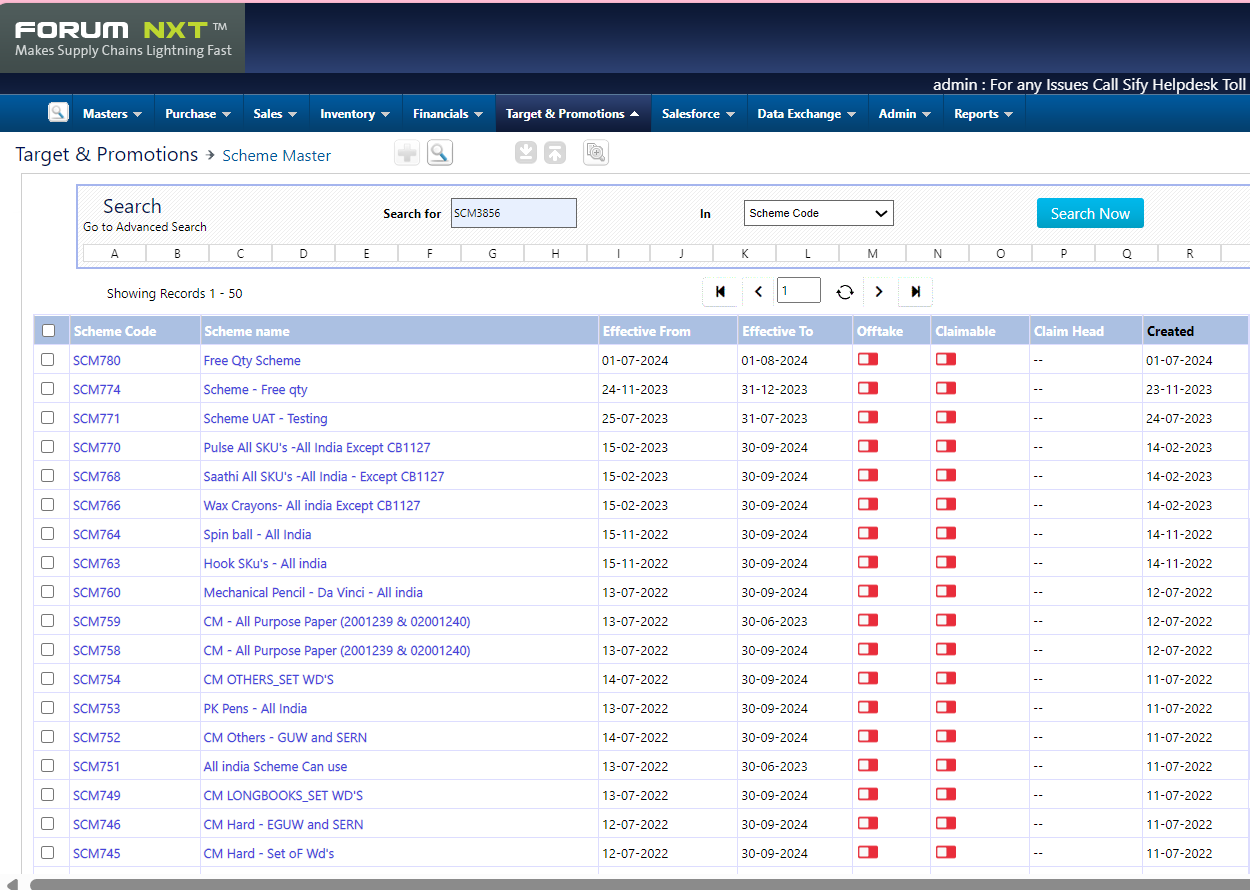
1. Navigate to the Scheme Master
Go to Target & Promotions --> Scheme master and search for the scheme.
Checklist for Scheme Validation:
Check Scheme Mapping
Search using the scheme code.
Ensure the scheme is mapped to the distributor. If it appears, it is mapped.
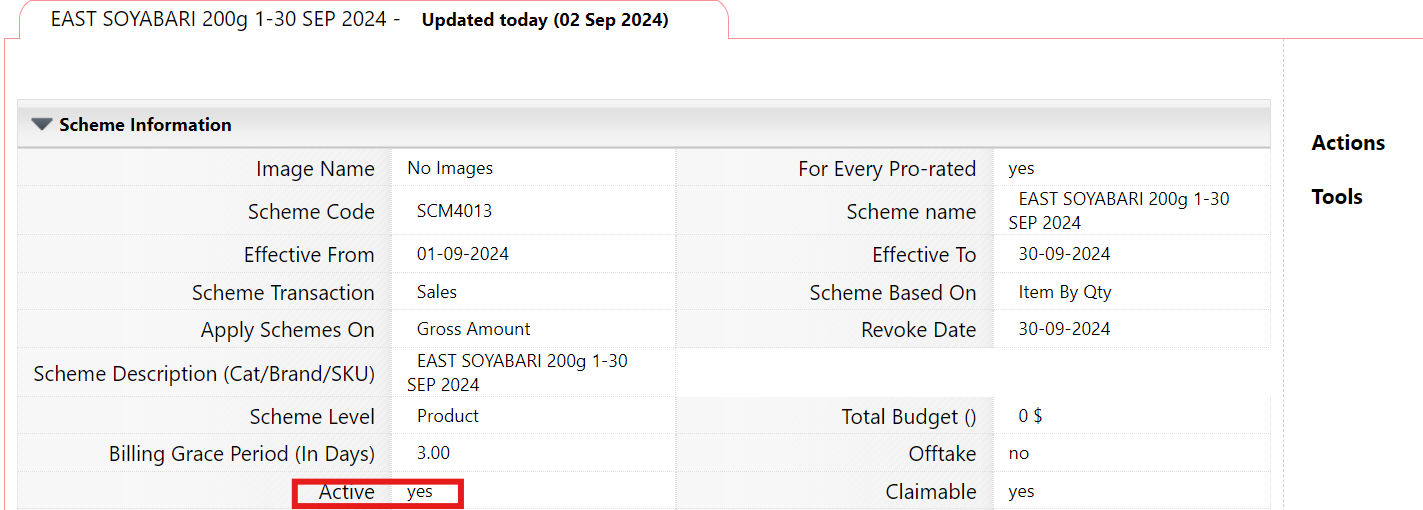
Verify Scheme Status:
Confirm that the scheme is "Approved".
Check the effective from/to dates and revoke date.
Ensure the scheme is Active.
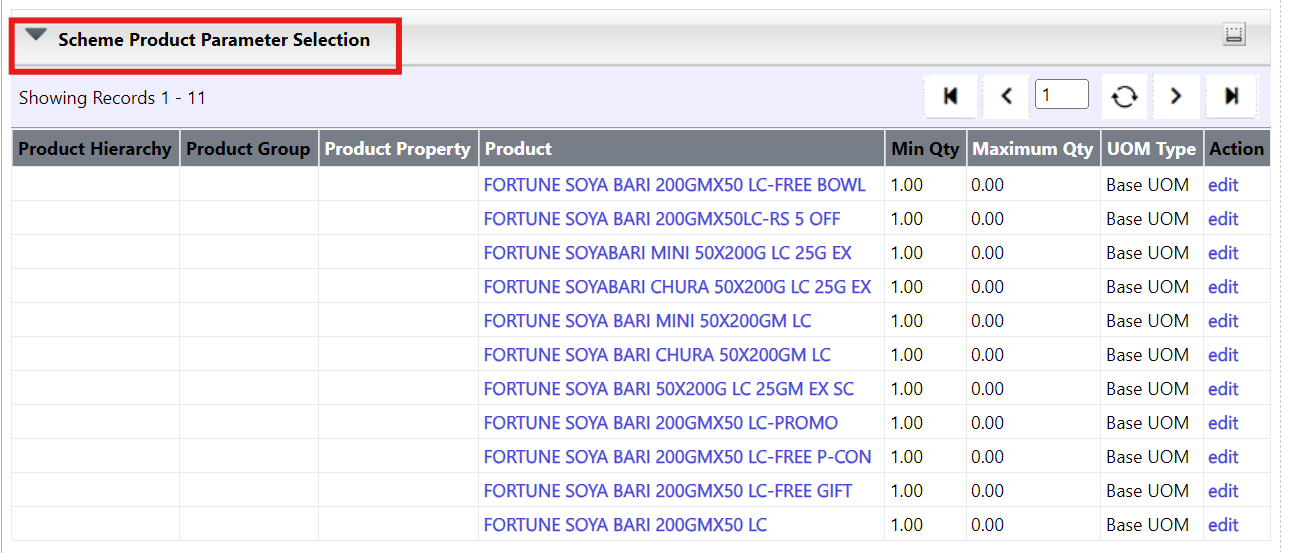
Validate Product Mapping (if issue is product-specific):
Go to Scheme Product Parameter Selection and verify that the product is mapped to the scheme.
If issue is for any specific product, check whether the product is mapped in the scheme. Scheme product parameter selection --> View the product details of respective scheme.
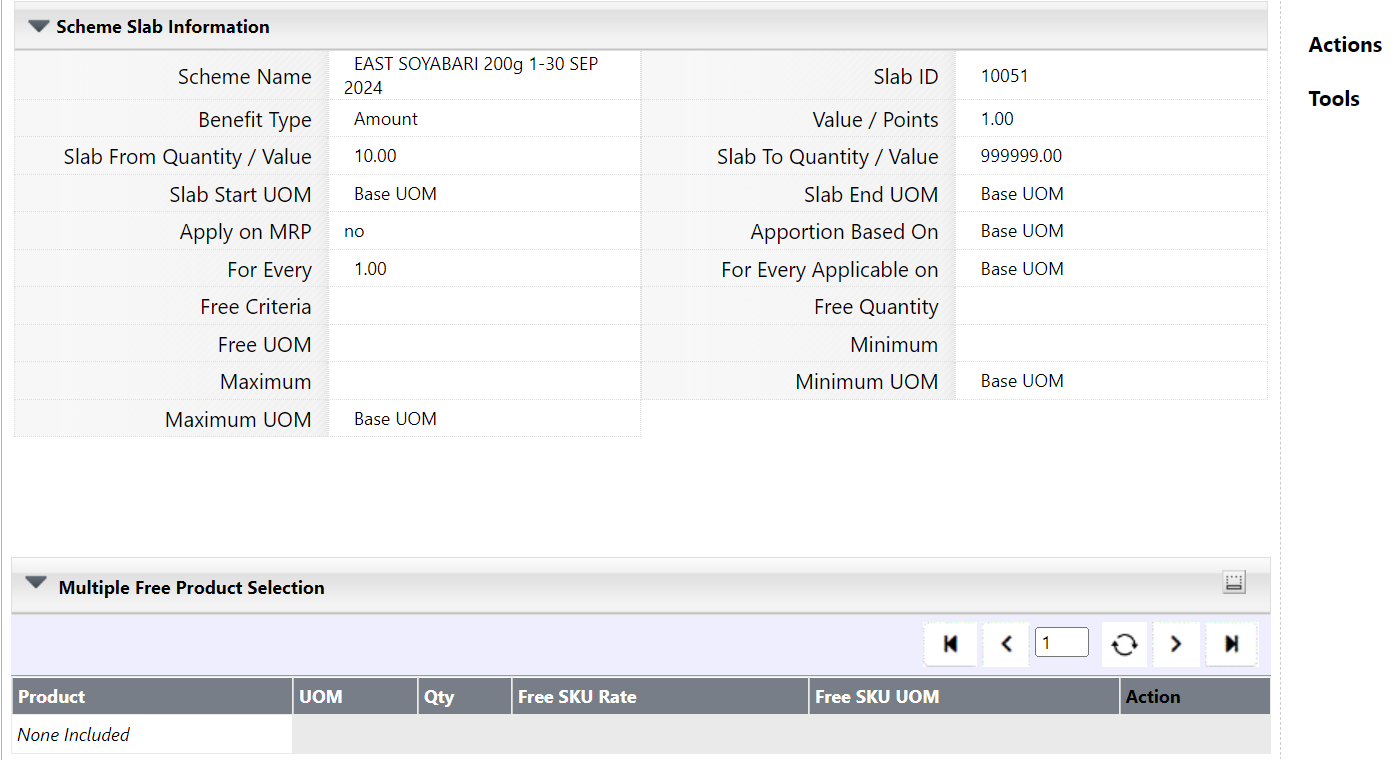
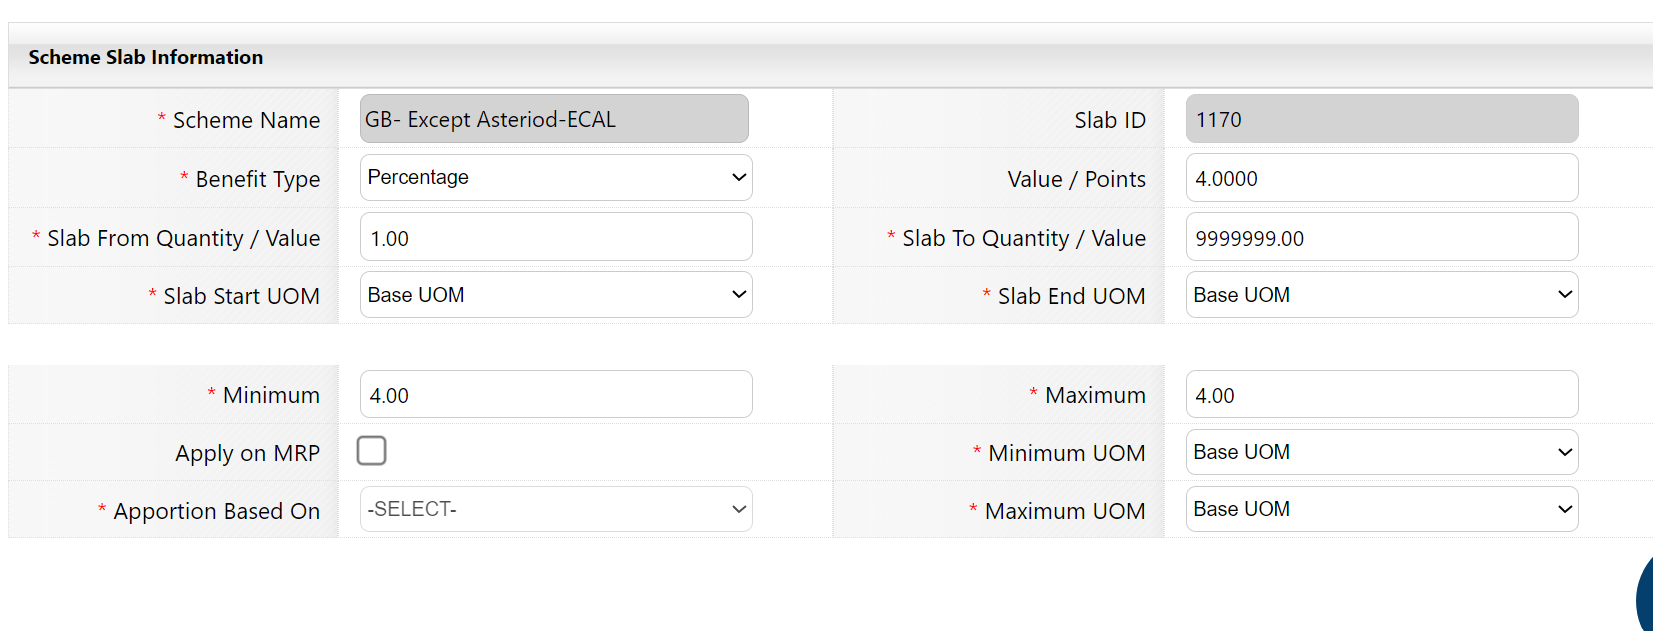
If above all criteria met-->go to scheme slab in order to get the scheme slab information
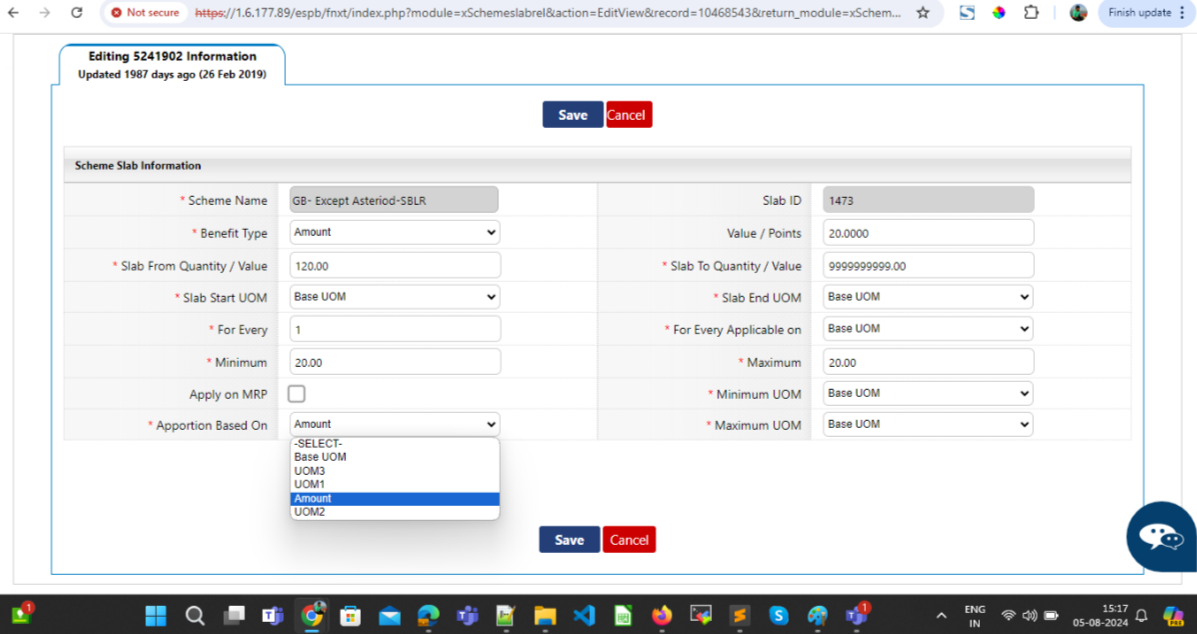
Review Scheme Slab:
Examine the scheme to understand the criteria.
For Eg: Based on the above slab--> the distributor has to bill the minimum qty of 10 for the defined products to apply the scheme.
Check Benefit Type:
If the benefit type is “Amount”, it is a discount-based scheme.
If it is “product”, it is a product-based scheme
Click on the scheme slab ID in order to get the free product details.
Free product details will be defined the Multiple free product selection column
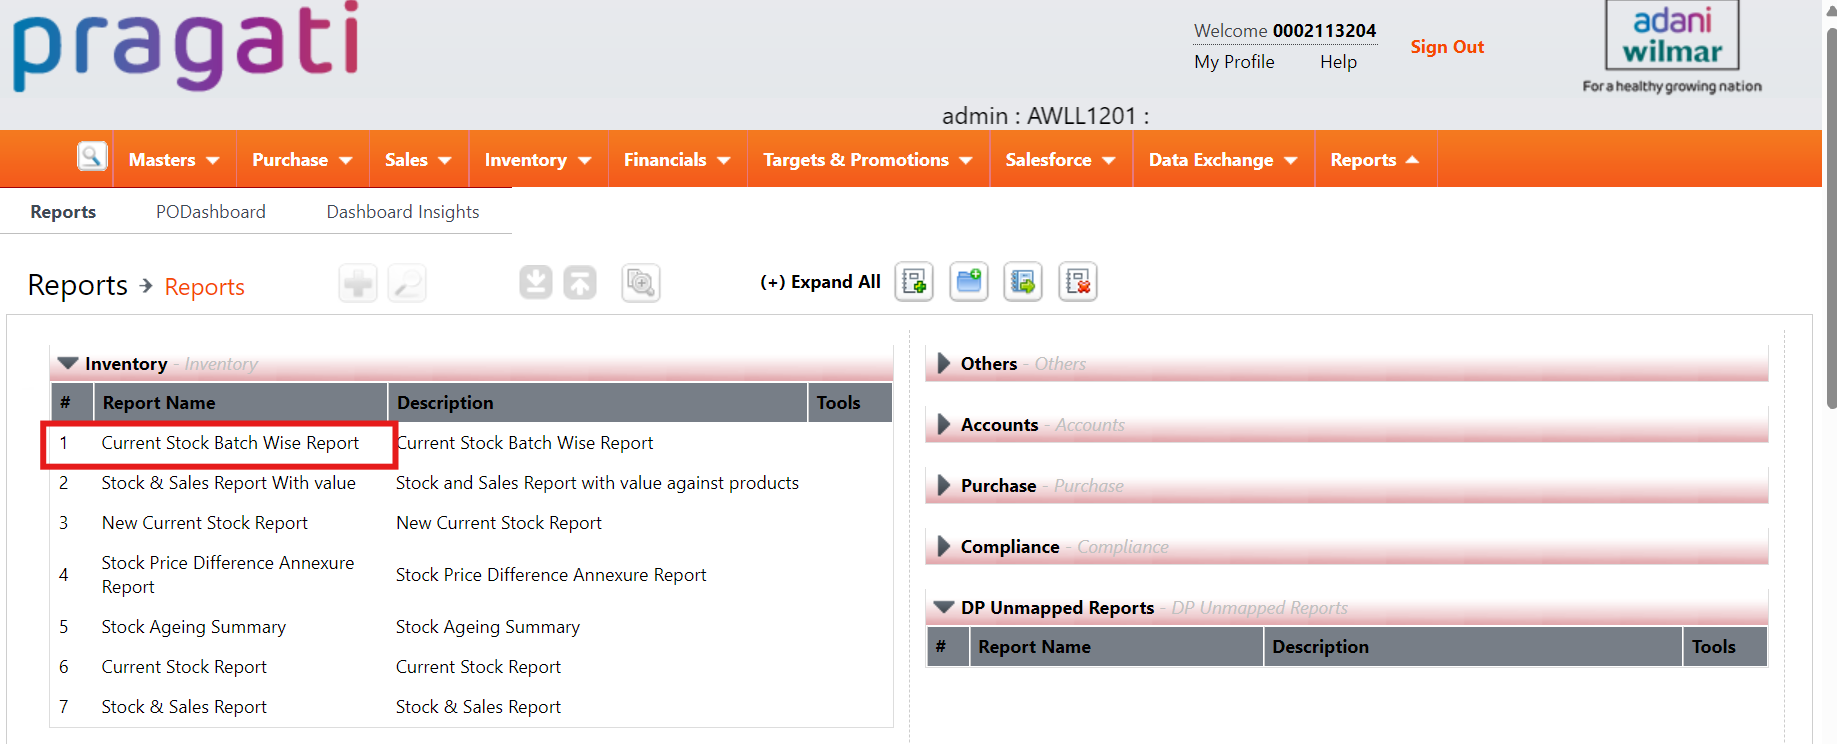
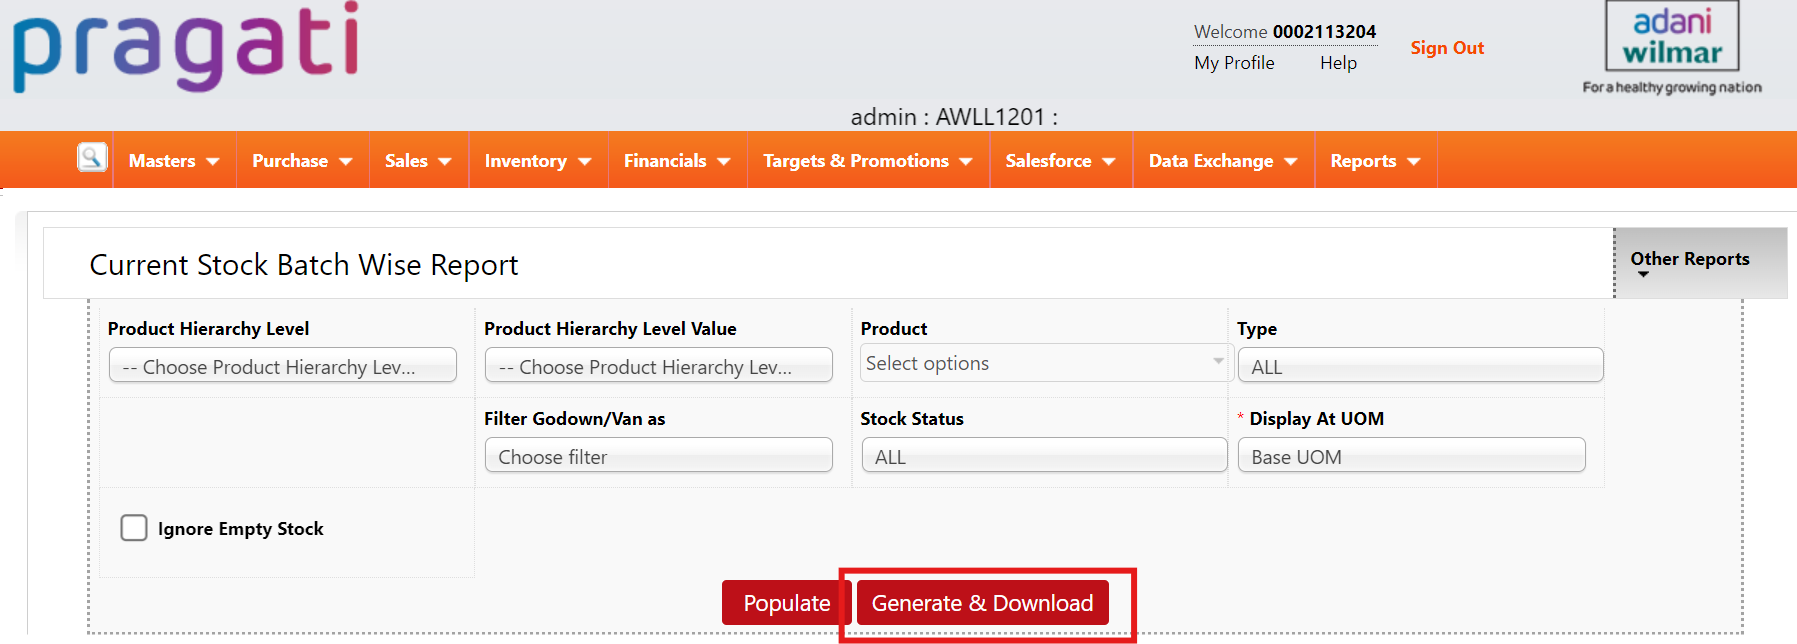
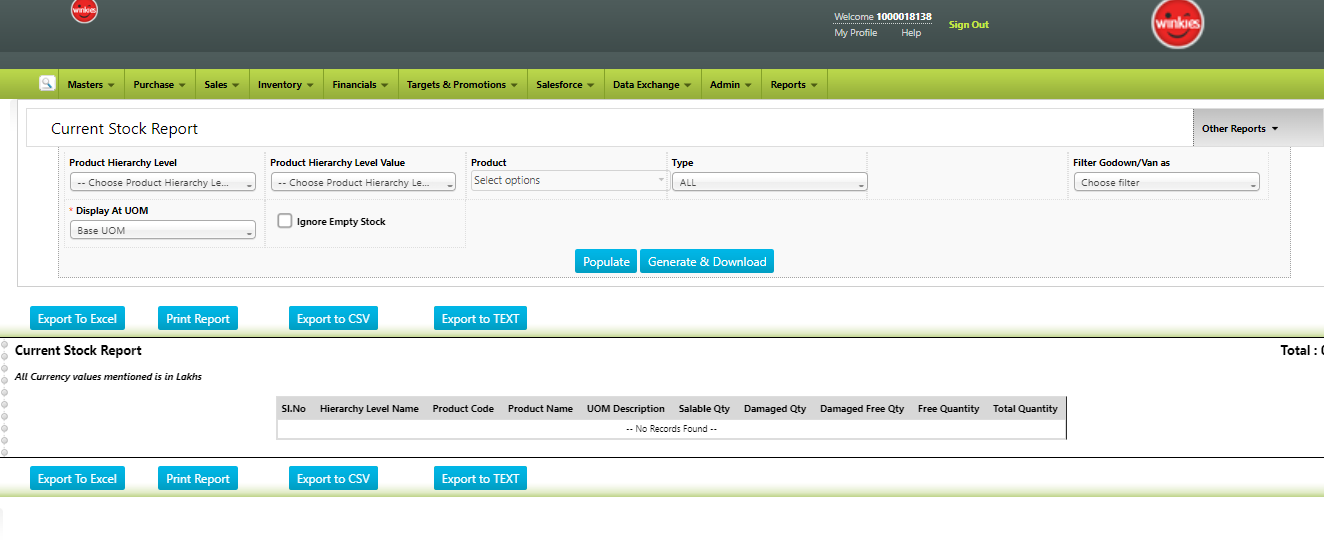
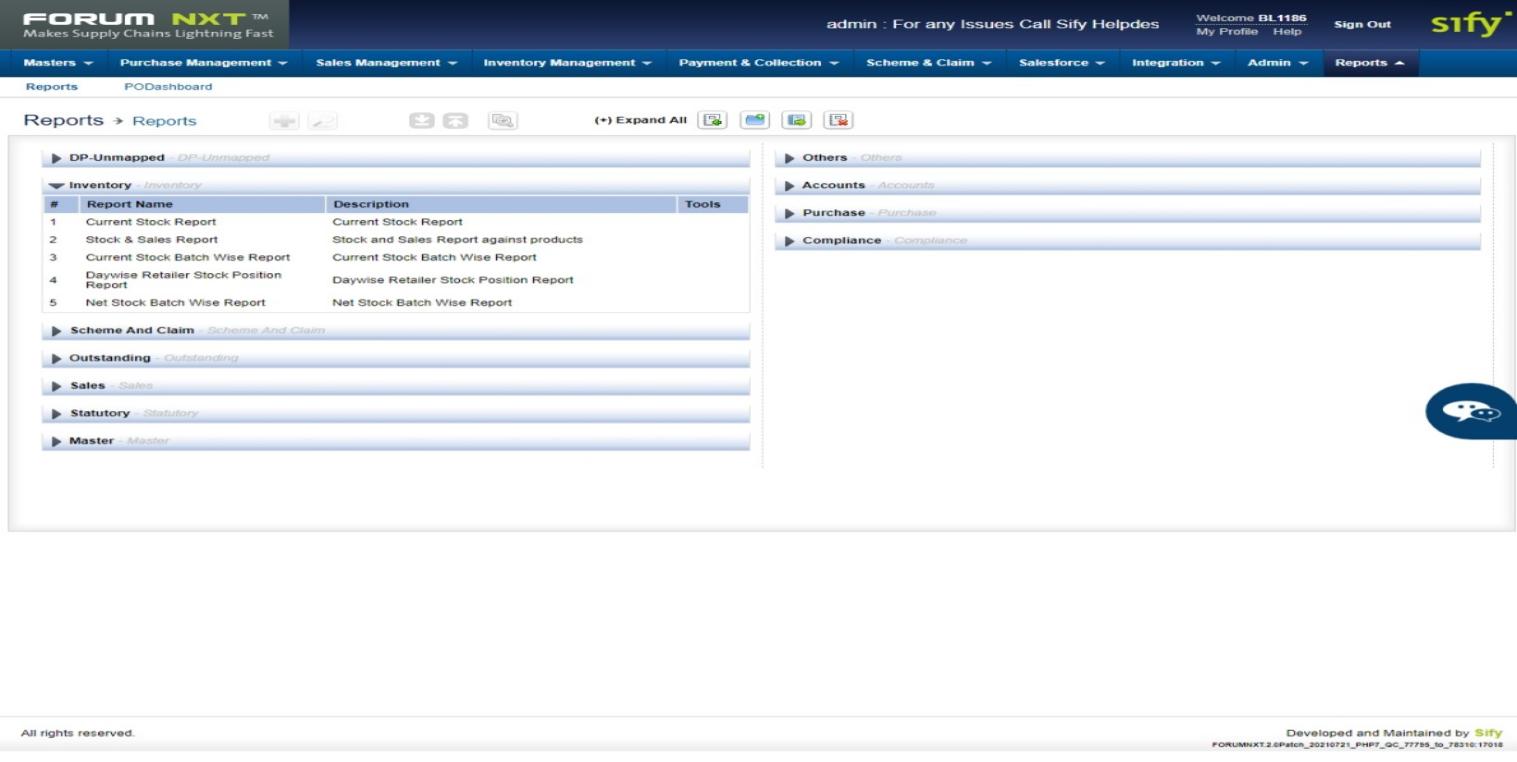
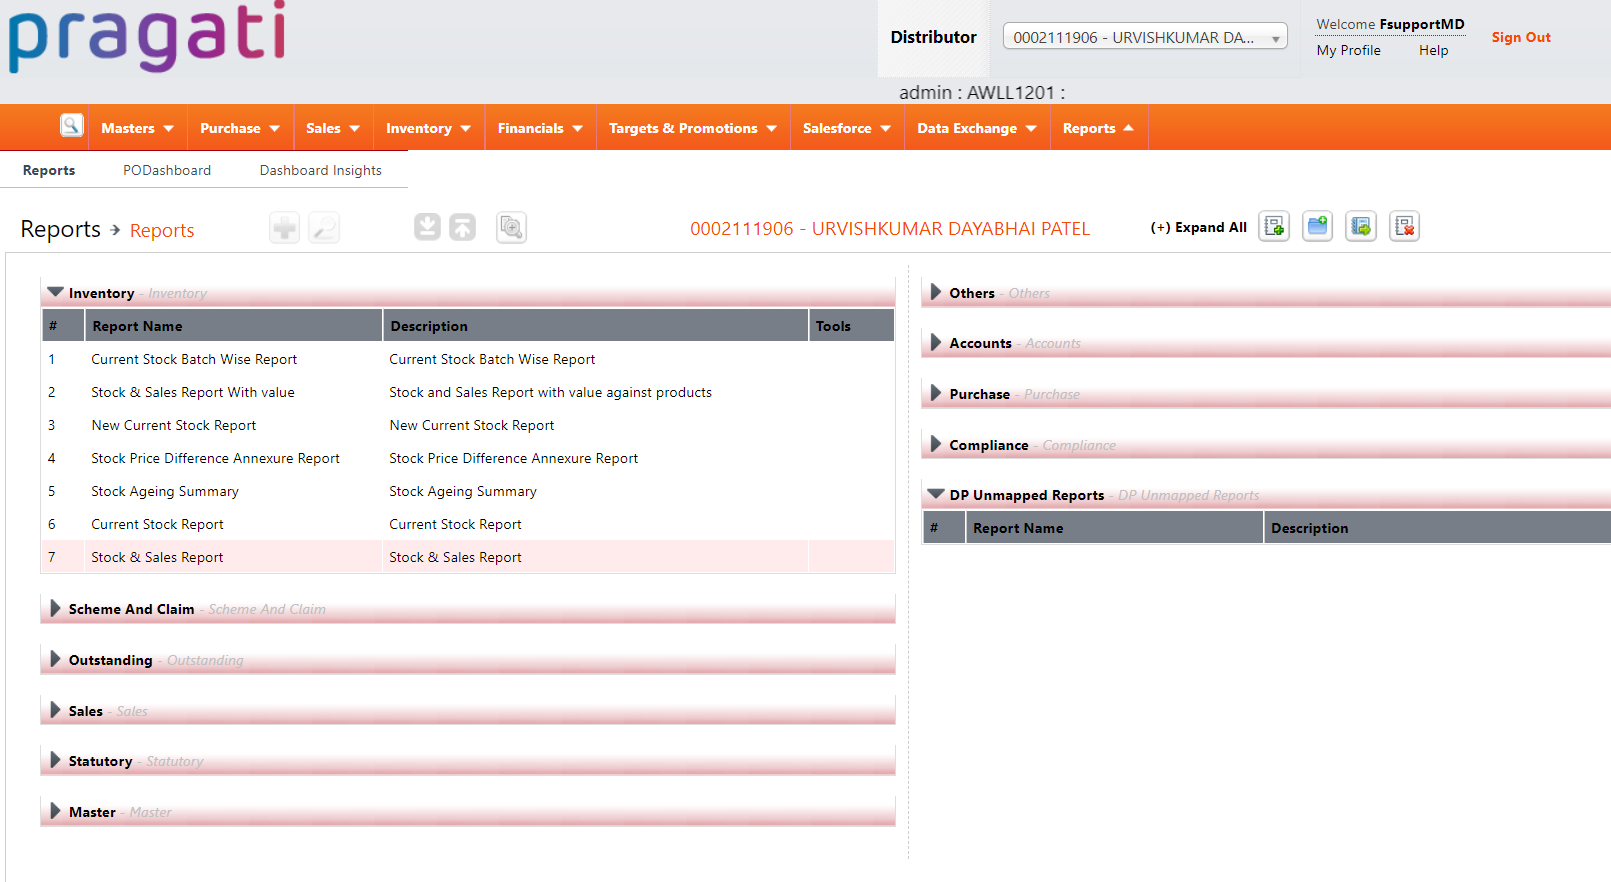
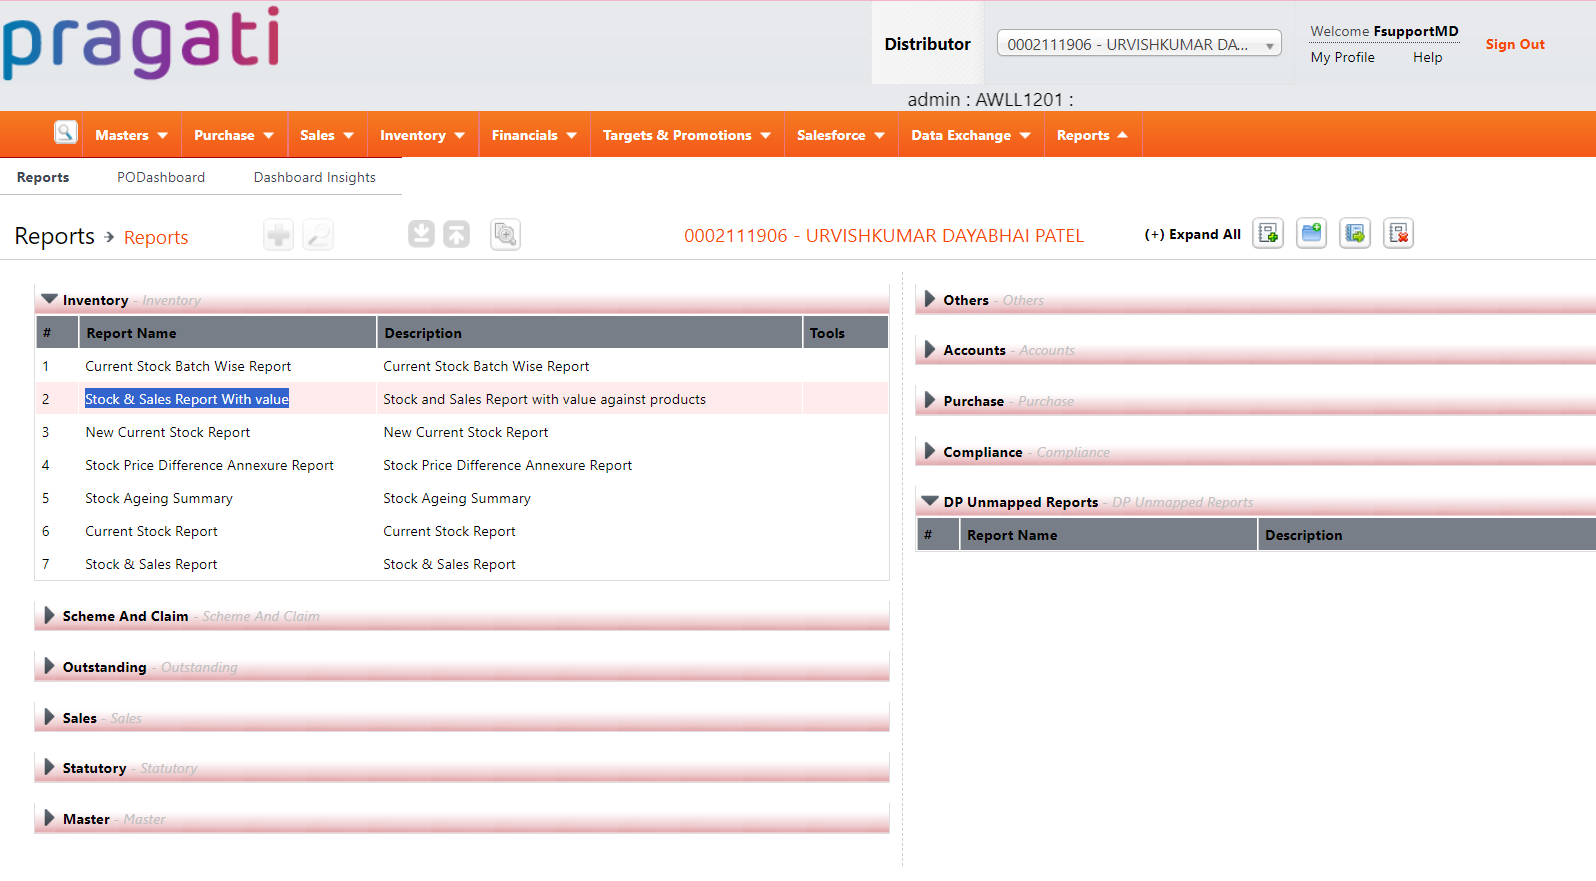
Free Product Stock Check:
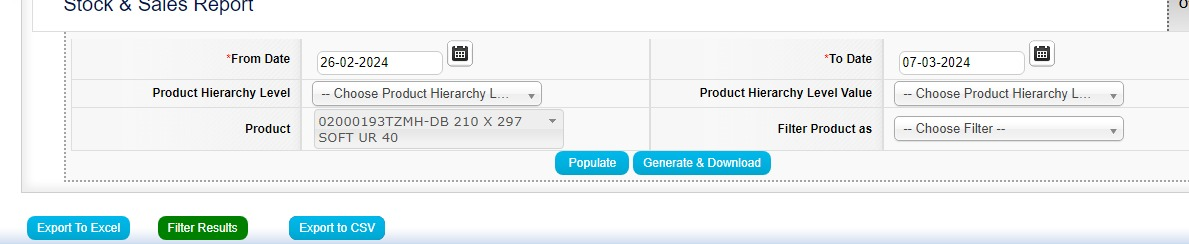
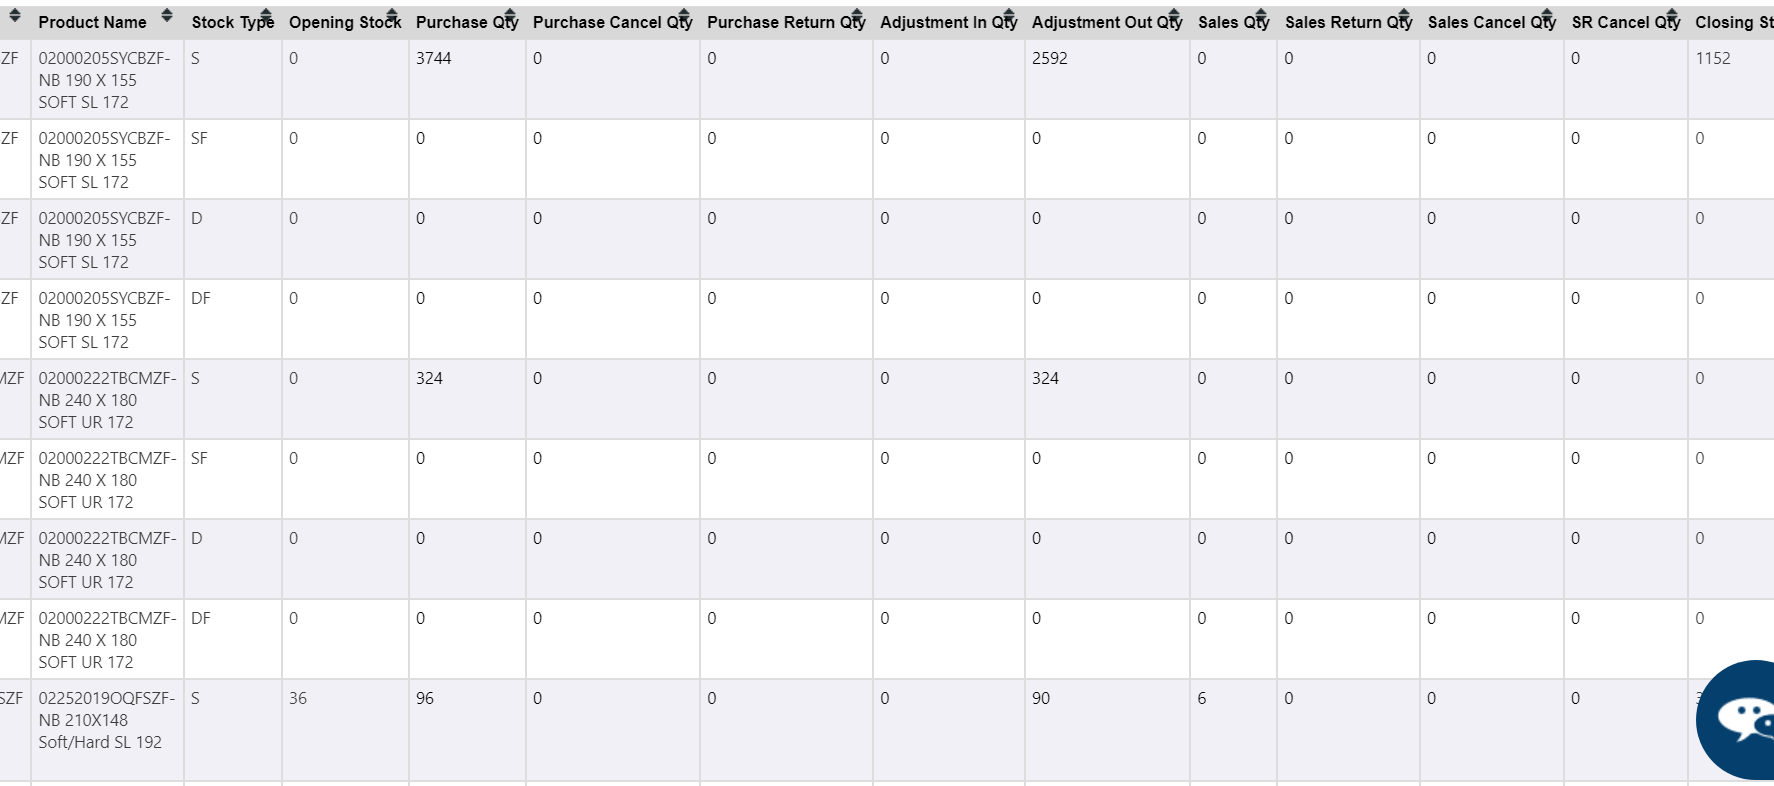
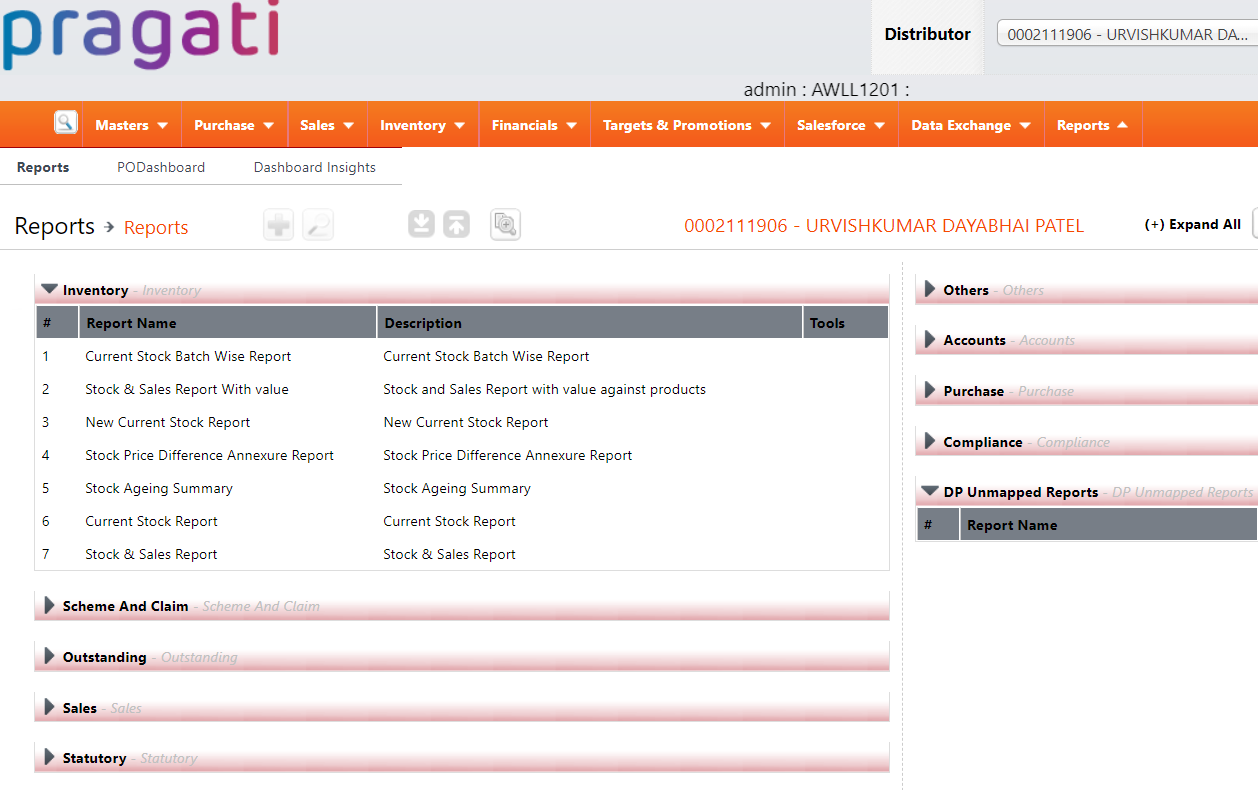
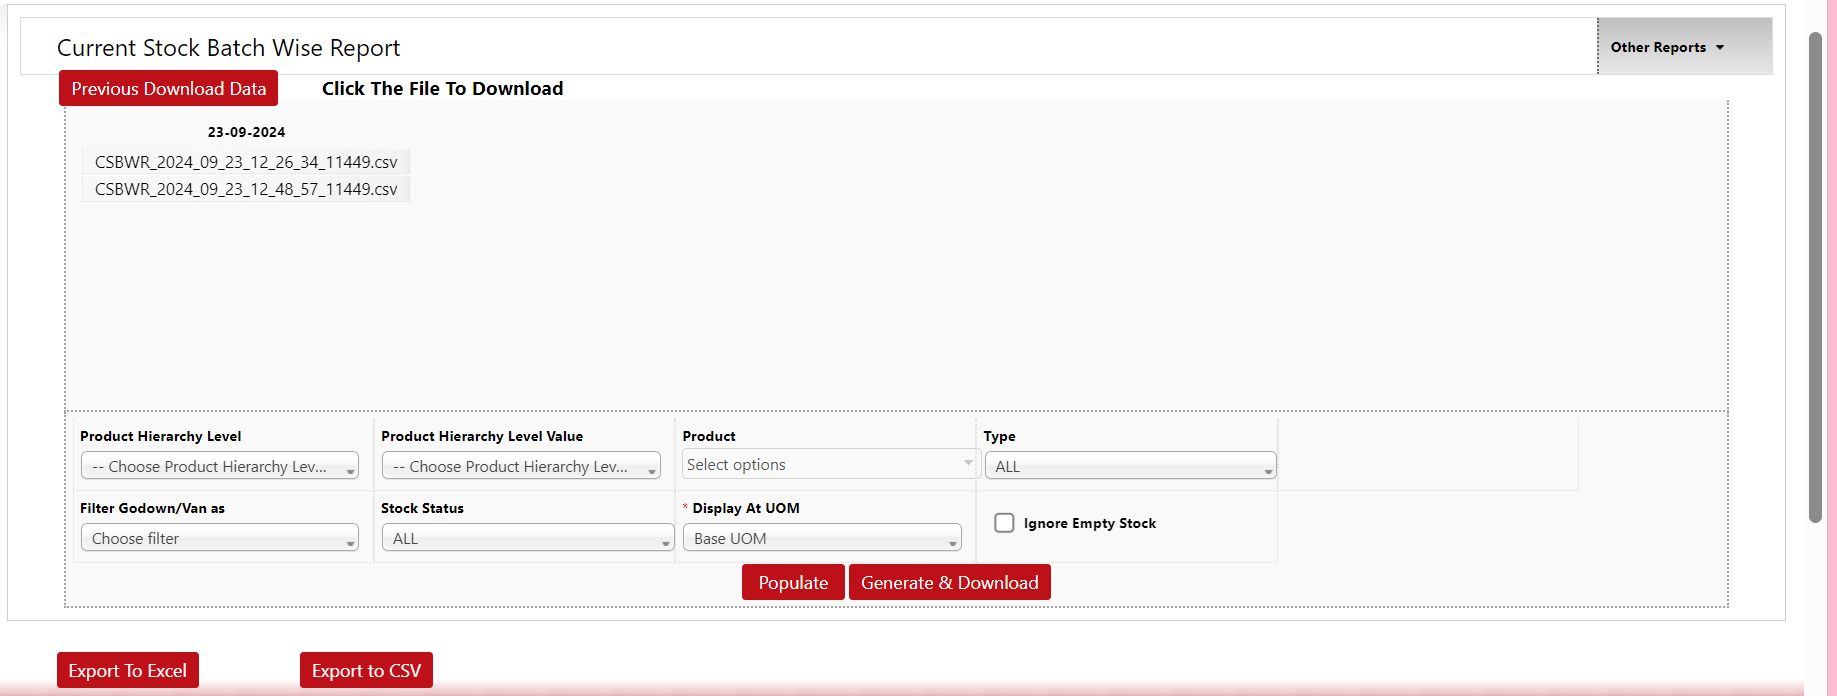
1. Go to Reports → Inventory → Current Stock Batch Wise Report.
2. Generate and download the report.
3. Check the free quantity stock for the specified free product.
Click on generate and download--> Download the report
Open the report--> check the free qty stock for the mentioned free product
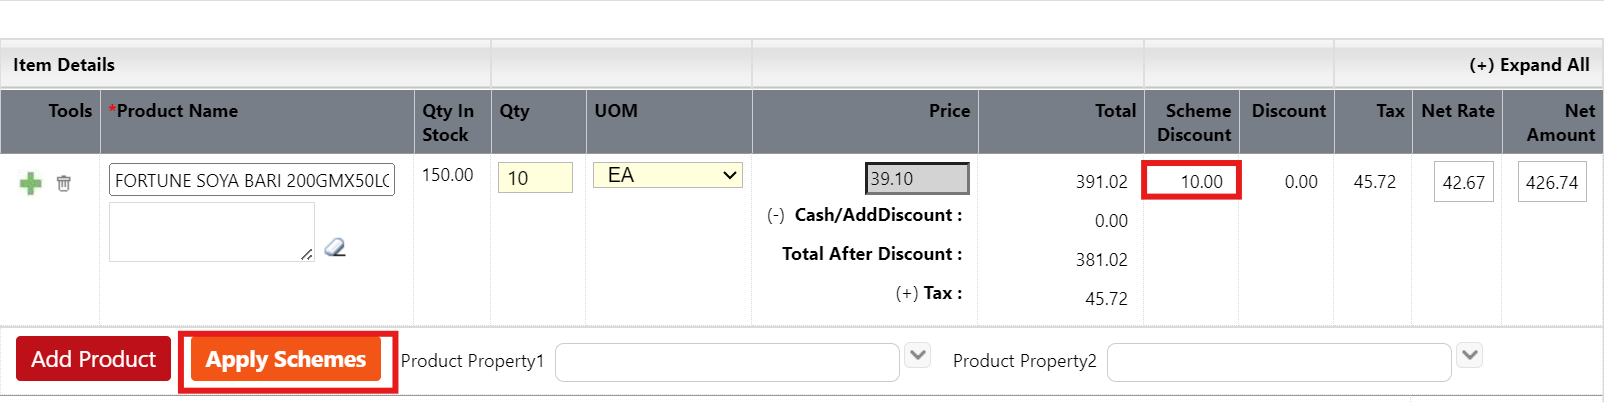
1. Create New Sales Order
Check all the above-mentioned points if it is met--> Go to sales invoice--> Create new sales invoice/sales order Note: In Adani we don’t have the feasibility to create direct manual invoice
2. Create new sales order in DMS to check the scheme application
3. Select the customer’s name and the product defined in the scheme.
4. Enter the quantity required defined based on the scheme slab and click on apply scheme button.
5. Check whether scheme is applying or not. If the scheme applies successfully, take a screenshot and provide the detailed analysis to the customer.
Additional Checks:
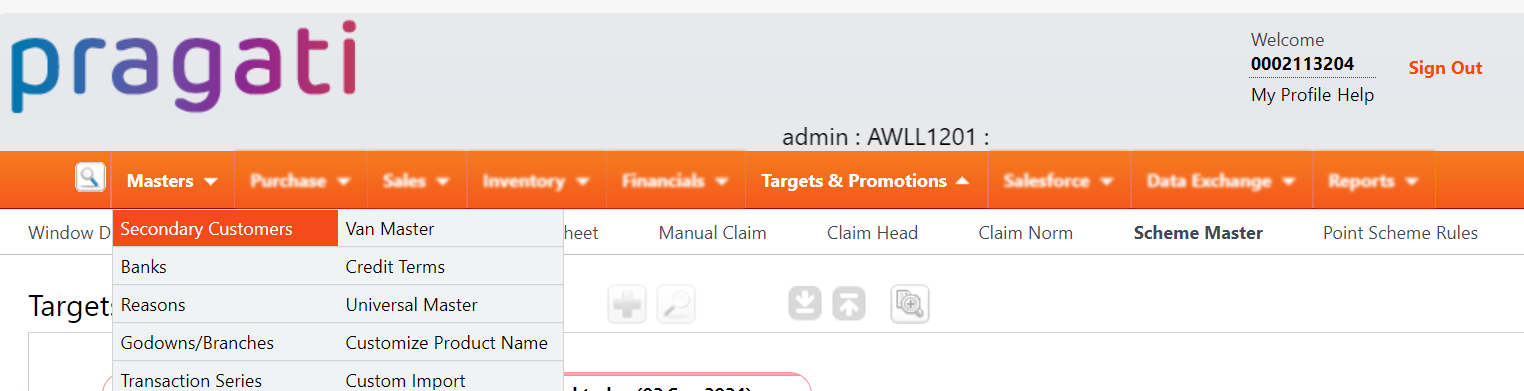
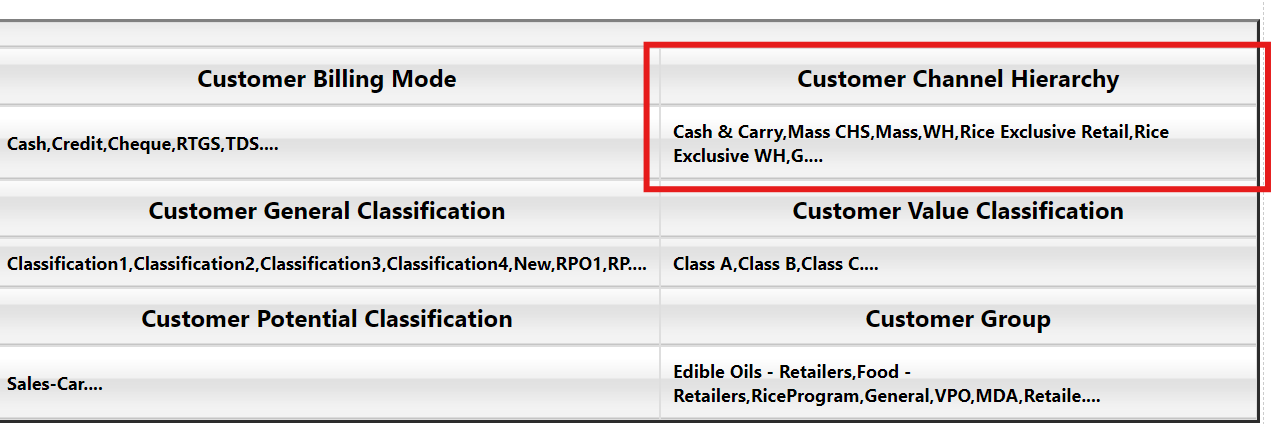
Channel Mapping:
If the issue is specific to a customer, verify the channel mapping in Masters.
Ensure the channel is mapped to the scheme. If not, send a detailed analysis to the customer.
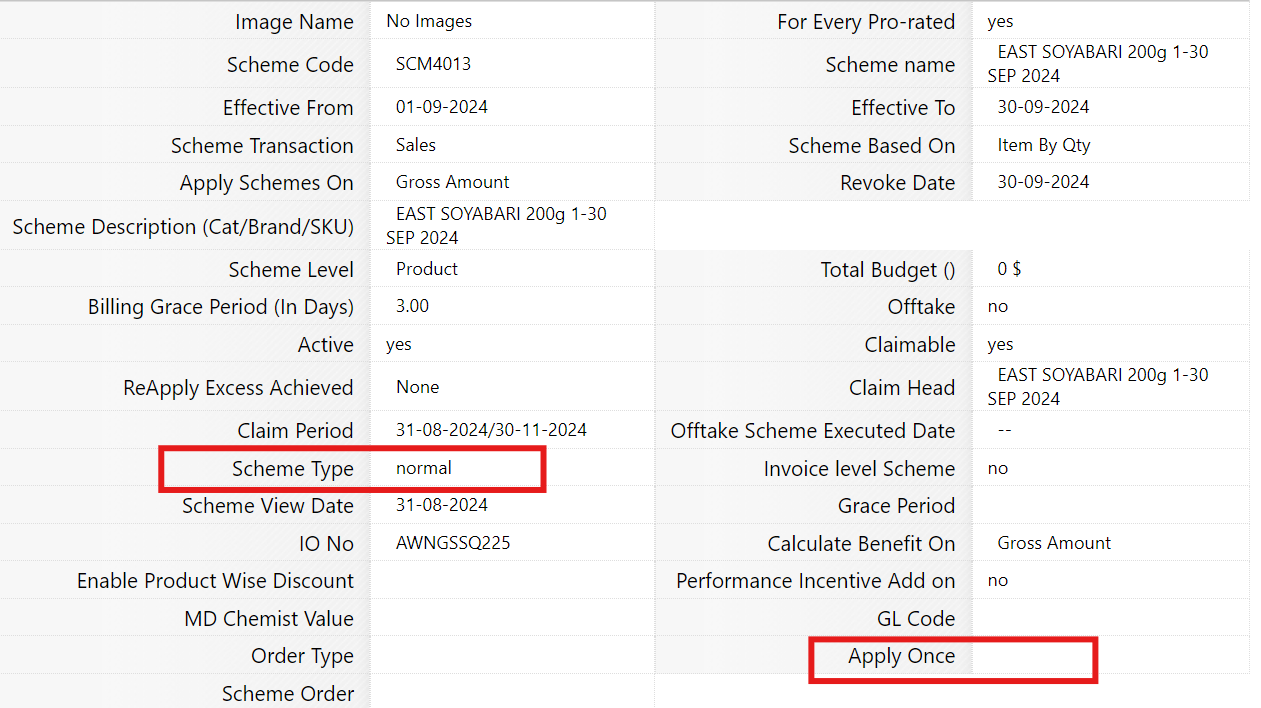
Scheme Type:
If, despite satisfying all requirements, the scheme is still not applying, make sure it is a combination or normal scheme.
According to the normal scheme, the specified product will be covered by the scheme.
Combination schemes describe how two products are combined. In this case, the customer must bill for both products; only the plan will be applicable.
Also check the Apply once status --> If it is updated as “Yes” states that the scheme will apply only once in the specified duration.
lso, we have a option of apply scheme based on the user selection criteria. Check the option is enabled in scheme. If it is enabled, please check based on the below steps.
Steps to Apply a Scheme Based on User Selection:
1. Verify Scheme Configuration:
Ensure that the scheme is set up to apply on user selection. Some schemes are configured to apply automatically based on predefined criteria (like quantity or product), while others require the user to manually apply the scheme during the sales process.
2. Create Sales Invoice/Order:
Log in to DMS with the user credentials.
Go to Sales → Sales Invoice or Sales Order.
Search for the relevant product or customer for which the scheme should be applied.
3. Select the Scheme Manually:
During the invoice/order creation, there will be an option to manually apply the scheme.
After selecting the product, look for an "Apply Scheme" or "Select Scheme" button.
Choose the appropriate scheme from the list of available schemes.
4. Ensure Correct Quantity/Criteria:
Check that the required criteria (e.g., minimum purchase quantity, specific product) are met for the scheme to be eligible.
Enter the correct quantity or product selection, which is necessary for the scheme to apply.
5. Check for Scheme Discounts or Free Products:
If the scheme is applied, verify if the discount (if applicable) or free products are reflected in the invoice or order.
6. Save and Confirm:
Save the order or invoice after confirming that the scheme has been applied.
Take a screenshot for reference and share it with the customer if needed.
Escalate to Development Team
If all requirements are met and the scheme is still not applying, assign the case to the development team.
Once the development team resolves the issue, recheck the scheme application and update the customer with screenshots.
Version Summary
Author
Reviewer
Approver 1
Approver 2
Current Version
Current Version Published On
Maiden Version Published On
Pavithra M
Nisha Bhatt
Julian Shawn Dmonte
Karthick Krishna Kumar, Subramanian, Kannan
2.1
22/11/2024
22/11/2024
OBJECTIVE:
This document provides a workflow for stock update in the DMS.
Issue Short Description : Stock Update Service Type : SR Priority : Low Problem Code : Others INPUTS:
To update stock in DMS, we need to get the stock details in a structured format. Below is the format that needs to be followed.
Workflow:
Create a case in the servicenow portal and provide the case ID to the customer.
Contact the distributor to get additional information and request for clarification if needed.
Stock Update Analysis and Validation Process 1. Login to the Distributor Portal: Use the provided ID and Password to access the system or use test credentials.
2. Navigate to Reports
Go to Reports → Inventory → Current Stock Report.
3. Generate and Download the Stock Report
a. Generate the Current Stock Report for the specified CD (Channel Distributor).
b. Download the report and review it to check the current stock levels.
c. Verification: Compare the generated stock report with the expected stock values.
d. If the report is empty or does not match the provided stock data:
Action: Assign the ticket to the Development Team
Post Update: 1. Recheck the Stock:
Go to Reports → Inventory → Current Stock Report.
Generate and download the current stock report again for the same CD.
2. Validation:
Compare the new report with the expected stock levels to ensure that the stock update was successful and inform to customer.
Version Summary
Author
Reviewer
Approver 1
Approver 2
Current Version
Current Version Published On
Maiden Version Published On
Mohammed Kashif S
Nisha Bhatt
Julian Shawn Dmonte
Karthick Krishna Kumar, Subramanian, Kannan
2.1
22/11/2024
22/11/2024
Scenario1 : Unable to generate E-invoice (IRN)
Issue Short Description : Unable to generate E-invoice (IRN)
Service Type : IR
Priority :High
Problem code : Unable to create/ Amend sales invoice for a user
For any Einvoice scenario, we must validate the mentioned points.
1. Retailer must be Registered.
2. Validate GST & PAN information has been updated in Sales invoice.
3. Confirm with customer in which portal they are trying to generate Einvoice (DMS/GST).
Inputs:
1. Need to request CD to explain the issue
2. Error screenshots if any
3. Sales invoice details
Workflow
Analysis Template:
Step1: Create the case for the reported issue in our service now portal and revert to our customer with the case ID
Step2: Reach CD and request CD to explain the issue in any desk.
Step3: Need to analyze the issue based on the following steps:
1. Go to distributor portal and put LOGIN ID and PASSWORD of CD.
2. After login in DMS, go to ---> Sales management
3. In sales management --> sales invoice--> Note down the sales invoice date
4. Sales management--> E invoice
5. E invoice--> Select the from and to date-->Populate
6. Check the mentioned invoice number
7. If the status if failed--> Go to reports--> Statutory
8. Statutory--> GSP sync log report
9. GSP sync log report--> Select from and to date & report type select as E invoice--> Populate
10. Find the mentioned sales invoice & check the status
11. If it failed-->click on failed--> it will open in new window--> Double click in URL
We will get the failed reason
For ex:
Duplicate IRN (Since it has generated for multiple times)
API user ID & Password is wrong
For these scenarios revert the case to customer with detailed information.
12. If status is not failed, Click on Generate e-Invoice → If an error message saying “NULL” appears, inform the customer to try again after some time. This error is not related to DMS; it occurs due to a delayed or no response from the GST portal. Hence, advise the customer to wait and retry.
Scenario2 :Unable to generate E-invoice (IRN), IRN Failed.
Issue Short Description : Unable to generate E-invoice (IRN). Service Type : IR. Priority : High. Problem code : Unable to create/ Amend sales invoice for a user.
Inputs:
1. Need to request CD to explain the issue
2. Error screenshots if any
3. Sales invoice details
Workflow
Analysis Template :
Step1: Create the case for the reported issue in our service now portal and revert to our customer with the case ID
Step2: Reach CD and request CD to explain the issue
Step3: Need to analyze the issue based on the following steps:
1. Go to DMS portal and put LOGIN ID and PASSWORD of CD
2. After login in DMS, go to --->Sales Management
3. In sales management --> sales invoice--> Note down the sales invoice date
4. Sales management--> E invoice
5. E invoice--> Select the from and to date-->Populate
6. Check the mentioned invoice number
7. Click on Generate IRN, if same erros shows assign the case to development team
8. Once correction is done from our DEVELOPMENT team, then we again check in DMS.
9. This issue happens because of Non-Taxable products.
10. Reach Spoc for closure confirmation with the Screenshot
Version Summary
Author
Reviewer
Approver 1
Approver 2
Current Version
Current Version Published On
Maiden Version Published On
Surekha
Vimal Kumar
Julian Shawn Dmonte
Subramanian
1.0
24-04-2024
24-04-2024
Corporate Name: ForumNXT
Issue : The Receive Purchase Invoice (RPI) has been received and converted into Purchase Invoice successfully but the stock was not updated in DMS for a particular product/ Invoice.
Issue Short Description for ref : Stock not reflecting in Inward Invoice
Service Type : IR
Priority : Medium
Service Req Type : Received Purchase invoice not processed in DP for a user
Inputs:
1. Need to request CD (Customer) to explain the issue via call or control (If req).
2. Error screenshot (If any)
3. Purchase Invoice Number/ Reference Number
4. Product Details (If issue is for any specific product)
Workflow
Analysis Template:
Step1: Create the case for the reported issue in our service now portal and reply to our customer with the case ID by looping respective SPOC and PMO.
Step2: Reach customer and request to explain the issue(if req)
Step3: Need to analyze the issue based on the following steps:
1. Go to ---> Distributor portal and put LOGIN ID and PASSWORD of CD
2. After login in DMS, go to àPurchase Management ---> Online Purchase Invoice
3. Search the PI using the reference number/ Transaction number
4. Clicking the Transaction number ,We will get the invoice information like product details and Quantity of the products.
5. Check the Status and Next Stage name of an Invoice Status should be in “Created” and Next Stage name should be “Publish”
6. If the above criteria is met--> Note down the purchase invoice date--> Go to reports--> Inventory--> Stock and Sales Report
7. Select the from date as purchase invoice date and select the product for which the stock was not updated ---> populate
Note : The qty of the purchase invoice should be updated in the Purchase qty column.
Based on the logic, cross verify the purchase quantity for a mentioned product with purchase invoice, if it is updated take a screenshot and share detailed resolution to customer. Note : Click on the Purchase qty entry in order to view the purchase invoice details.
8. If the stock has been updated, verify with the customer whether there is any stock mismatch. In such cases, it's important to validate the product's Unit of Measure (UOM) conversion.
Here's the process :
Note down the product name, quantity, UOM, and date from the Purchase Invoice.
Cross-verify this information using the Stock and Sales Report.
If the customer purchased 1 BAG but the report reflects the quantity as 1 EA, check the conversion factor.
To validate the conversion :
Navigate to Masters → View Products.
Check the UOM details and conversion factors.
Manually calculate the conversion.
If the values are accurate, communicate the clarification to the customer via email.
If there is a discrepancy, escalate the case to the development team for stock correction.
If the stock is not updated for a specific product/ invoice, please assign the case to Development team.
9. Once correction is done from our development team, then we have to check and reply to customer with screenshots.
Note :
If stock is updated, check the following scenarios as well, whether customer made any Sales invoice, Stock reconciliation (stock adjustment) and Sales return. Calculate the qty and cross verify with closing stock and share the detailed information to customer.
Version Summary
Author
Reviewer
Approver 1
Approver 2
Current Version
Current Version Published On
Maiden Version Published On
Pavithra M
Nisha Bhatt
Julian Shawn Dmonte
Subramanian
1.0
24-04-2024
24-04-2024
Corporate Name: ForumNXT
Issue : The Receive Purchase Invoice (RPI) has been received manually but not showing in DMS.
Issue Short Description for ref : Purchase invoice not showing in DMS.
Service Type : IR
Priority : High
Service Req Type : Received Purchase invoice not processed in DP for a user.
Inputs:
1. Need to request CD (Customer) to explain the issue via call or control (If req).
2. Purchase Invoice Reference Number
3. RPI Date
4. OD number (If any)
5. Distributor code (If issue is for any specific Distributor)
6. Date and Time of RPI flown information
Workflow
Analysis Template:
Step1: Create the case for the reported issue in our service now portal and reply to our customer with the case ID by looping respective SPOC and PMO.
Step2: Reach customer and request to explain the issue(if req)
Step3: Need to analyze the issue based on the following steps:
1. Go to àDistributor portal and put LOGIN ID and PASSWORD of CD
2. After login in DMS, go to àData Exchange ---> Receive purchase invoice
3. Click on Receive purchase invoice in order to view the details
4. Search the RPI with the help of reference number. If it shows take screenshot and share detailed analysis to customer.
5. If not Go to Purchase management--> Online purchase invoice--> need to check whether the RPI is already converted in to purchase invoice.
6. If it is converted in PI--> Take screenshot and share detailed analysis to customer.
Assign the case to development team to validate the RPI has received to Sify end. Based on the resolution provided, send detailed resolution information to customer.
Version Summary
Author
Reviewer
Approver 1
Approver 2
Current Version
Current Version Published On
Maiden Version Published On
Pavithra M
Nisha Bhatt
Julian Shawn Dmonte
Subramanian
1.0
24-04-2024
24-04-2024
OBJECTIVE:
This document provides a workflow for New Login Creation to salesman in DMS.
Issue Short Description : New login creation to salesman in Corportal portal
Service Type : SR
Priority : Low
Problem Code : Others
Inputs:
1. Username.
2. Users Mobile number.
Workflow
Create a case in the Servicenow portal and provide the case ID to the customer.
Contact the distributor to get additional information and request for clarification if needed.
To validate whether the Corporate User is already available in the system, follow these steps:
Log in to the Corporate Portal:
Use credentials to access the corportal portal.
Step 1: Go to Salesforce Module.
Step 2: Select corporate salesman.
Under Salesforce,Select the corporate salesman.
Step 3: Search with the username whether the corporate user created or not. If it is not available we have to create new corporate salesman.
Step 4: Proceed to create new users in corportal salesman.
proceed with the following steps to import it:
1. Admin ---> Settings ---> Users ---> click new user.
2. Fill the mandatory fields.
Username ---> Fill the mentioned username.
Password ---> Username fill has the password.
Confirm password ---> Same username fill has the confirmed password.
First name ---> Fill user first name.
Second name ---> Fill user second name.
Date format ---> DD-MM-YYYY. (default)
Reports to ---> Select cpadmin . (default)
Geography hierarchy ---> Select the India geography. (default)
Role ---> Select the Company admin. (default)
Signature ---> Username
Select the save options to save the users.
3. Next Select Salesforce to created Corporate Salesman.
Select the new creation, filled the mandatory fields.
Select the save options to save the Corporate Salesman.
4. Select the Company salesman name to add the CD’s & Add the connect CD key .
Select the distributor mapping ---> click select the distributor ---> Select all the distributor & save.
Select the Connect CD key ---> Click Add connect CD key.
Filled the mandatory fields.
Company salesman ---> User name
CD key select any one .
Integration type ---> Mobile ( default)
Integration version ---> fill the update version. (refer to the salesman who is currently active on the system and choose the latest active record) or else, check with respective PMO for the updated version information.
Save the CD key
Creating corporate salesman MJP.
Select the corporate salesman MJP ---> click new creation .
Filled the mandatory fields.
Select the Route based ---> Select the from date (tomorrow ) & to date (31/12/2024)
MJP details we will loaded & Select the route has DEMO route. (default)
Select the Repeat from date & click the repeat plan.
Select the SAVE options to save the MJP details.
Following the above steps we have created the new users & new corporate salesman creation & Created MJP for mentioned corporate salesman.
Version Summary
Author
Reviewer
Approver 1
Approver 2
Current Version
Current Version Published On
Maiden Version Published On
Nageena Sultana.K
Nisha Bhatt
Julian Shawn Dmonte
Subramanian
1.0
24-04-2024
24-04-2024
Corporate Name : ForumNXT
Issue : Issue in generating DSR report
Knowledge Article: Daily Sales Report (DSR) Not Generating in DMS
This Knowledge Article outlines common issues related to the generation of the Daily Sales Report (DSR) in DMS. For all report-related scenarios, it's essential to collect the following inputs:
Report name and Report Number.
Date range
Parameters entered while generating the report
Confirmation of in which login customer is generating the report (CP/DP)
Common Scenarios :
1. CD Details Not Reflecting in DSR (UOM-1)
2. DSR (UOM-1) Generating as Blank
3. DSR Not Generating
Scenario 1 : CD Details Not Reflecting in DSR with UOM-1
Customer is generated the report in CP Portal in which some of the Distributor details are not showing in the report.
Issue Short Description : DSR report not displaying CD details
Service Type : IR
Priority : Low
Problem Code : Report Value Mismatch (FORUMNXT)
Required Inputs :
1. CD details missing in the report
2. Copy of the DSR report (if already generated)
3. Error screenshot (if available)
Analysis Workflow
Step 1 : Log a case in the ServiceNow portal and reply to customer with the case ID.
Step 2 : Reach out to the concerned CD for issue clarification (if required).
Step 3 : Follow the steps below for validation:
1. Login to the DMS portal using the CP credentials.
2. Go to sales invoice menu in the sales management option in DP portal and cross verify whether the distributor made any sales in the respective date range.
3. Navigate to the Reports section.
4. Select Daily Sales Report (UOM-1).
5. Enter the required parameters exactly as provided by the customer.
6. Click on Generate and download the report. Also cross verify the same using populate option as well.
7. Verify if the mentioned distributor/CD details are visible in the report in both the fields (Generate & Download, Populate)
8. If the issue replicates assign the case to development team. Once corrections done validate the same before sending resolution email to customer.
Scenario 2 : DSR UOM1 is generating blank
Customer stating that DSR UOM1 is generating blank.
Note : Obtain confirmation from the customer regarding which portal (CP or Distributor Portal) they used to generate the report.
If the issue is observed in the CP portal, validate whether the same report is generating correctly in the Distributor portal.
Additionally, ensure to check both the “Generate & Download” and “Populate” options, as this will help the team to troubleshoot the issue more effectively.
Analysis Template:
1. Login to DB portal
2. Navigate to the Reports section.
3. Select Daily Sales Report (UOM-1)
4. Enter the required parameters exactly as provided by the customer.
5. Click on Generate and download the report. Also cross verify the same using populate option as well.
6. Validate the still the report is generating blank.
If the issue replicates assign the case to development team. Once corrections done validate the same before sending resolution email to customer.
Scenario 3 : DSR Not generating
For this scenario please follow the same steps which is mentioned in the scenariow2 and check. If the report is not generating assign the case to development team.
Note : Daily Sales report will not show the data of cancelled sales invoice status.
Version Summary
Author
Reviewer
Approver 1
Approver 2
Current Version
Current Version Published On
Maiden Version Published On
Nageena Sultana.K
Nisha Bhatt
Julian Shawn Dmonte
Subramanian
1.0
24-04-2024
24-04-2024
There are 4 types of issues :
1. MJP: Outlet count issue
2. MJP: Not showing in the portal
3. MJP: Issue in the MJP status
4. SFF: Customer details not showing in MJP
1. MJP: Outlet Count Mismatch in DMS
Issue Description : Mismatch in outlet count for MJP in DMS
Service Type : IR
Priority : Low
Problem Code : Salesman & MJP Issue
Required Inputs :
1. CD details
2. Reference number of MJP
3. Screenshot (If any)
4. Confirming the specific module where they encountered the mismatch issue—whether in DMS or SFF.
Workflow :
1. Create a case in the ServiceNow portal and share the case ID with the customer.
2. Connect with the CD for further clarification if needed.
3. Analyze using the following steps:
1. Login to the corporate portal.
2. Select the appropriate CD
3. Navigate to Salesforce > Monthly Journal Plan.
4. Search and select the reference number.
Cross-verify the beat and customer count in the MJP
Generate customer master report and validate for the respective beat how many active customers are mapped. Cross verify with MJP if the count is mismatched assign the case to development team
Note : Please make sure the date of MJP (It should be future date).
5. If a mismatch exists, escalate to the development team.
6. Once resolved, validate and respond to the customer with relevant screenshots
2. Uploaded MJP not showing in DMS portal
Issue Short Description for ref : MJP not showing in DMS
Service Type : IR
Priority : Medium
Service Req Type : Salesman & MJP Issue
Inputs :
1. Need to request CD (Customer) to explain the issue via call or control (If req).
2. Error screenshot (If any)
3. MJP Referene Number
4. Please collect the file that was uploaded in DMS and confirm with the customer whether the upload was successful.
Workflow Analysis Template:
Step1 : Create the case for the reported issue in our service now portal and reply to our customer with the case ID by looping respective SPOC and PMO.
Step2 : Reach customer and request to explain the issue(if req)
Step3 : Need to analyze the issue based on the following steps:
1. Go to Corporate portal and put LoginID and Password.
2. Select the respective CD.
3. Navigate to Salesforce → Monthly Journal Plan.
Search using the provided reference number.
Verify if the reference number appears. In this case, it does not appear in DMS as per the customer’s attachment.
4. Since the data import status is successful but not reflected in the portal, escalate the case to the development team.
5. Once the development team resolves the issue, validate it and respond to the customer with screenshots confirming the fix.
3. MJP: Issue in the MJP status
Issue Short Description : Issue in the MJP status
Service Type : IR
Priority : Medium
Problem code : Salesman & MJP issue
Inputs :
1. CD details
2. Get reference number of MJP
3. Error screenshot.
Workflow Analysis Template :
Step1 : Create the case for the reported issue in our service now portal and revert to our customer with the case ID.
Step2 : Reach CD and request CD to explain the issue (if required)
Step3 : Need to analyze the issue based on the following steps:
1. Go to a corporate portal and put ID and PASSWORD.
5. Then select the reference number ---> verify the beat.
6. After verifying the beat code with the customer attachment file, the beat code will reflect incorrectly.
7. In this scenario, assign the case to the development team. Once correction is done from our development team, then we must check and reply to customer with screenshots.
4. SFF: Customer details not showing in MJP
Issue Short Description : SFF: Customer details not showing in MJP
Service Type : IR
Priority : High
Problem code : Data Sync Master Download Integration Process failure for a user
Inputs :
1. CD details
2.Send the reference number.
3.Error screenshot.
4.Attachement of the salesman details which are mapped to the beat.
Workflow Analysis Template :
Step 1 : Create the case for the reported issue in our service now portal and revert to our customer with the case ID.
Step2: Reach CD and request CD to explain the issue (if required)
Step3: Need to analyze the issue based on the following steps:
1. Go to a corporate portal and enter ID and PASSWORD.
5. When we check the attachment of customers with the reference number, the beat and salesman are mapped correctly.
6. Then we must check in Horeca Application and follow the below steps:
Steps 1 : Login to Horeca application and then mark the attendance.
Steps 2 : While doing full sync, make sure to “upload and download”.
Steps 3 : If the customer is not visible.
Step 4 : Then we must ask customer to upload the log files in SFF. Also get confirmation of Version of Application and mobile device (Ios/Android)
Step 5 : Make sure update all the information in Ticket and assign the case to development team.
Step 6 : Once correction is done from our development team, then we must check and reply to customer with screenshots.
Version Summary
Author
Reviewer
Approver 1
Approver 2
Current Version
Current Version Published On
Maiden Version Published On
Nageena Sultana.K
Nisha Bhatt
Julian Shawn Dmonte
Subramanian
1.0
24-04-2024
24-04-2024
Issue : Net Amount Difference Between Sales Report GST and DSR Report
Issue Short Description : Sales Report GST and DSR Report
Service Type : IR
Priority : Low
Problem Code : Report Value Mismatch
Inputs :
1. Need to understand the issue with the help of Customer
2. Collect User details like Login ID, Which Dates report generating Mismatch
3. Collects the Screenshots if any
4. Confirm in which module the mismatch is occuring
For all report-related scenarios, it's essential to collect the following inputs :
1. Report name and Report Number
2. Date range
3. Parameters entered while generating the report
3. Confirmation of in which login customer is generating the report (CP/DP) and respective username
Workflow Analysis Template:
Step 1 : Create the case for the reported issue in our service now portal and revert to our customer with the case ID by looping all the HO’s and PMO’s
Step 2 : Reach CD and request CD to explain the issue and ask them for mentioned Details.
Step 3 : Take the AnyDesk Control and Analyze the issue.
Step 4 : Login to the DMS Distributor portal ---> By using User Login ID and Password
Step 5 : Go to Reports ---> Sales ---> Sales Report GST ---> Enter From and To date as WD said ---> Generate & Download the Report ---> Check Net Amount Column for overall the Report.
Step 6 : Go to Reports ---> Sales ---> Daily Sales Report ---> Enter From and To date as WD said ---> Generate & Download the Report ---> Check Net Amount Column for overall the Report.
Step 7 : If both the reports showing Net Amount Mismatch Need to Assign to Development Team. Please validate the invoice status should be created.
Note : DSR report will not contains the data of cancelled invoice
Step 8 : Once Correction Done from Development Side, need to Cross check in DMS and Need to Provide RCA.
RCA :- Based on the Development Team Analysis some of the Procedure Shedules are Stopped by ESPB Team End Only. Kindly find the Screenshot for Shedulers.
Note :- Our Development Team Executed Procedures Manually for the Sales Report GST Sheduler Afer Manual Execution both the reports showing Correct Data. And Requested ESPB Team to Run the Sheduler.
Step 9 : After Matching Both the Reports need to Update CD and get Closure from CD side and set Closure from Respective Spoc.
Version Summary
Author
Reviewer
Approver 1
Approver 2
Current Version
Current Version Published On
Maiden Version Published On
Nageena Sultana.K
Nisha Bhatt
Julian Shawn Dmonte
Subramanian
1.0
24-04-2024
24-04-2024
Amendment :
A minor change or addition designed in an invoice. Sales invoice amendment states that if customer has already made sales invoice on the necessary product and qty, if he need to update in an existing invoice like adding product or updating the qty, SI amendment helps distributors to update the sales invoice.
Navigations :
1. Login to the portal ---> Sales
2. Sales ---> Sales Invoice
3. Click on the sales invoice menu ---> Open the invoice which user needs to amend
4. Click on the SI amendment button ---> Edit the invoice based the distributor requirement --> Save
5. If we amend any Sales invoice the old invoice will automatically moved into cancel status and new invoice will be automatically generated with the same transaction number with the same sales invoice date.
6. Also, We have validation of Amend the invoice details. Based on corporate wise amendment limit may differ.
6.1 If Distributor amend the invoice more than the limit ---> It show a validation as “Amendment limit has been exceeded”.
7. Finally we have validation of amendment period as well. Based on the corporate wise it will differ.
7.1 ID Distributor did not amend the invoice within the stipulated time ---> It will show the validation as “ Amendment period has been exceed”.
8. Additionally, if the customer has already imported the transaction details for the respective month into Tally before the Sales Invoice (SI) amendment, they will need to re-import the data to reflect the latest invoice information.
9. In case an E-Way Bill or E-Invoice has been generated for the respective invoice, it must also be regenerated post-amendment.
Please note the following prerequisites for amending a Sales Invoice :
The retailer linked to the invoice must be in an active status.
If any collection has been made against the invoice, the distributor must cancel the collection before proceeding with the amendment.
Note : Kindly check with the respective Project manager to get the Amendment limit & Amendment period details.
Version Summary
Author
Reviewer
Approver 1
Approver 2
Current Version
Current Version Published On
Maiden Version Published On
Pavithra.M
Nisha Bhatt
Julian Shawn Dmonte
Subramanian
1.0
24-04-2024
24-04-2024
OBJECTIVE :
Issue Short Description : Sync error in Horeca applications
Service Type : IR
Priority :Medium
Problem Code :Data Sync Master Download integration Process failure for a user
INPUTS:
1. BDE (Name,ID,Phone number)
2. Request the customer to explain the issue via call or remote session if needed.
3. Error screenshot (if any).
4. Version of Horeca Application
5. Confirm whether the user is accessing the application from an Android or IOS device.
6. Ask customer to upload the log file in Application.
7. Confirm the last sync date with customer
Workflow :
Step 1 : Create a case in the Service Now portal and provide the case ID to the customer.
Step 2 : Reach out to the customer to gather more information about the issue.
Step 3 : Kindly reached the customer informed him/her to do the Full-sync process and check whether the issue is fixed,If not fixed please follow the below steps :
Note : Confirm the network connectivity of customer
Step 4 : Request customer to upload the log files in log file menu.
Once we collect the LOG file & attached the file in ticket then we need to assigned the case to DEV team, Also draft an email to SFF team regarding this concern.
Once SFF team done the corrections, we need to reached the concern person informed him to do the FULLSYNC process.
Then shared a mail with SPOC/Customer the mentioned issue has been resolved.
Version Summary
Author
Reviewer
Approver 1
Approver 2
Current Version
Current Version Published On
Maiden Version Published On
Nageena Sultana.K
Nisha Bhatt
Julian Shawn Dmonte
Subramanian
1.0
24-04-2024
24-04-2024
Issue : Need to add new Users in Horeca App
Issue Short Description : Need to add new Users in Horeca App
Service Type : SR
Priority :Low
Problem Code :Others
INPUTS:
1. Salesman ID
2. Company ID
3. URL.
4. Get the latest version Application URL from PMO.
Workflow Analysis Template :
Step 1 : Create the case for the reported issue in our service now portal and revert to our customer with the case ID by looping all the HO’s and PMO’s.
Step 2 : Reach CD and request CD to explain the issue and ask them for mentioned Details.
Step 3 : Before register the user must present in Horeca App need to add users in SFF, AWL Team will add the users in Horeca.
Step 4 : Request development team to unregister the CD keys and update the server code for New Registration (It is applicable for existing user).
Step 5 : After Correction from Development Team, Ask User to Install the Horeca App and ask them to Register. (New user).
How to Install Horeca App in Mobile :
Step 1 : Reach User for Any Desk Control ask User to Download below mentioned App in their Mobile Phones.
Step 2 : After Download need to Install Application and Click on Allow to Install by giving More Details and give allow all permissions.
Step 3 : Ask User to register the Horeca App by giving mentioned details.
URL : pragati.forumnxt.com
Company Code : AWLL1118
Version Summary
Author
Reviewer
Approver 1
Approver 2
Current Version
Current Version Published On
Maiden Version Published On
Surekha
Nisha Bhatt
Julian Shawn Dmonte
Subramanian
1.0
24-04-2024
24-04-2024
Issue Short Description : E invoice Done But Not showing in Bill Print
Service Type : IR
Priority :High
Problem Code :Print Settings change request by a user
INPUTS:
1. Need to request CD (Customer) to explain the issue via call or control (If req).
2. Sales invoice number, Date & Customer name.
Workflow Analysis Template :
Step 1 : Create the case for the reported issue in our service now portal and reply to our customer with the case ID by looping respective SPOC and PMO.
Step 2 : Reach customer and request to explain the issue(if req).
Step 3 : Need to analyze the issue based on the following steps:
1. Go to a DMS distributor portal and put LOGIN ID and PASSWORD of CD
2. After login in DMS, go to àSales --> Einvoice--> check whether Einvoice is generated for a specific invoice by selecting the appropriate date and populate.
3. If it is generated, Go to sales ---> Sales invoice ---> Select the appropriate invoice ---> Export to PDF ---> Click on duplicate and check.
4. If IRN and QR is showing in print, take a screenshot and send detailed analysis to customer.
5. If the issue persists, we need to verify the print format settings configured for the respective corporate and distributor. Ensure that the correct print format has been applied. If the settings are incorrect or missing, guide the distributor on how to update the print format appropriately.
6. After making the necessary corrections, validate whether the IRN and QR code are appearing in the invoice print. If the issue still remains unresolved, escalate the case to the development team for further analysis.
Version Summary
Author
Reviewer
Approver 1
Approver 2
Current Version
Current Version Published On
Maiden Version Published On
Pavithra M
Nisha Bhatt
Julian Shawn Dmonte
Subramanian
1.0
24-04-2024
24-04-2024
Scenario 1 : IVY ORDERS NOT REFLECT IN DMS (ADANI WILMAR LIMITED)
Issue : Orders Punched in IVY but not showing in DMS.
Issue Short Description : Orders Punched in IVY but not showing in DMS.
Service Type : IR
Priority :High
Problem Code :Order data not sync with Fnxt Web for a user
INPUTS:
1. Need to understand the issue with the help of Customer.
2. Collect outlet details what and all the outlets pushed in IVY
3. Collects the Error logs and Screenshots if any
4. Confirm which orders are not showing in IVY( Purchase/Sales)
5. If the issue in mobile application confirm the module name. In which module the details like (Product, Stock, Retailers) are not showing.
Workflow Analysis Template :
Step 1 : Create the case for the reported issue in our service now portal and revert to our customer with the case ID by looping all the HO’s and PMO’s.
Step 2 : Reach CD and request CD to explain the issue and ask them for outlet details and screenshot if any.
Step 3 : Need to analyze the issue based on the following steps:
1. Go to ---> Distributor portal and put LOGIN ID and PASSWORD of CD
2. After login in DMS, if customer is stating sales orders not received
3. Go to Sales ---> sales order validate whether order details are showing in DMS.
4. Need to discuss with Mr. Rajesh after that make sure to loop ivycpg_adani_in@ivy-support.com and Komal Adsul
5. After getting Confirmation from IVY Team, revert an email to customer.
Scenario 2 : Pushed details not fetched in IVY Portal(ITC-ESPB)
Error: We pushed the details(Route/ DS / WD) from SIFY but the route details was not fetched in IVY portal.
Inputs :
1. Need to understand the issue with the help of Customer
2. Collect Server and Product details what and all the Servers pushed to IVY
3. Collects the Error logs and Screenshots is any
4. Service Name and Date format which they are using to fetch the info in IVY
5. If the issue in mobile application confirm the module name. In which module the details like (Product, Stock, Retailers) are not showing.
Workflow Analysis Template :
Step 1 : Create the case for the reported issue in our service now portal and revert to our customer with the case ID by looping all the PMO’s
Step 2 : Reach CD and request CD to explain the issue and ask them for Server and product details and screenshots if any
Step 3 : Need to analyze the issue based on the following steps:
Go to ---> Distributor portal and put LOGIN ID and PASSWORD of CD
After login in DMS, validate when the product/ retailer/salesman/beat was updated.
Under Targets & Promotions, go to Scheme Master.
In the Scheme Master, search using the Scheme Code.
Select the corresponding Scheme Code and review the Scheme Slabs details. Also, ensure that the scheme is currently running and marked as active.
Logic to Note :
If the Benefit Type is set to "Percentage", the Apportion Based On field will default to "Amount".
If the Benefit Type is set to "Amount", the Apportion Based On field will become editable, and you can choose from a list of values.
If the system still displays "Unable to edit the scheme slab", please assign the case to the Development Team. Once the correction is implemented, verify the update and respond to the customer with appropriate screenshots for confirmation.
Version Summary
Author
Reviewer
Approver 1
Approver 2
Current Version
Current Version Published On
Maiden Version Published On
Nageena Sultana.K
Nisha Bhatt
Julian Shawn Dmonte
Subramanian
1.0
24-04-2024
24-04-2024
Issue Short Description : Unable to edit the scheme slab in corporate portal.
Service Type : IR
Priority :Medium
Problem Code :Unable to Create/Amend -Sales Invoice for a user.
INPUTS:
1. Scheme code
2. Error screenshot.
Workflow Analysis Template :
Step 1 : Create the case for the reported issue in our service now portal and reply to our customer with the case ID by looping respective SPOC and PMO.
Step 2 : Reach customer and request to explain the issue(if req)
Step 3 : Need to analyze the issue based on the following steps:
Log in to the Corporate Portal using Login ID and Password.
Once logged in to DMS, navigate to Targets & Promotions.
Under Targets & Promotions, go to Scheme Master.
In the Scheme Master, search using the Scheme Code.
Select the corresponding Scheme Code and review the Scheme Slabs details. Also, ensure that the scheme is currently running and marked as active.
Logic to Note :
If the Benefit Type is set to "Percentage", the Apportion Based On field will default to "Amount".
If the Benefit Type is set to "Amount", the Apportion Based On field will become editable, and you can choose from a list of values.
If the system still displays "Unable to edit the scheme slab", please assign the case to the Development Team. Once the correction is implemented, verify the update and respond to the customer with appropriate screenshots for confirmation.
Version Summary
Author
Reviewer
Approver 1
Approver 2
Current Version
Current Version Published On
Maiden Version Published On
Nageena Sultana.K
Nisha Bhatt
Julian Shawn Dmonte
Subramanian
1.0
24-04-2024
24-04-2024
OBJECTIVE :
This document provides a workflow for Reset the password in DMS.
Issue Short Description : Password Reset
Service Type : SR
Priority :Low
Problem Code :Others.
INPUTS:
1. Distributor Login ID
Workflow :
Create a case in the servicenow portal and provide the case ID to the customer.
Here’s a clear and concise guide to resetting the password in the corporate portal based on the provided steps :
Steps to Reset the Password in the Corporate Portal
Step 1 : Login to the Corporate Portal :
Access the portal using Support credentials.
Step 2 : Navigate to Settings :
Go to the Admin section.
Click on Settings.
Step 3 : Access User Options :
Locate and click on the Users option.
Step 4 : Filter by User Name :
Use the filter BY : User Name (default setting).
Step 5 : Search Distributor Code :
Enter the distributor code in the search field and click Search.
Step 6 : Select the Distributor Code :
Enter the distributor code in the search field and click Search.
Step 7 : Change Password :
Upon selecting the user make sure to check the status of the user (Active/Inactive).
If the user is active :
If the user is active, Select the Change Password option.
Enter the distributor code as the New Password and Confirm Password.
Click Save to complete the reset process.
If the user is inactive :
If the user is inactive, please sent an email to respective SPOC/HO and get approval from HO team to active the user.
Post approval edit the user information and change the status from inactive to active and proceed to reset the password.
When replying email resolution make sure to mention that the user has been activated and then password has been reset.
Step 8 : Notify the Customer :
Please validate and inform the customer about the password reset via one-on-one communication through email.
Version Summary
Author
Reviewer
Approver 1
Approver 2
Current Version
Current Version Published On
Maiden Version Published On
Nageena Sultana.K
Nisha Bhatt
Julian Shawn Dmonte
Subramanian
1.0
24-04-2024
24-04-2024
There are 3 types of issues :
1. Reports : Stock & Sales report is not generating
2. SFF : Stock showing blank
3. Inventory : Negative stock issue
For all report-related scenarios, it's essential to collect the following inputs :
1. Report name and Report Number
2. Date range
3. Parameters entered while generating the report
4. Confirmation of in which login customer is generating the report (CP/DP) and respective username.
1. Reports: Stock & Sales report is not generating :
Issue Short Description : Reports: Stock & Sales report is not generating
Service Type : IR
Priority :High
Problem Code :Sales Reports Not Generating
INPUTS:
1. CD details
2. Error screenshot
Workflow Analysis Template :
Step 1 : Create the case for the reported issue in our service now portal and revert to our customer with the case ID.
Step 2 : Reach CD and request CD to explain the issue (if required).
Step 3 : Need to analyze the issue based on the following steps:
1. Go to a corporate portal and put ID and PASSWORD.
2. Select the CD.
3. Reports ---> Stock & sales report
4. when we are generating the reports the mentioned report its not generated.
5. Reports ---> Stock & sales report with value.
6. When we are generating the mentioned report, it's not generated.
7. the reported issue has reflects, then assign the case to the development team. Once correction is done from our development team, then we must check and reply to customer with screenshots.
2. SFF : Stock showing blank
Issue Short Description : SFF : Stock showing blank
Service Type : IR
Priority :High
Problem Code :Sales Reports Not Generating
INPUTS:
1. CD details
2. Error screenshot
Workflow Analysis Template :
Step 1 : Create the case for the reported issue in our service now portal and revert to our customer with the case ID.
Step 2 : Reach CD and request CD to explain the issue (if required).
Step 3 : Need to analyze the issue based on the following steps:
1. Go to a corporate portal and put ID and PASSWORD.
5. Then we must check in IVY Application and follow the below steps :
Step 1 : Login to Horeca application and then mark the attendance.
Step 2 : While doing full sync, make sure to “upload and download”.
Step 3 : If the current stock value mismatch.
Step 4 : Then upload the log file in SFF.
6. when we check for some of the products(For Ex : FORTUNE POHA 40X500G) ---> In DMS Reports the stock value showing 220 but in IVY End showing 500 & the closing stock also not updated for all the products.
7. In this scenario, assign the case to the development team. Once correction is done from our development team, then we must check and reply to customer with screenshots.
3. Inventory : Negative stock issue
Issue Short Description : Inventory : Negative stock issue
Service Type : IR
Priority :Low
Problem Code :Stock Adjustment Issue
INPUTS:
1. CD details
2. collect mentioned report
3. Error screenshot
Workflow Analysis Template :
Step 1 : Create the case for the reported issue in our service now portal and revert to our customer with the case ID.
Step 2 : Reach CD and request CD to explain the issue (if required)
Step 3 : Need to analyze the issue based on the following steps:
1. Go to a corporate portal and put ID and PASSWORD.
2. Select the CD.
3. Reports ---> Stock & sales report.
4. When we Generate the report. we found some of the stocks are reflecting in negative.
5. In this scenario, assign the case to the development team. Once correction is done from our development team, then we must check and reply to customer with screenshots.
Version Summary
Author
Reviewer
Approver 1
Approver 2
Current Version
Current Version Published On
Maiden Version Published On
Nageena Sultana.K
Nisha Bhatt
Julian Shawn Dmonte
Subramanian
1.0
24-04-2024
24-04-2024
Short description
Change the customer credit norm details, such as credit days to be restricted for 60 days for all the customers
in the customer master
Severity: SR
Priority: Low
Problem code: Service Request
Inputs:
1. Login credentials
2. Credit days limit
3. Customer details
Workflow Analysis template
Step 1: Create the case for the reported issue in our service now portal and revert to our customer with
the case ID
Step 3: Need to analyse the issue based on the following steps:
1. Go to → DMS portal and put LOGIN ID and PASSWORD of CD
2. After login in DMS, go to → SALES MANAGEMENT
3. In sales management we need to click on → BULK ORDER CONVERSION
4. Then we need to put From Date and To Date and then click on → POPULATE
5. Check whether we are getting an error or not
6. If the issue replicates ,Assign this case to development team
7. Once our DEVELOPMENT team has completed the correction, we must provide the customer with
screenshots as proof for closure confirmation.
Short description
CD is Unable to download the Customer master report from Distributor portal.
Severity: IR
Priority: Low
Problem code: Customer Master Edit
Inputs:
1. Login credentials
2. Screenshot of the error
Workflow Analysis template
Step 1: Create the case for the reported issue in our service now portal with required information and
revert back to our customer with the case ID
Step 3: Need to analyse the issue based on the following steps:
1. Go to àDMS portal and put LOGIN ID and PASSWORD of CD
2. After login in DMS, go to → REPORTS
3. In reports find the Customer Master Report
4. Then we need to click on →
5. Check whether we are getting an error or not
6. If the issue replicates ,Assign this case to development team
7. Once our DEVELOPMENT team has completed the correction, we must provide the customer with
screenshots as proof for closure confirmation.
Kindly find the resolved screed shot:
Short description
We have saved Invoice No. 4590726812 Dated. 29-11-2022 Rs.1,30,539.00 Sl. No. 1 MAK Ruby Grease 2 Kg HSN: 271019
: 22G03 3 CS But, while making the bill MAK Ruby Grease - 2 Kg - Not accepting.
Severity: IR
Priority: Low
Problem code: Invoice Related Doubts
Inputs:
1. Login credentials
2. Error screenshot
3. Product name
Workflow Analysis template
Step 1: Create the case for the reported issue in our service now portal with required information and
revert back to our customer with the case ID
Step 3: Need to analyze the issue based on the following steps:
1. Go to → DMS portal and put LOGIN ID and PASSWORD of CD
2. After login in DMS, go to → SALES MANAGEMENT
3. In Sales Management àSales Invoice
4. Create new invoice with the given product name
5. Check error is there or not
6. Assign this case to development team
7. Once correction is done from our DEVELOPMENT team, then we have to revert to customer with
screenshots for closure confirmation
8. Kindly find the resolved screenshot
Short description
In the distributor portal report number 30 salesman wise invoice summary report is not generating.
Severity: IR
Priority: Low
Problem code: Others
Inputs:
1. Test Login
2. Ask for the report's name
Workflow Analysis template
Step 1: Create the case for the reported issue in our service now portal with required information and
revert back to our customer with the case ID
Step 3: Need to analyze the issue based on the following steps:
1. Assign this case to development team
2. Once correction is done from our DEVELOPMENT team, then we have to revert to customer with
screenshots for closure confirmation
3. Kindly find the resolved screenshot & Working file
Short description
We are not able to update Salesman details in Forum NXT portal. It is asking to update Salesman category, but no
option is appearing in dropdown.
Severity: IR
Priority: Low
Problem code: Invoice Related Doubts
Inputs:
1. Login credentials
2. Error screenshot
Workflow Analysis template
Step 1: Create the case for the reported issue in our service now portal with required information and
revert back to our customer with the case ID
Step 3: Need to analyse the issue based on the following steps:
1. Go to → DMS portal and put LOGIN ID and PASSWORD of CD
2. After login in DMS, go to → SALES MANAGEMENT
3. In Sales Management → SALES INVOICE
4. Check error is there or not
5. Assign this case to development team
6. Once correction is done from our DEVELOPMENT team, then we have to revert to customer with
screenshots for closure confirmation
Kindly find the resolved screenshot
Short description
We are not able to download sales report data from DMS of below customer
Severity: IR
Priority: Low
Problem code: Invoice Related Doubts
Inputs:
1. Login credentials
2. Error screenshot
3. Report name
4. From and to date of the report
Workflow Analysis template
Step 1: Create the case for the reported issue in our service now portal with required information and
revert back to our customer with the case ID
Step 3: Need to analyse the issue based on the following steps:
1. Go to → DMS portal and put LOGIN ID and PASSWORD of CD
2. After login in DMS, go to → REPORTS
3. In Reports → Find the mentioned report name
4. After finding report then we need to put from and to date of the report and click on →
Generate & Download
5. Check error is there or not
6. Assign this case to development team
7. Once correction is done from our DEVELOPMENT team, then we have to revert to customer with
screenshots for closure confirmation
Kindly find the resolved screenshot
Short description
CD raised a concern regarding GST number need to be updated in the sales invoices
Severity: SR
Priority: Low
Problem code: Service Request
Inputs:
1. Login credentials
2. Invoice number & GST number
3. Customer name
Workflow Analysis template
Step 1: Create the case for the reported issue in our service now portal with required information and
revert back to our customer with the case ID
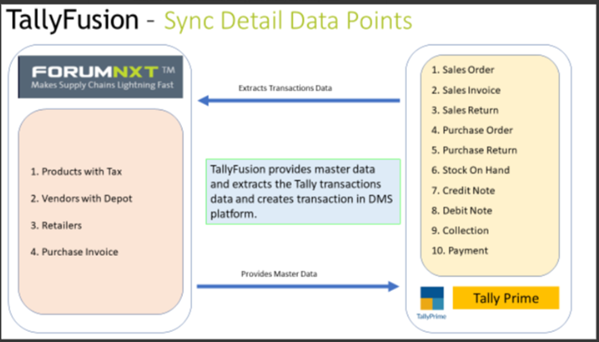
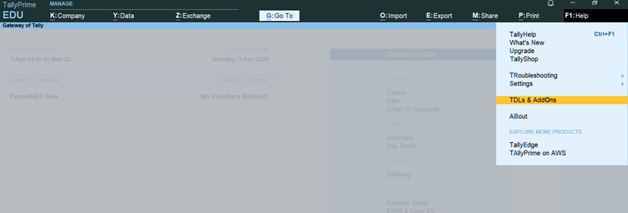
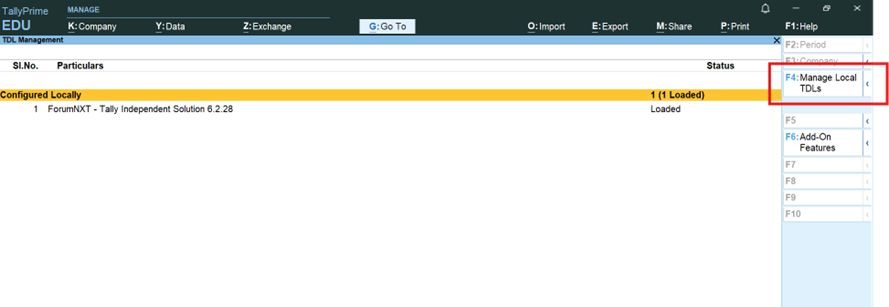
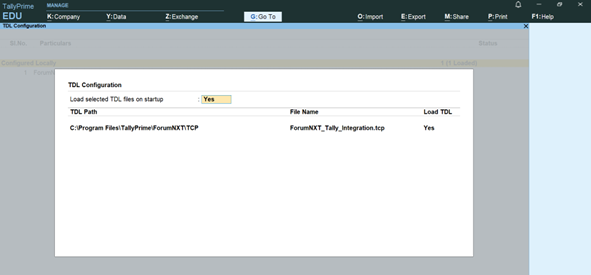
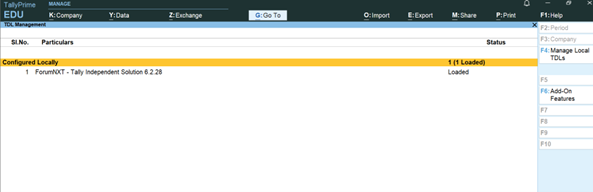
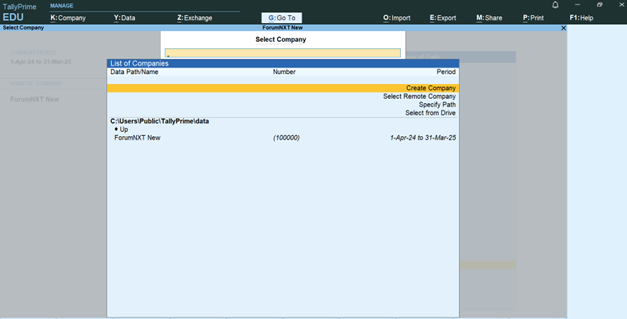
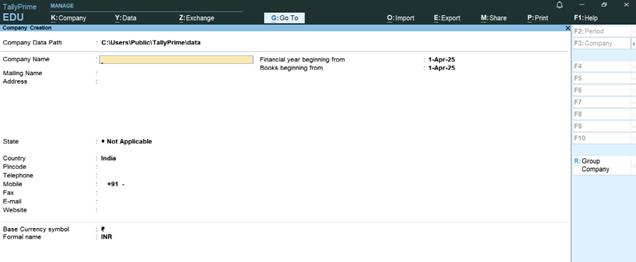
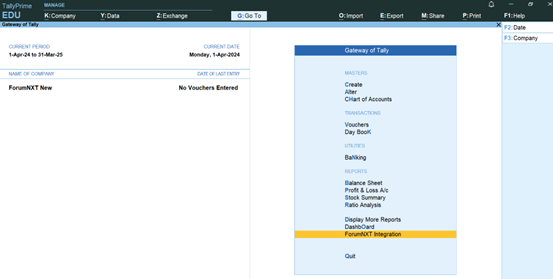
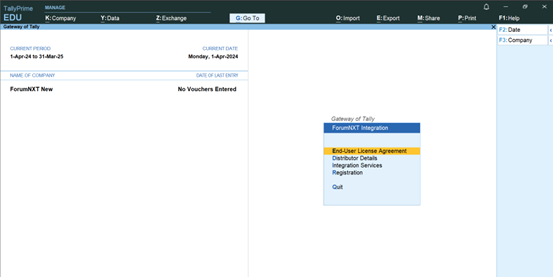
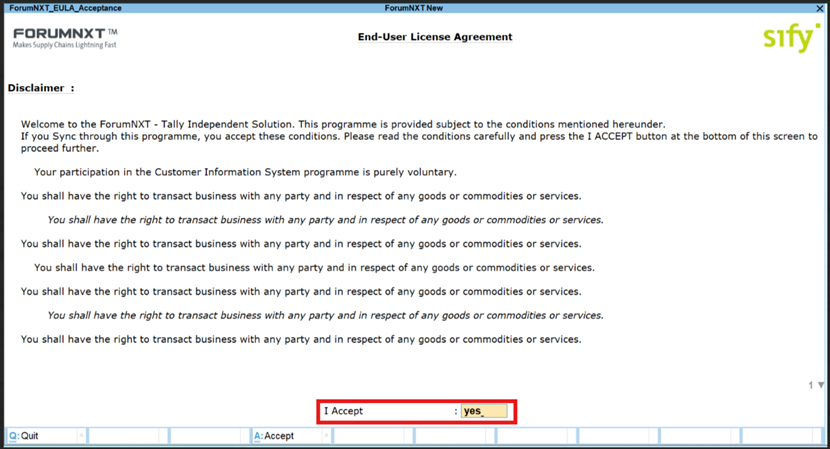
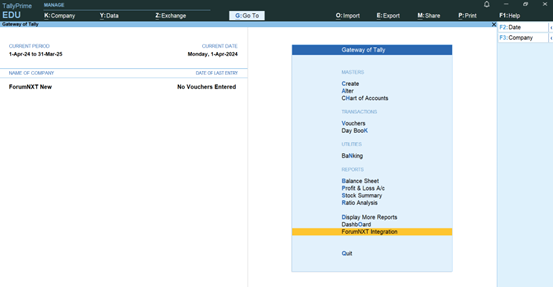
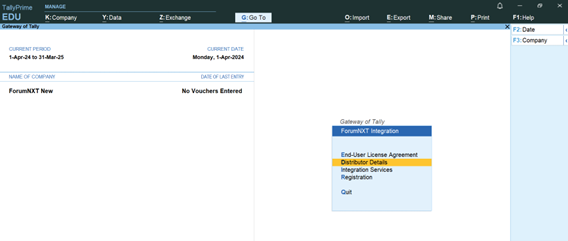
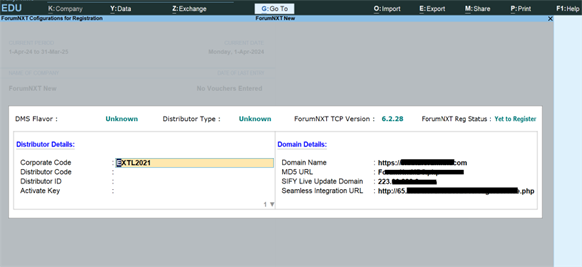
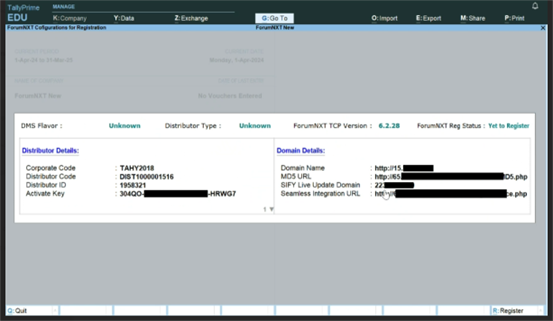
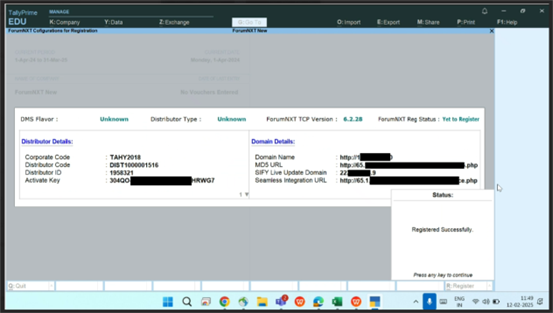

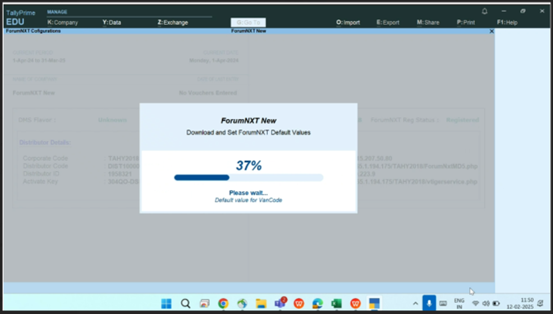
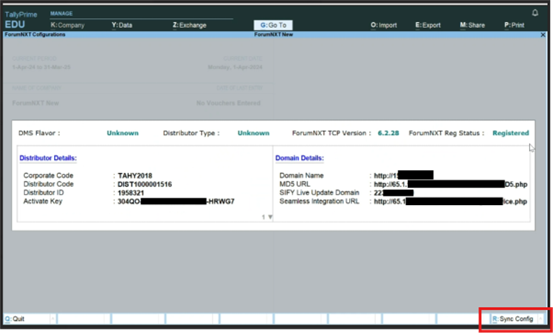
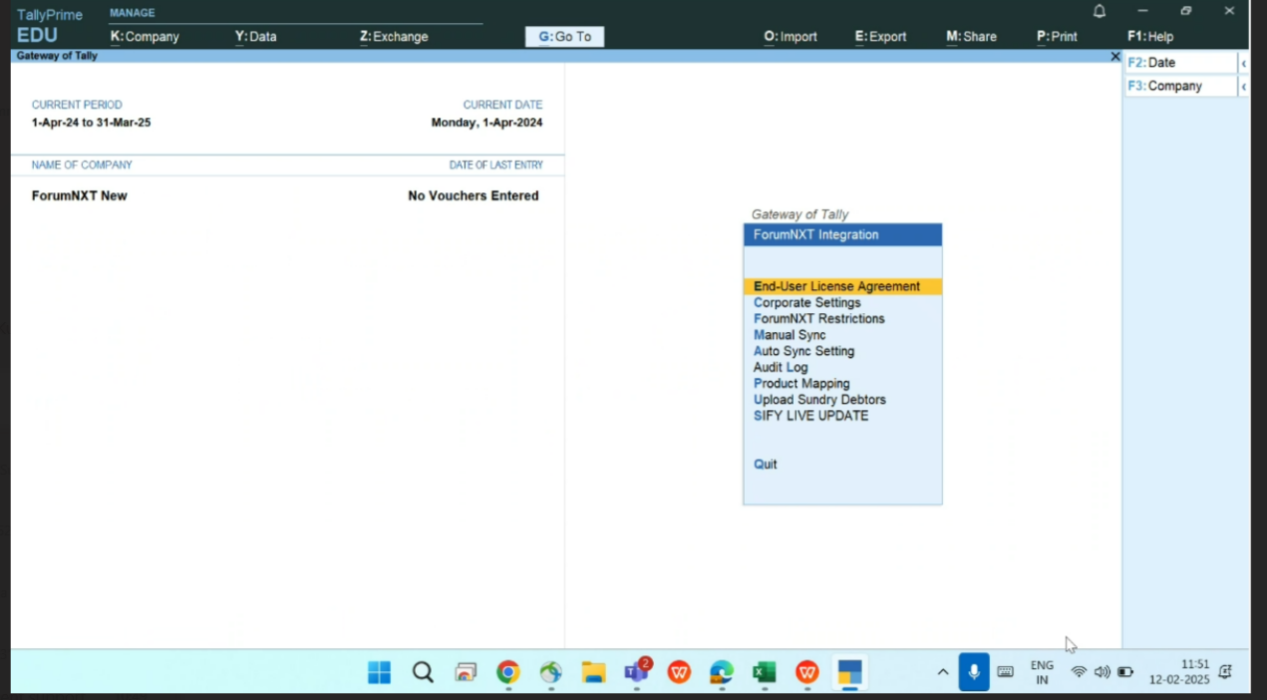
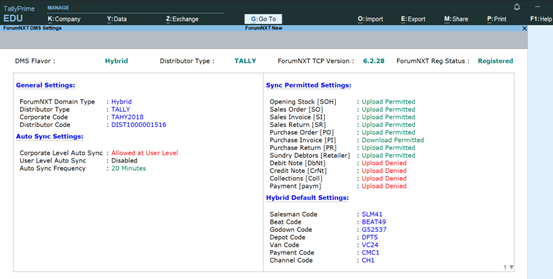
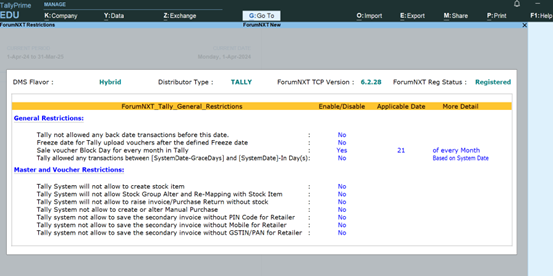
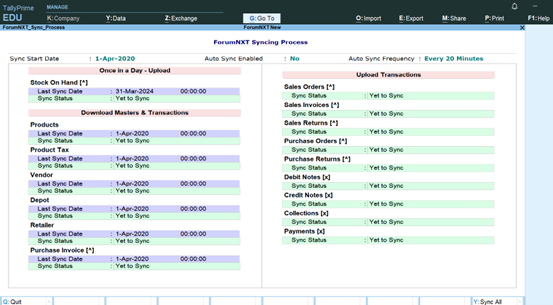
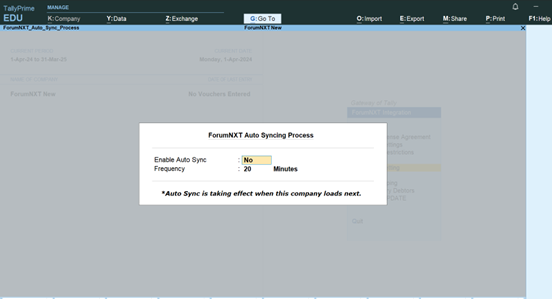
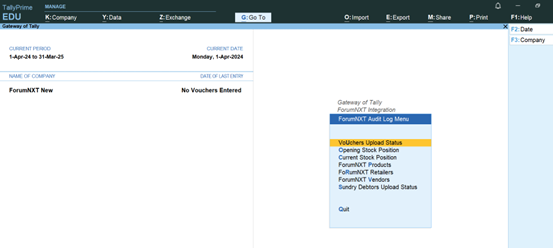
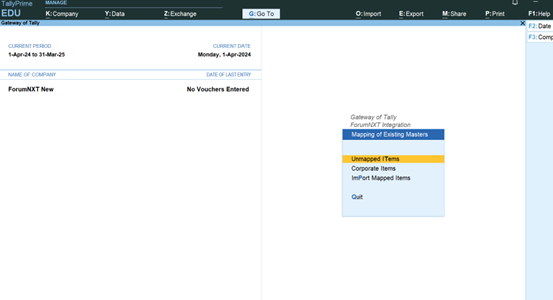
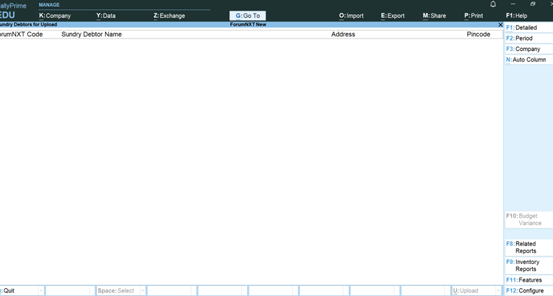
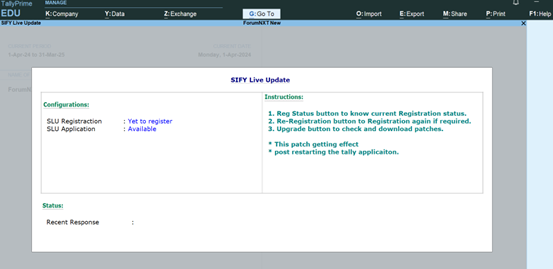
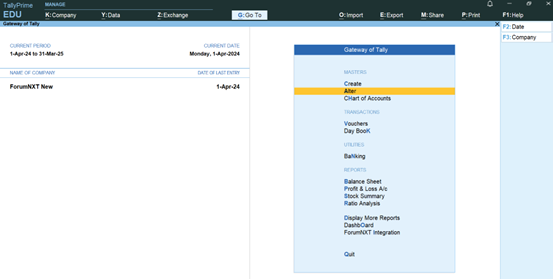
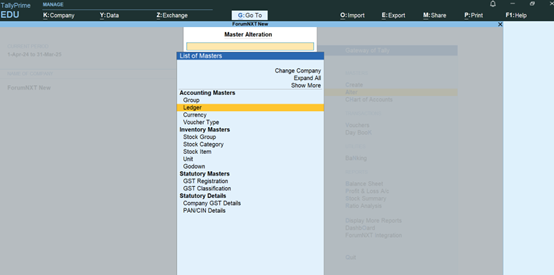
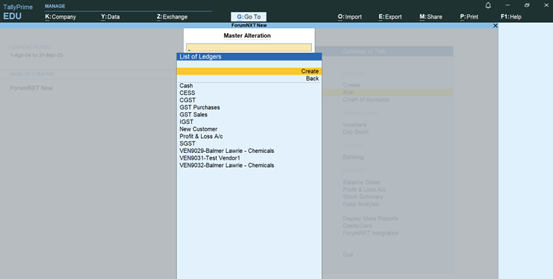
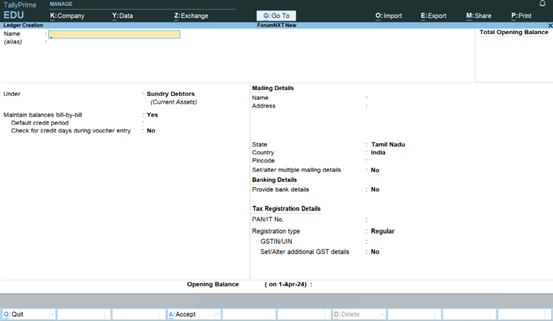
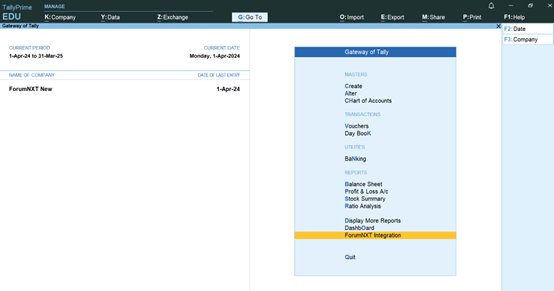
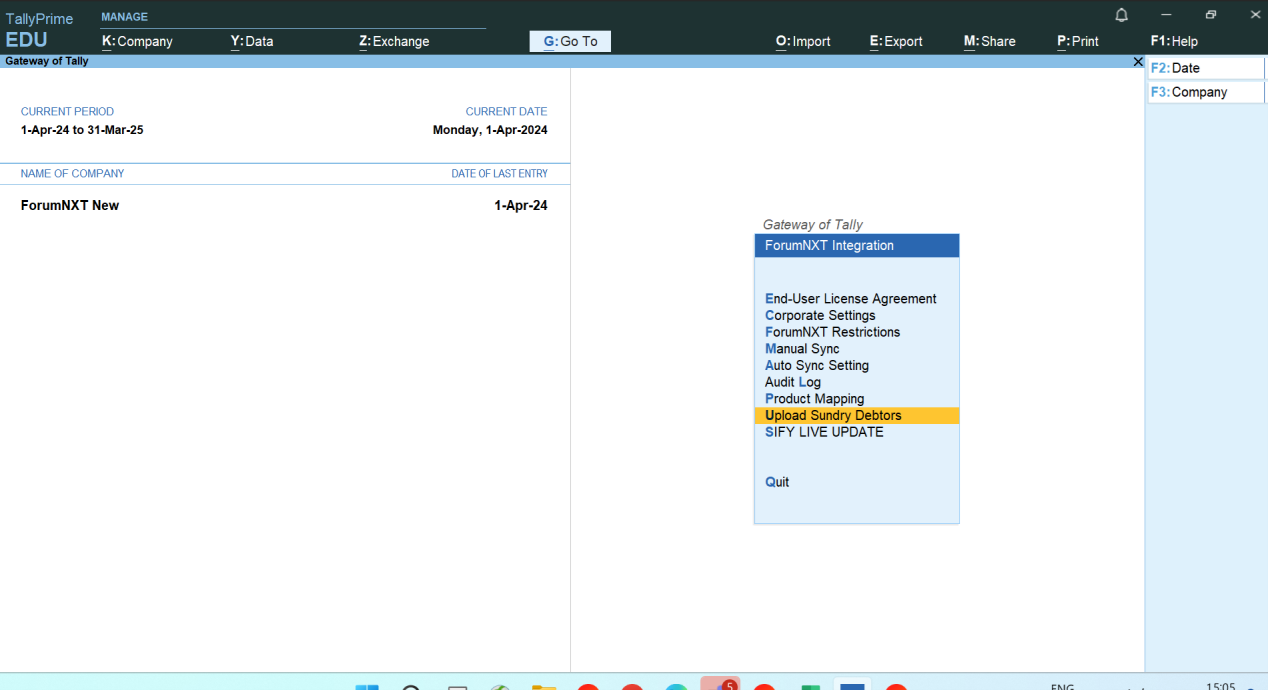

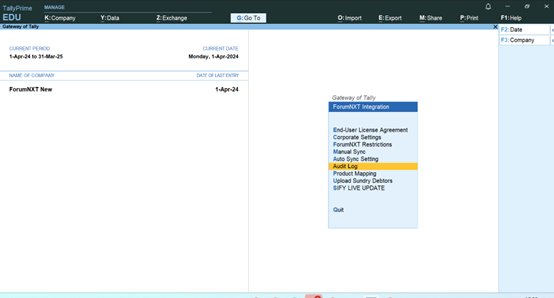
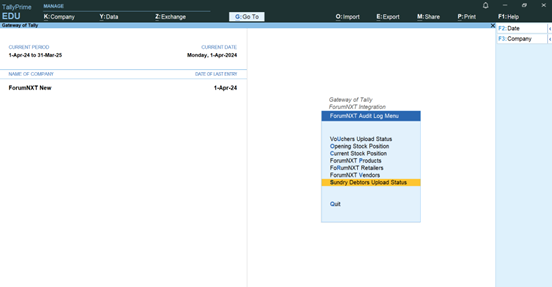
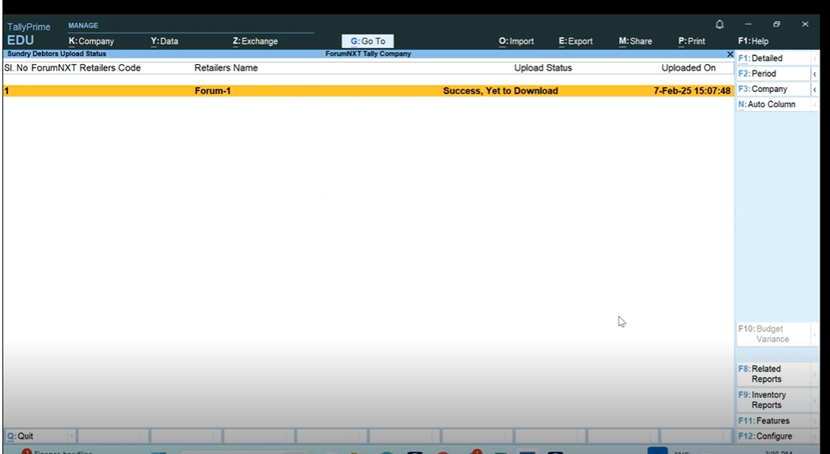
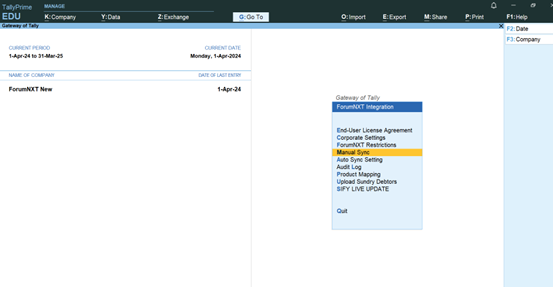
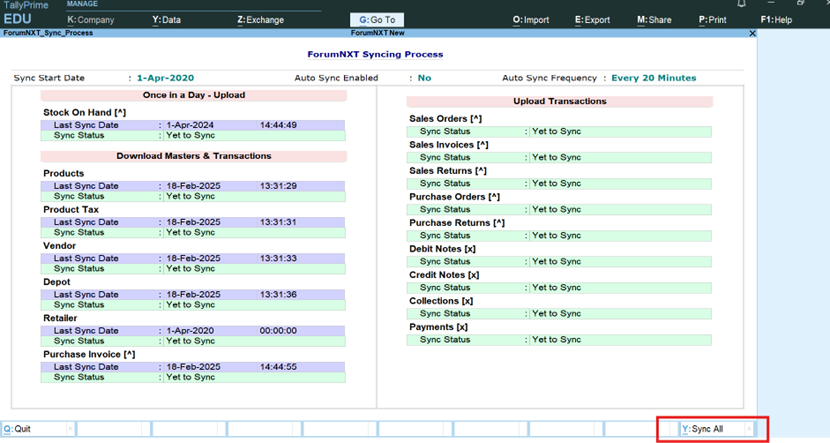
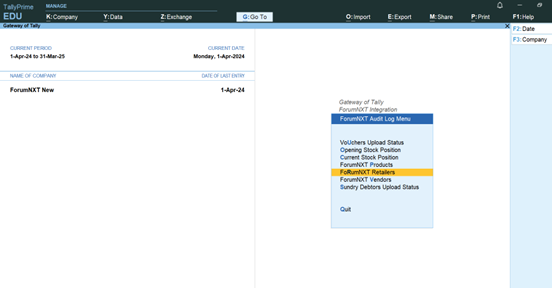
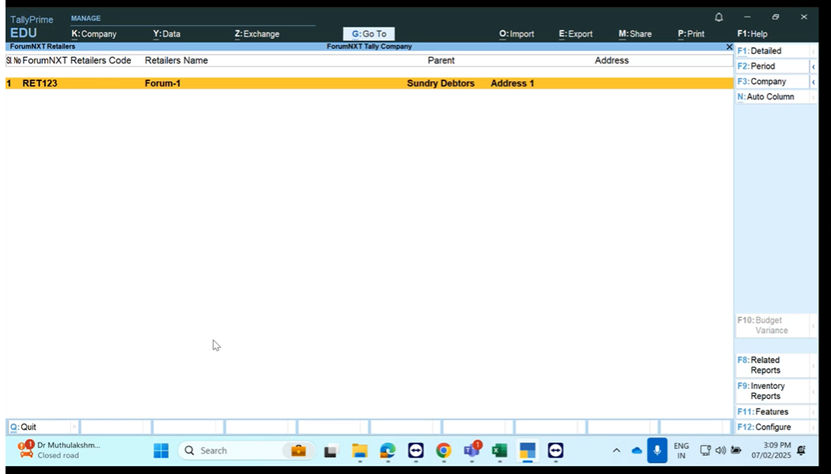
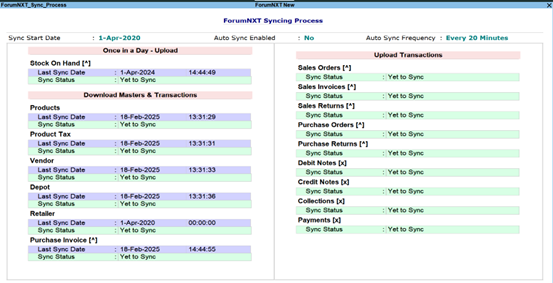
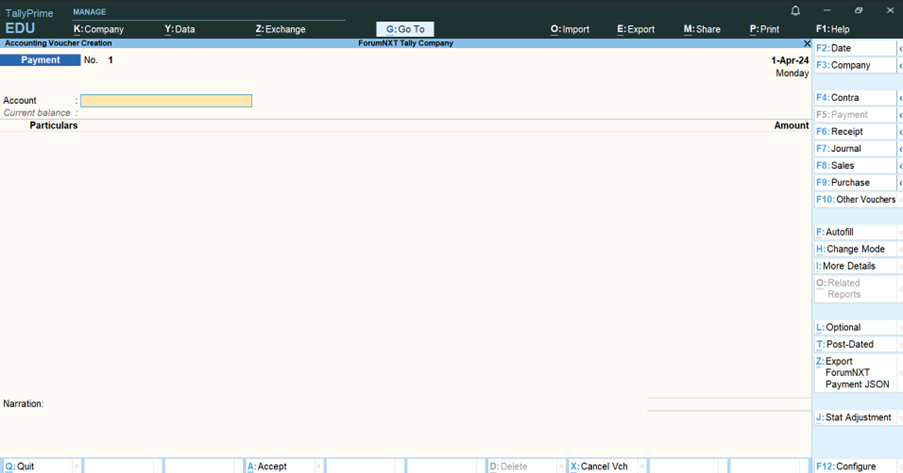
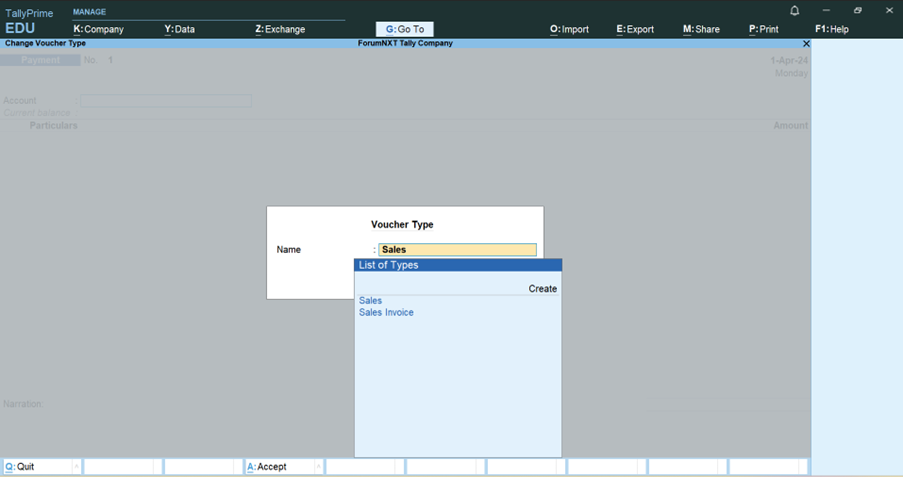
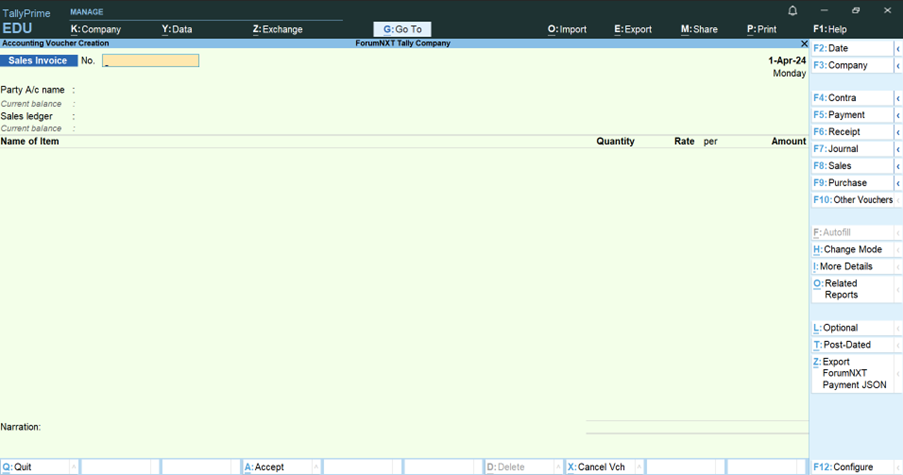
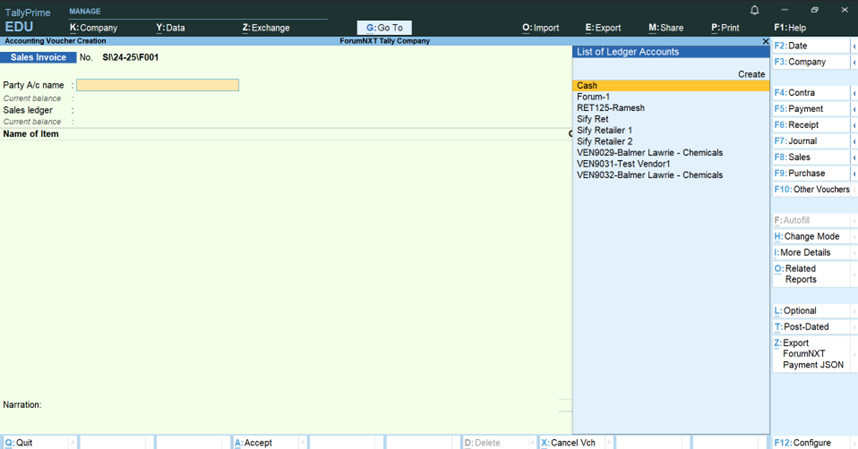

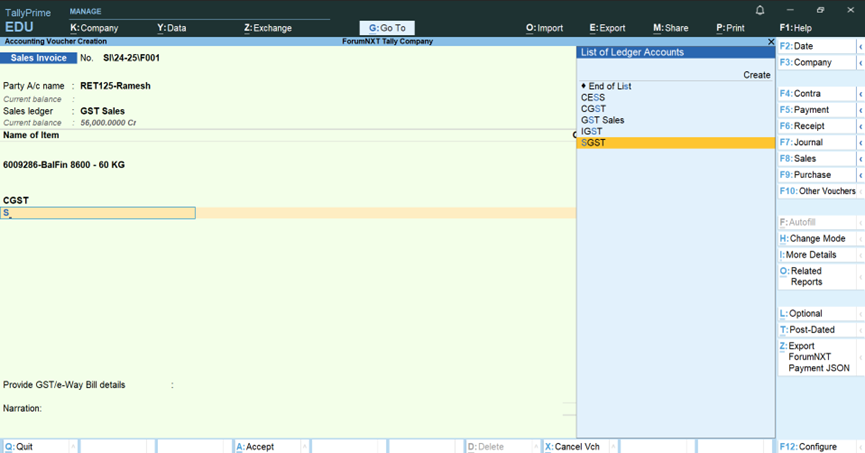
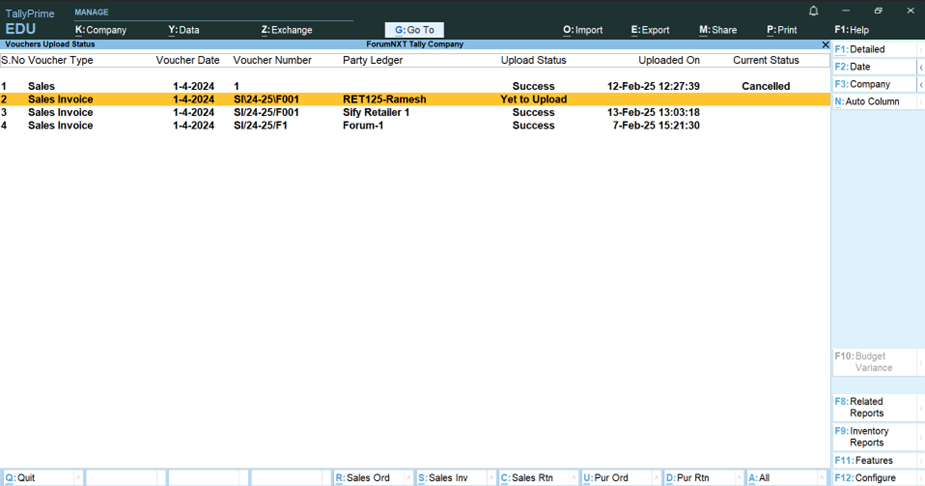
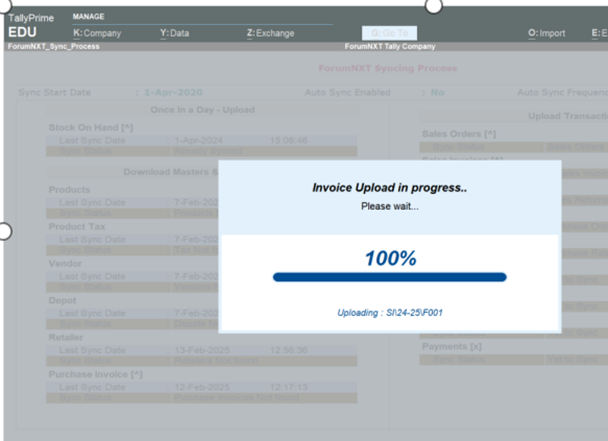
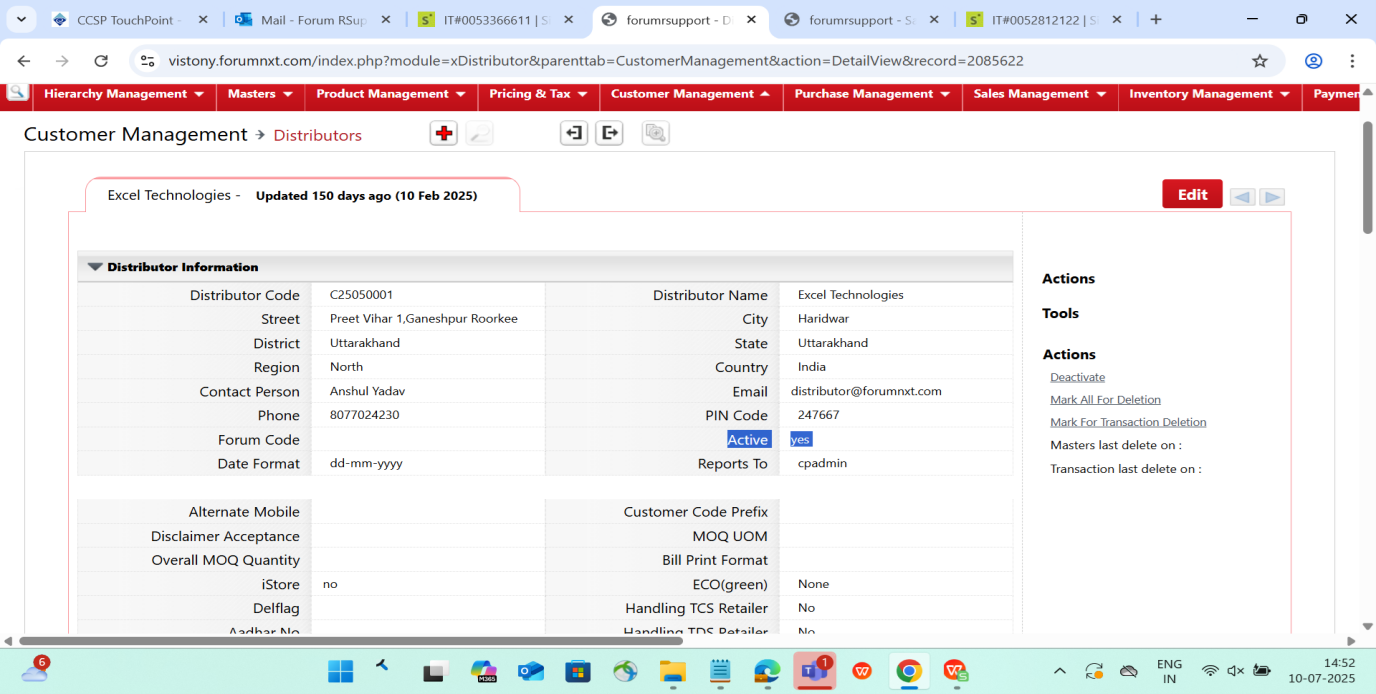
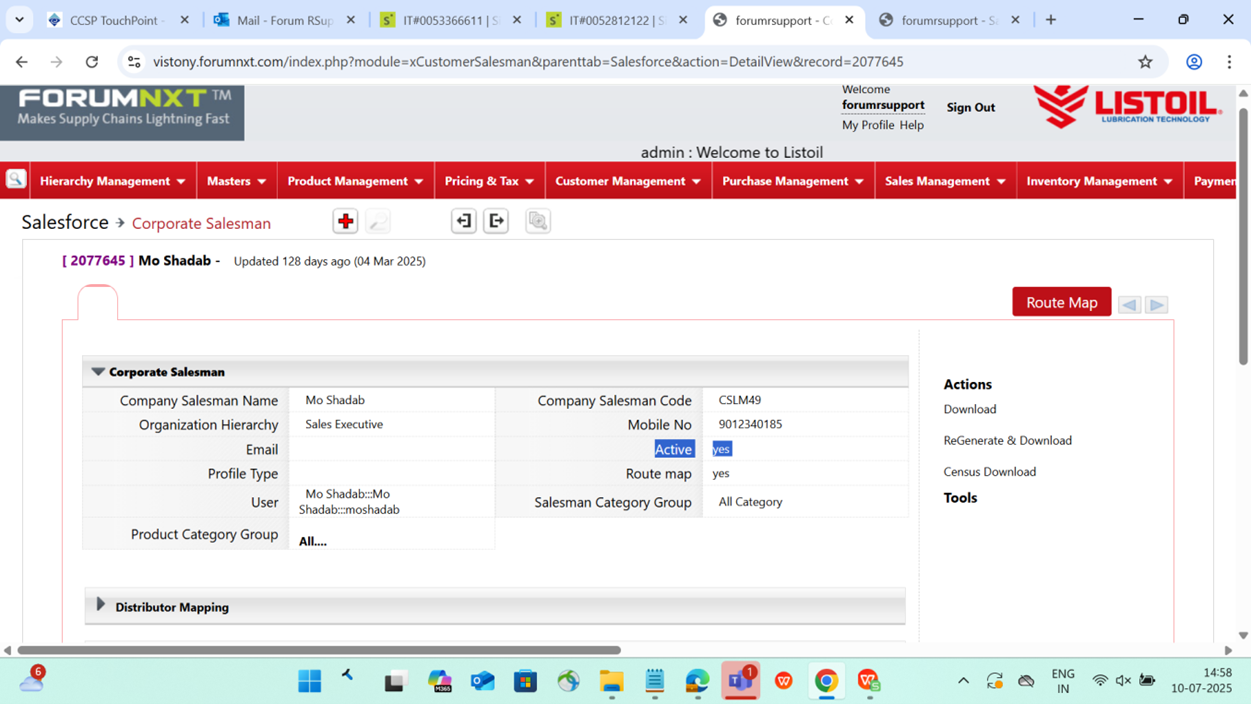
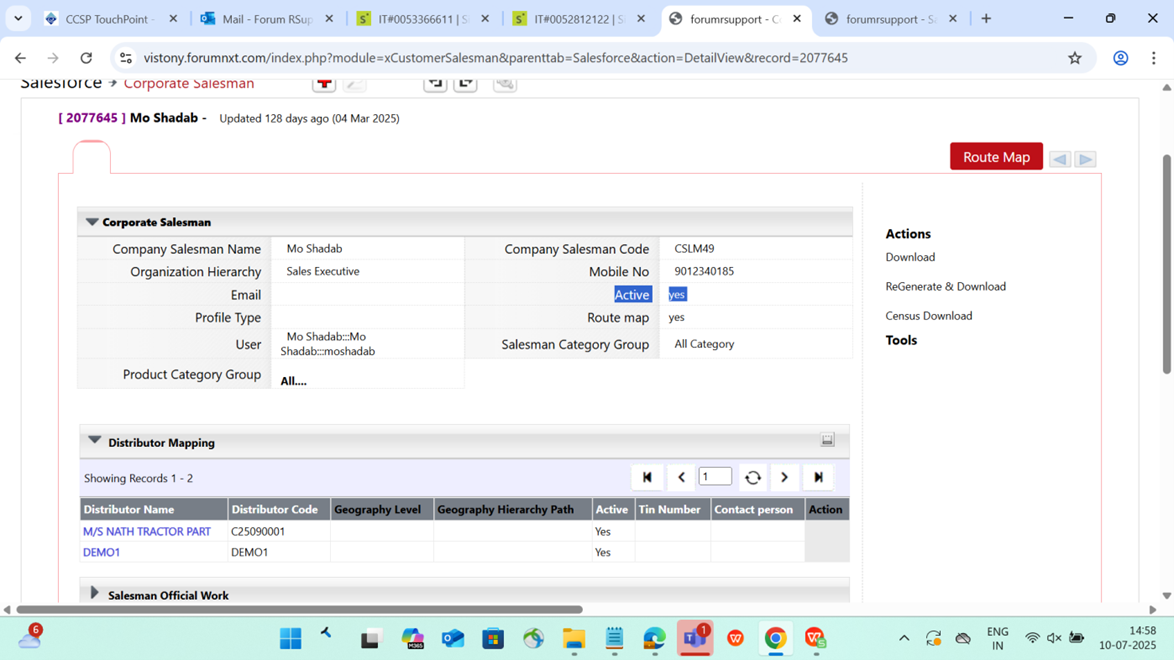
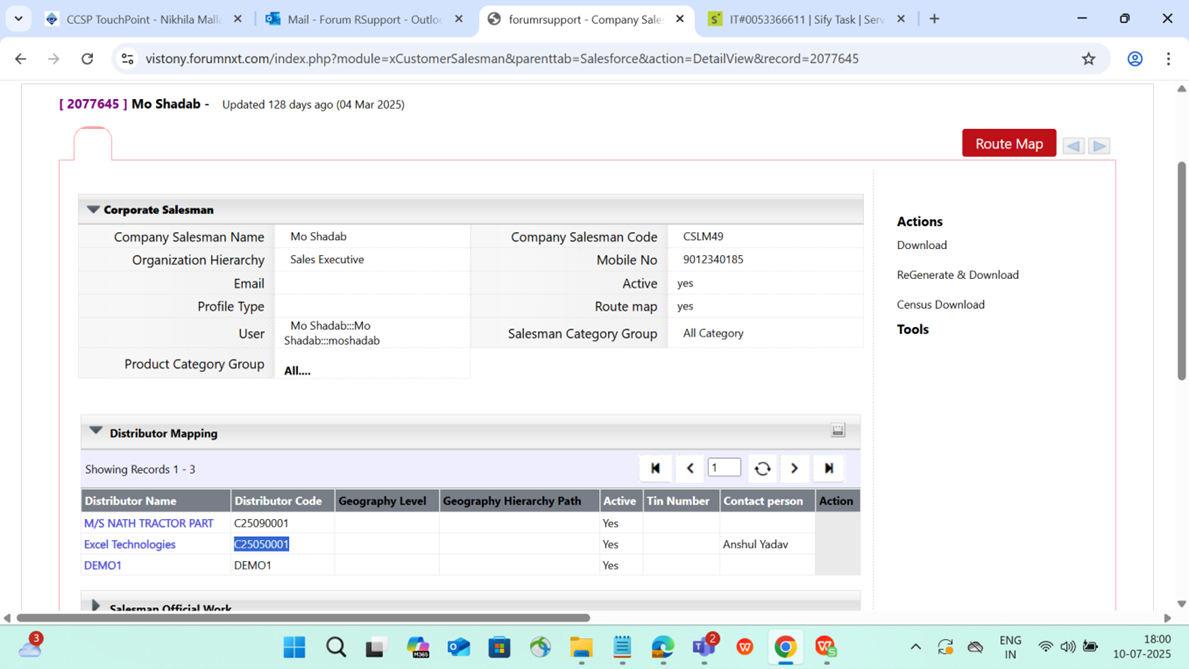
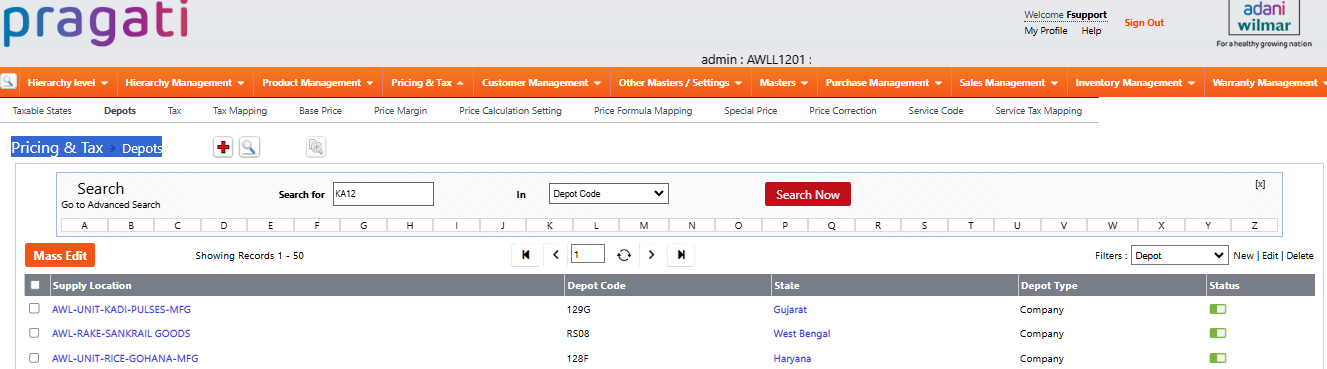
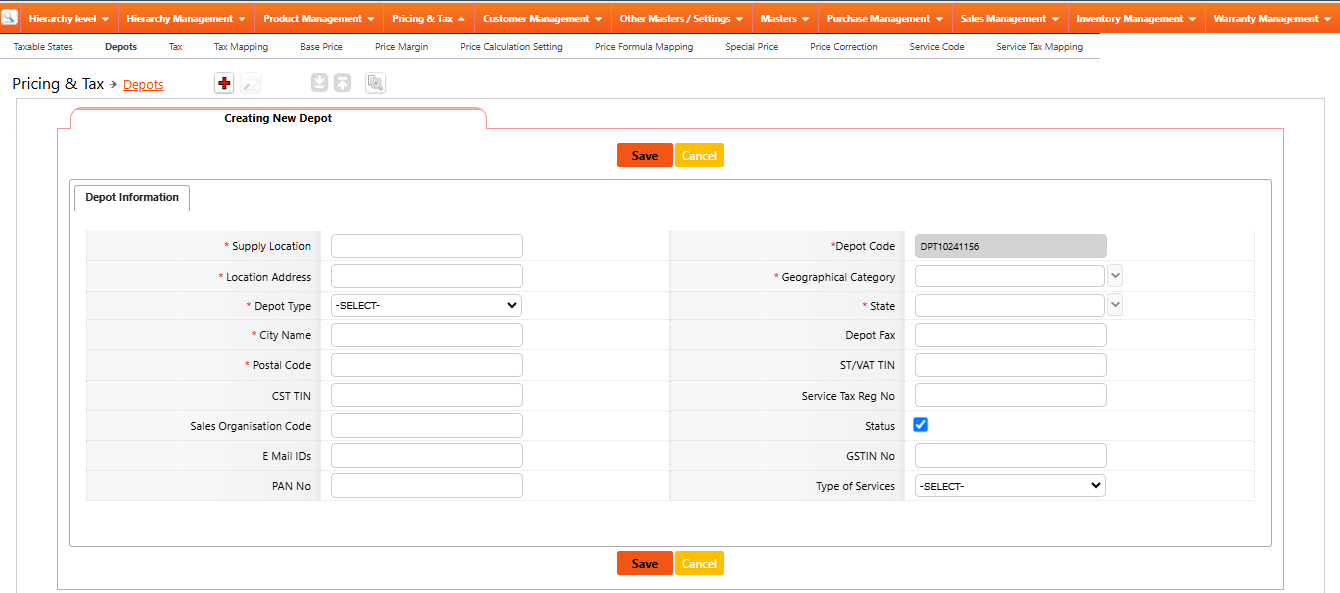

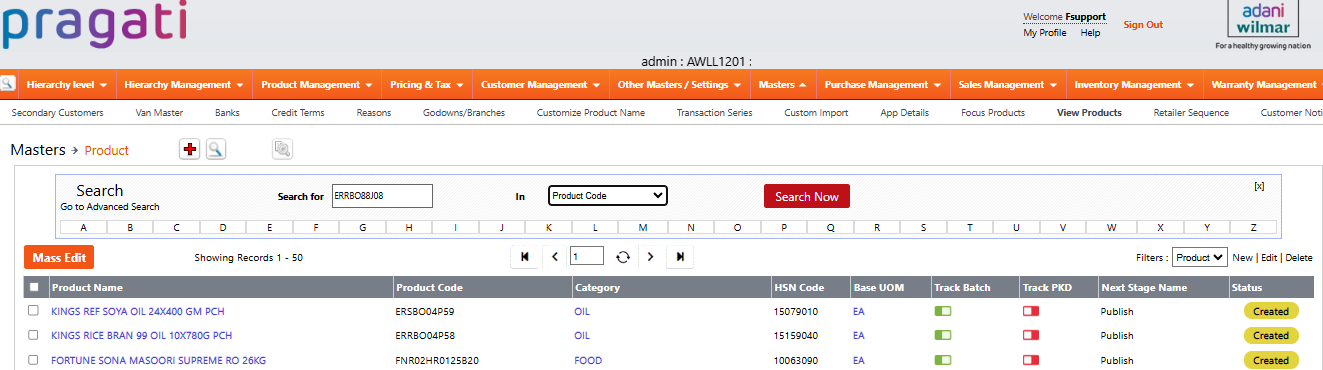
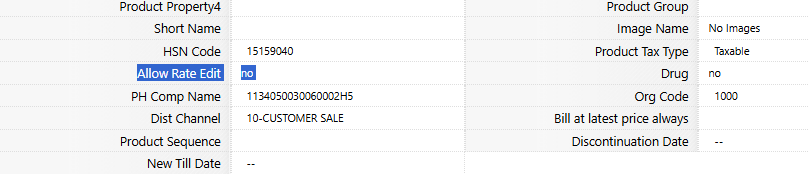
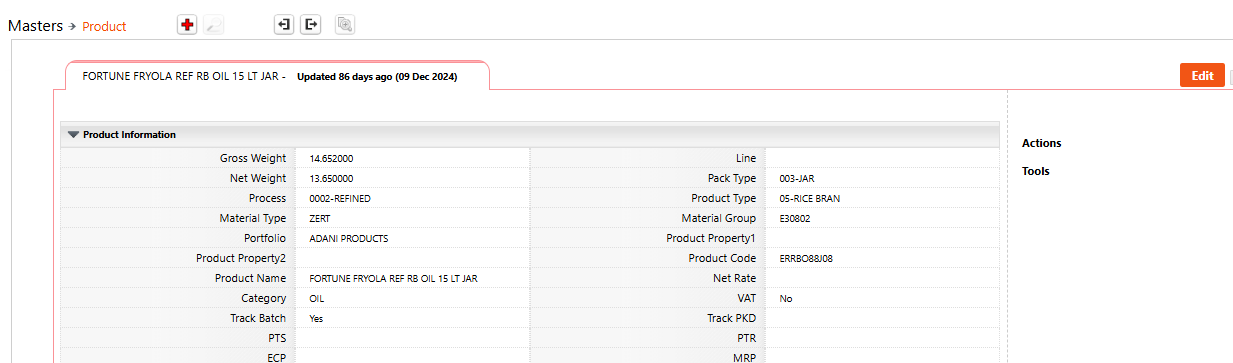

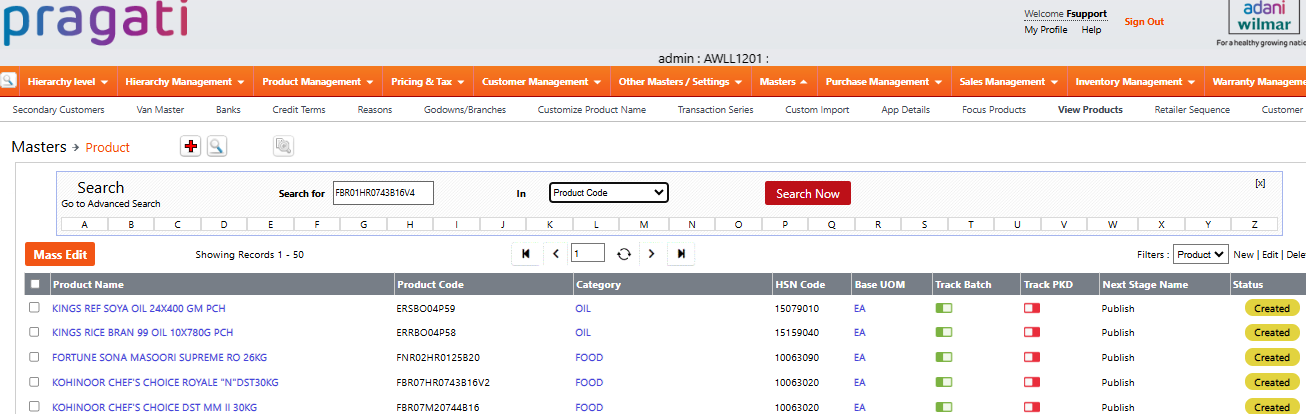
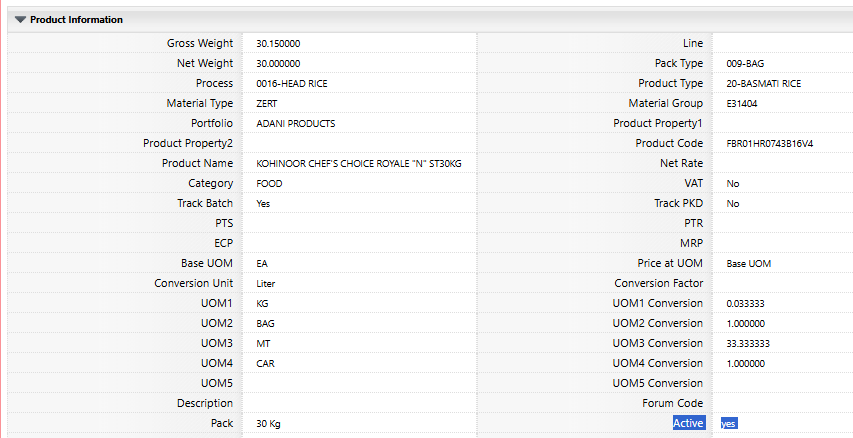
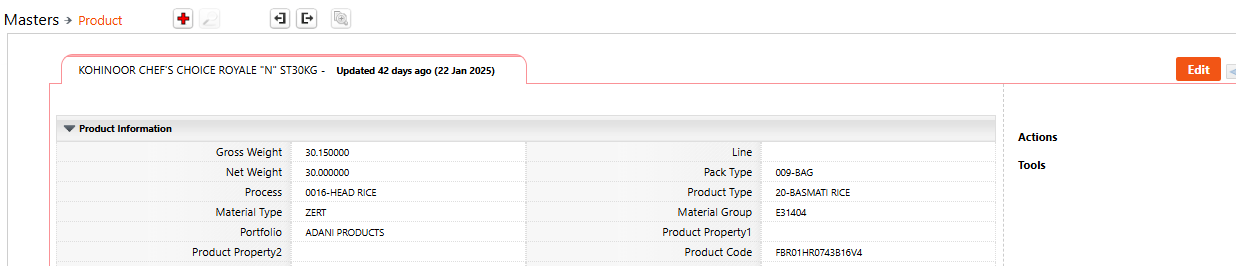
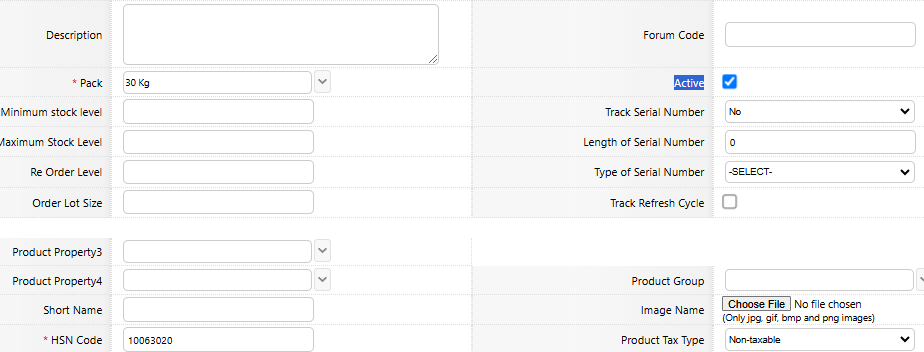
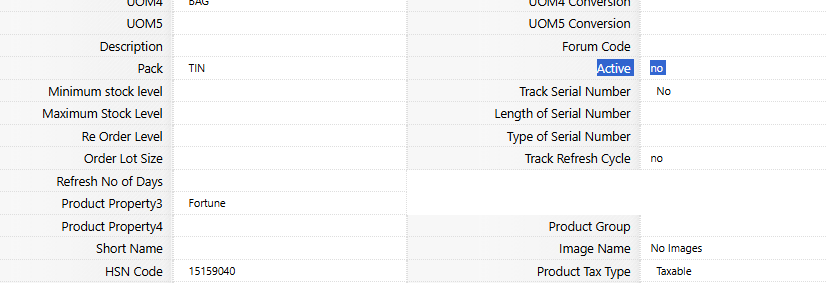

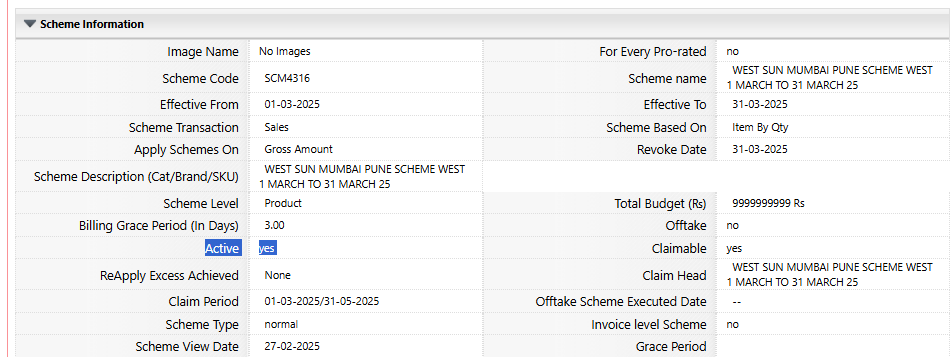

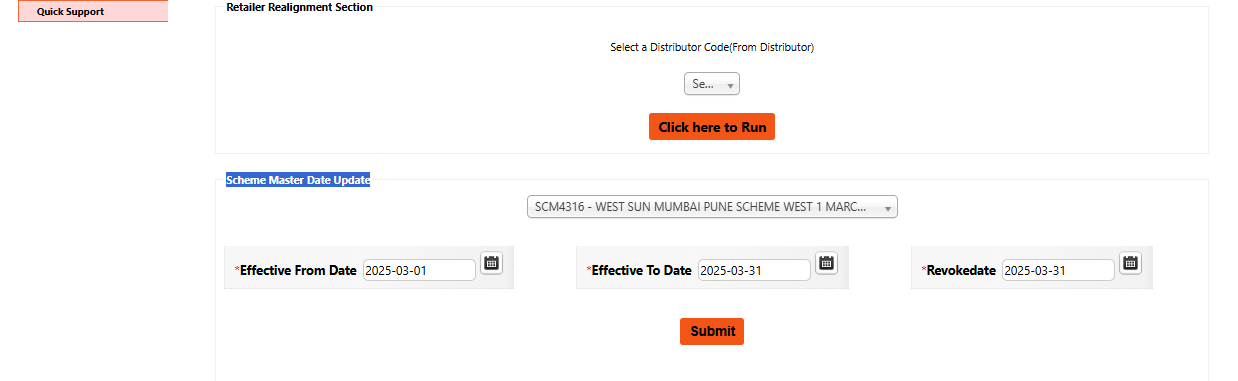


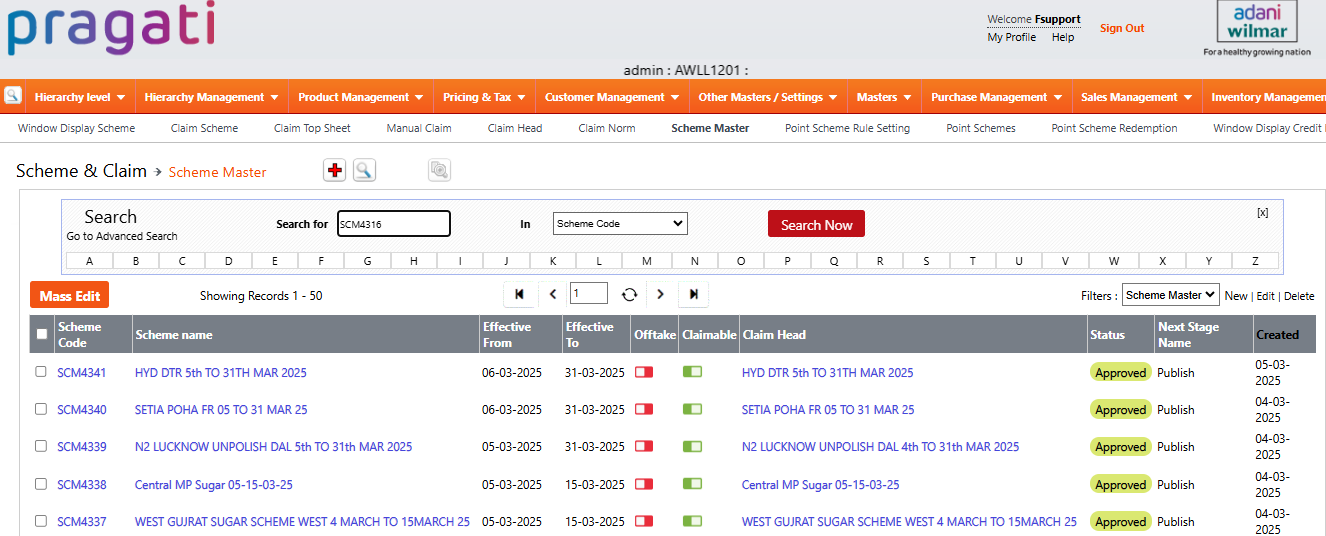


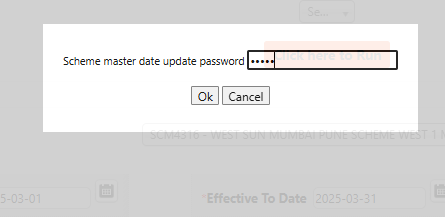


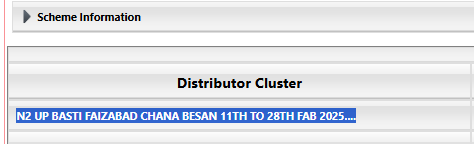
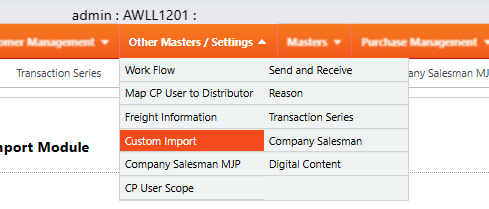
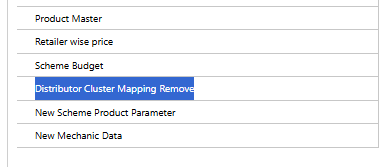
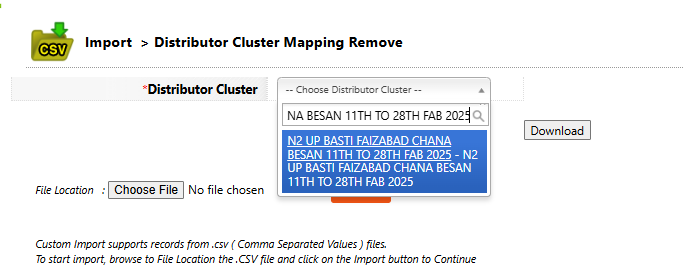
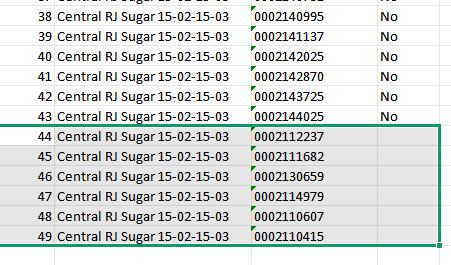


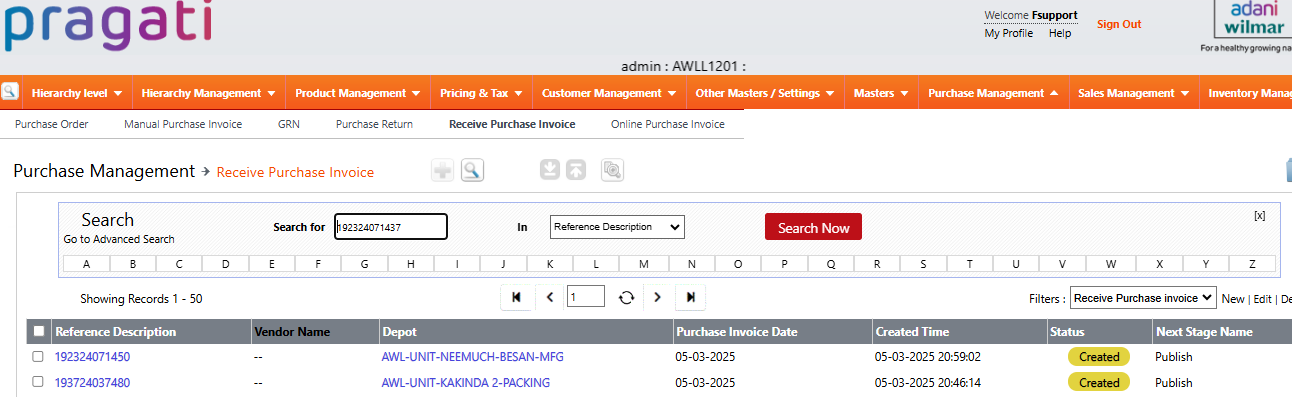
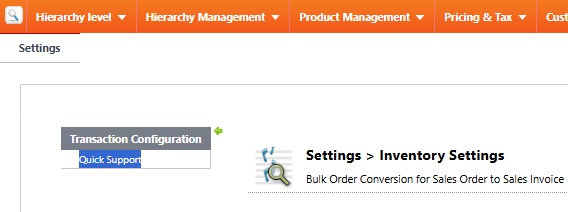
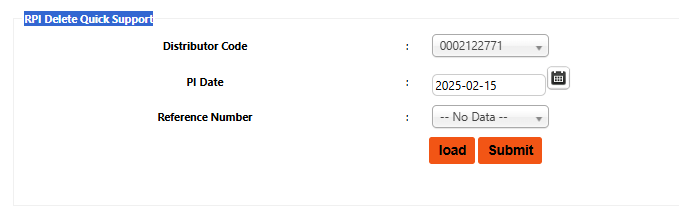
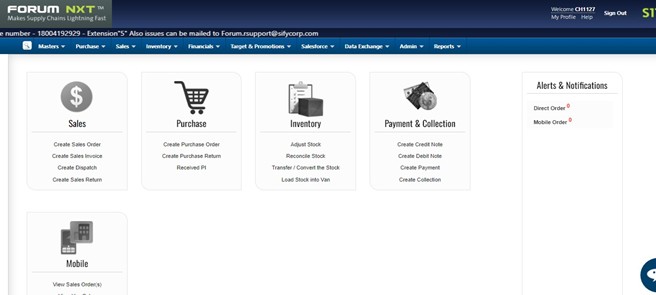
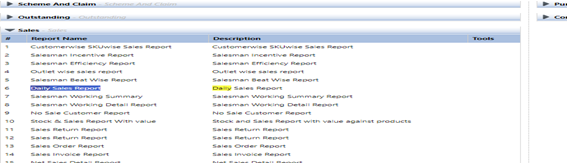
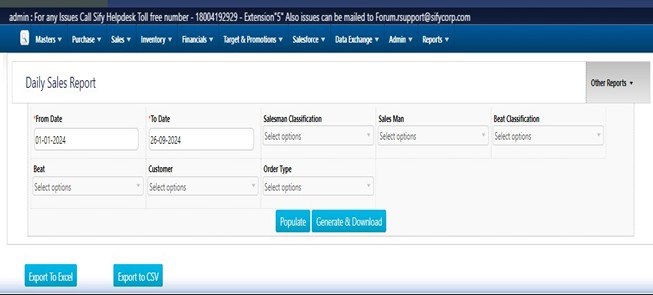
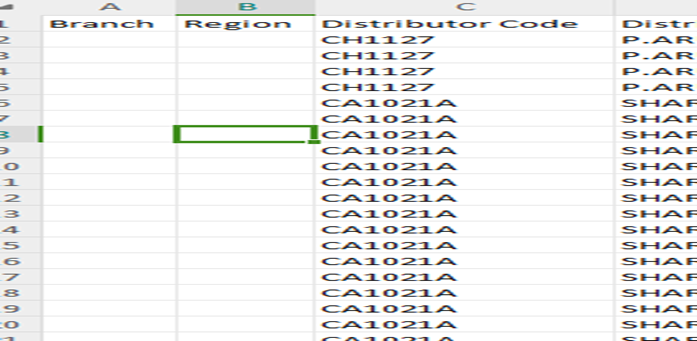
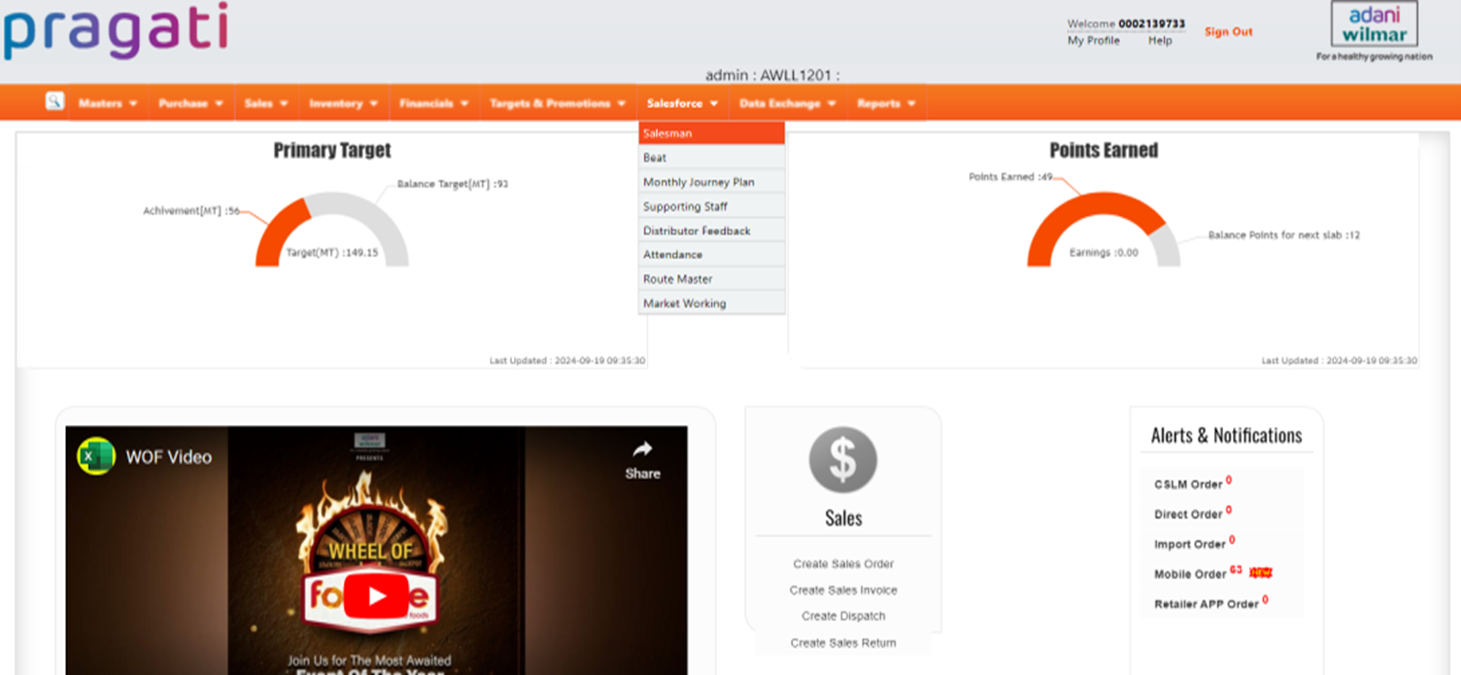

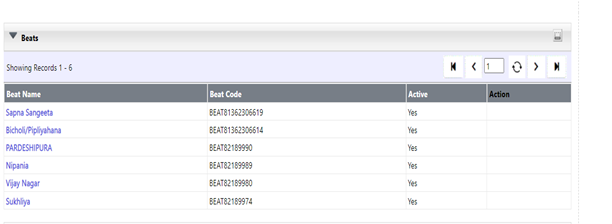
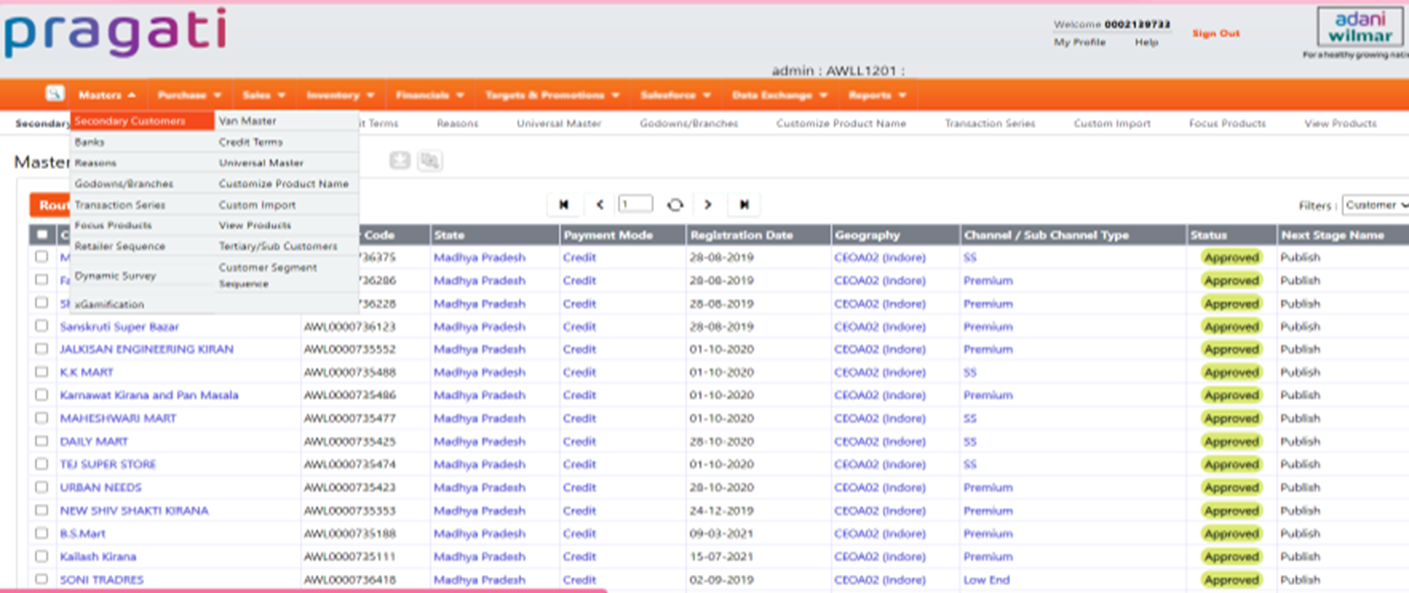
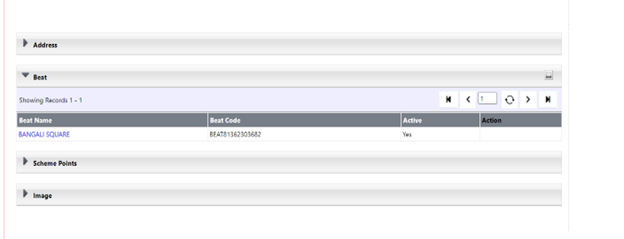

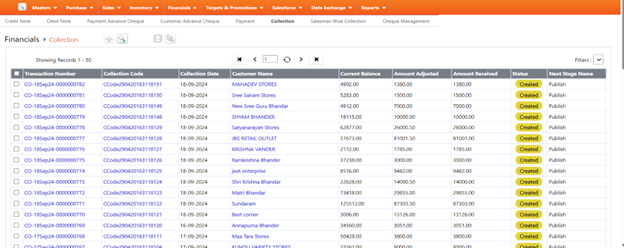 3.Verify the collection status: